Toshiba MW20FN1 Owners Manual
Toshiba MW20FN1 Manual
 |
View all Toshiba MW20FN1 manuals
Add to My Manuals
Save this manual to your list of manuals |
Toshiba MW20FN1 manual content summary:
- Toshiba MW20FN1 | Owners Manual - Page 1
/R MW24FN1/R TV operation 23 Playback (VCR) 35 MW27FN1/R Recording (VCR) 40 OWNER'S MANUAL Other functions (VCR) 45 Basic playback (DVD) 49 Advanced playback 52 (DVD) Function setup (DVD) 56 Others 62 Illustration of MW20FN1/R ©2003 Toshiba Corporation This device does not tape - Toshiba MW20FN1 | Owners Manual - Page 2
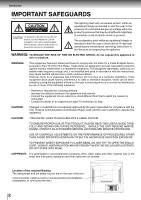
operating and maintenance (servicing) instructions in the literature dealer or an experienced radio/TV technician for help. CAUTION GUIDE CAREFULLY AND RETAIN FOR FUTURE REFERENCE. SHOULD THE UNIT REQUIRE MAINTENANCE, CONTACT AN AUTHORIZED SERVICE LOCATION-SEE SERVICE PROCEDURE. USE OF CONTROLS - Toshiba MW20FN1 | Owners Manual - Page 3
refer to the respective pages on this Owner's Manual for their operating instructions. 11. GROUNDING OR POLARIZATION This unit is equipped are unable to insert the plug into the outlet, contact your electrician to replace your obsolete outlet. Do not defeat the safety purpose of the grounding- - Toshiba MW20FN1 | Owners Manual - Page 4
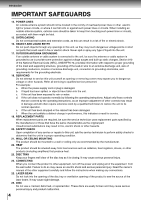
Code (NEC), ANSI/NFPA 70, provides information with respect to proper grounding of the mast and supporting service. 19. REPLACEMENT PARTS When replacement parts are required, be sure the service technician uses replacement 's manual of the other equipment carefully and follow the instructions when - Toshiba MW20FN1 | Owners Manual - Page 5
THE NATIONAL ELECTRICAL CODE ANTENNA LEAD IN WIRE GROUND CLAMP ELECTRIC SERVICE EQUIPMENT NEC-NATIONAL ELECTRICAL CODE S2898A ANTENNA or cut the blade. It is the user's responsibility to have an electrician replace the obsolete outlet. • If you cause a static discharge when touching the unit - Toshiba MW20FN1 | Owners Manual - Page 6
this case, place the unit away from the TV, radio, or VCR. Moisture condensation damages the saturated cloth to clean the unit, follow that product's instructions. To obtain a clear picture The unit is a inspection and maintenance (cleaning or parts replacement) every 1,000 hours of use depending - Toshiba MW20FN1 | Owners Manual - Page 7
Introduction Notes on discs On handling discs Do not touch the playback side of the disc. Playback side Do not attach paper or tape to discs. Structure of disc contents Normally, DVD video discs are divided into titles, and the titles are sub-divided into chapters. Video CDs and Audio CDs are - Toshiba MW20FN1 | Owners Manual - Page 8
in the unit. Refer to instruction notes of discs. " " may appear on the TV screen during operation. A " supports Video CDs equipped with the PBC (Version 2.0) function. (PBC is the abbreviation of Playback Control the TV screen (Menu Playback). Some of the functions described in this owner's manual - Toshiba MW20FN1 | Owners Manual - Page 9
58 Parental control setting 59 To change the parental level 60 Temporary disabling of rating level by DVD disc 61 Others Before calling service personnel 62 Reception disturbances 64 Language code list 65 Specifications 66 Limited warranty 67 Recording (VCR) Recording a TV program 40 - Toshiba MW20FN1 | Owners Manual - Page 10
Identification of Controls See the page in for details. This owner's manual uses the illustrations of MW20FN1/R. MW27FN1/R model has some differences in appearance from the illustrations. Example: The front panel buttons are round instead of square. Front panel Illustration of MW20FN1/R Cassette - Toshiba MW20FN1 | Owners Manual - Page 11
, press DISPLAY again. While watching TV TV/VCR Clock Stereo and second audio program Day of the week TV/VCR 8 : 47AM MON STEREO :18 2:02:31 1/8 Eng DolbyDigital 1/8 Eng 1/1 Camera angle PBC (PlayBack Control) on Video CD Track elapsed playing time Disc operation Track number Play list PBC - Toshiba MW20FN1 | Owners Manual - Page 12
Introduction Identification of Controls (continued) The instructions in this manual describe the functions on the remote control. See the page in for details. Remote control DVD button 49 TV/VCR button 19 Direct channel selection buttons 23 Number buttons 28 DISPLAY button 11 SLEEP button 24 AUDIO - Toshiba MW20FN1 | Owners Manual - Page 13
the battery compartment. 3 Replace the compartment cover. Battery precautions remote control at the remote sensor and press control buttons to operate. • Operate the remote control within 30° angle on either side of the remote sensor, up to a distance of Approx. 7 meters. Illustration of MW20FN1 - Toshiba MW20FN1 | Owners Manual - Page 14
Connections Antenna connections If you are using an indoor or outdoor antenna, follow the instructions below that correspond to your antenna system. If you are using a cable TV service (CATV), see page 15 for Cable TV connections. Combination VHF/UHF Antenna (Single 75 ohm Cable or 300 ohm Twin- - Toshiba MW20FN1 | Owners Manual - Page 15
Cable directly to the Antenna Jack on the back of the unit. 75 ohm Coaxial Cable For subscriber to scrambled cable TV service If you subscribe to a cable TV service which requires the use of a Converter/Descrambler box, connect the incoming 75 ohm Coaxial Cable to the Converter/Descrambler box - Toshiba MW20FN1 | Owners Manual - Page 16
Connecting a camcorder or a TV game Select "LINE 2" using the INPUT SELECT button. Signal flow Illustration of MW20FN1/R Camcorder (yellow) (white) (red) To audio inputs of the amplifier Notes: • Refer to the owner's manual of the connected equipment as well. • If you place the unit near a tuner - Toshiba MW20FN1 | Owners Manual - Page 17
Digital Connect the equipment the same way as described in "Connecting to an amplifier equipped with a Dolby Digital decoder." Refer to that amplifier's owner's manual and set the amplifier so you can enjoy Dolby Pro Logic Surround sound. With an amplifier not equipped with Dolby Digital Connect the - Toshiba MW20FN1 | Owners Manual - Page 18
of the unit. • Connect the BITSTREAM/PCM AUDIO OUT jack of the unit to the "COAXIAL" input of a Receiver or Processor. • Refer to the owner's manual of the connected equipment as well. • When you connect the unit to other equipment, be sure to turn off the power and unplug all of - Toshiba MW20FN1 | Owners Manual - Page 19
VCR and the DVD have their own menu op- tion 56 . • If no buttons are pressed for more than 60 seconds, the TV/VCR MENU screen will return to normal TV operation automatically. Basic setup 2 Press or to select "LANGUAGE", then press ENTER. ENTER SYSTEM SETUP CLOCK SET LANGUAGE/IDIOMA/LANGUE AUTO - Toshiba MW20FN1 | Owners Manual - Page 20
and press POWER. The POWER indicator will light. POWER POWER 3 Press DISPLAY to check the clock on the screen. DISPLAY TV/VCR 8 : 47AM MON STEREO SAP CH 125 00 : 00 : 00 SP 4 If the clock is not set, to "OFF", the Auto Clock adjustment does not function. • Set the clock manually 22 . 20 - Toshiba MW20FN1 | Owners Manual - Page 21
wrong station for the Auto Clock set. To correct the situation: You can set the Daylight saving time automatically or manually. 1 Press MENU. MENU SETUP M E N U TIMER REC SET TV SETUP CH SETUP AUTO REPEAT ON OFF SYSTEM SETUP 〈 / /ENTER/MENU〉 2 Press or to select "SYSTEM SETUP", then press ENTER - Toshiba MW20FN1 | Owners Manual - Page 22
Time if the Auto Clock process did not set them correctly. 2-4 1 2-4 Manual clock setting EXAMPLE: Setting the clock to "8:30 AM", 29th. (WED) select the "SYSTEM SETUP", then press ENTER. ENTER M E N U TIMER REC SET TV SETUP CH SETUP AUTO REPEAT ON OFF SYSTEM SETUP 〈 / /ENTER/MENU〉 3 Press - Toshiba MW20FN1 | Owners Manual - Page 23
If a channel with no broadcast is selected, the sound will automatically be muted. • If a station being viewed stops broadcasting, the TV will automatically shut itself off after 15 minutes. VHF/UHF/CATV CHANNELS TV VHF 2-13 UHF 14-69 CATV VHF 2-13 STD/HRC/IRC 14-36 (A) (W) 37-59 (AA) (WW) 60-85 - Toshiba MW20FN1 | Owners Manual - Page 24
TV operation TV Operation (continued) CHANNEL / MUTE CHANNEL RETURN SLEEP Sleep Mute To set the unit to turn off after a preset amount of time, press SLEEP on the remote control. The clock will count down 10 minutes for each press of SLEEP (120, 110, ...10, 0). After the sleep time is programmed - Toshiba MW20FN1 | Owners Manual - Page 25
For television programs broadcasting with Closed Captions, look in your TV guide for the Closed Captions symbol (CC). WHAT IS CLOSED properly. TO VIEW CLOSED CAPTIONS Press CLOSED CAPTION on the remote control to switch between normal TV and the two Closed Caption Modes (Captions and Full Screen - Toshiba MW20FN1 | Owners Manual - Page 26
/ /ENTER/MENU〉 4 Press MENU repeatedly until the menu screen is cleared. MENU SETUP Notes: • If a station being viewed stops broadcasting, the TV will automatically shut itself off after 15 minutes. • You can't select "CH SETUP" if you set the channel to "LINE1" or "LINE2". 4 Press MENU repeatedly - Toshiba MW20FN1 | Owners Manual - Page 27
channel selection 1,5 1,2,4 1-3 To ADD/DELETE channels 1 Press MENU. Press or to select "CH SETUP", then press ENTER. MENU SETUP ENTER M E N U TIMER REC SET TV SETUP CH SETUP AUTO REPEAT ON OFF SYSTEM SETUP 〈 / /ENTER/MENU〉 2 Press or to select "ADD/DELETE", then press ENTER. ENTER CH SETUP - Toshiba MW20FN1 | Owners Manual - Page 28
All children 7 years old and above General Audience Parental guidance 14 years old and above 17 years old and above • When you select TV-Y7, TV-PG, TV-14 or TV-MA, press the DISPLAY button to explain the rating. Press or to select the desired rating you want. Press the ENTER button to - Toshiba MW20FN1 | Owners Manual - Page 29
screen is cleared. MENU SETUP Note: The V-Chip function is activated only on programs and tapes that have the rating signal. To use the TV after the TV is protected. When the program applied to the V-Chip setting is received, enter the password, then press the ENTER button. When the password is - Toshiba MW20FN1 | Owners Manual - Page 30
/MENU〉 ENTER 5 Enter the new password using the Number buttons (0-9), then press ENTER. 123 456 789 0 ENTER V-CHIP SET V-CHIP : ON TV RATING : TV-PG MOVIE RATING : PG-13 CHANGE PASSWORD NEW PASSWORD: - - - - 〈0-9/ENTER/CANCEL/MENU〉 6 Enter the same password again to confirm, then press - Toshiba MW20FN1 | Owners Manual - Page 31
〉 2 Press or to select "ON/OFF TIMER", then press ENTER. ENTER TV SETUP V-CHIP SET ON/OFF TIMER PICTURE AUDIO SURROUND ON OFF STABLE SOUND ON OFF TIMER has been set. To continue watching the TV, press any button to cancel the one hour automatic shut off. • To cancel ON TIMER, follow above - Toshiba MW20FN1 | Owners Manual - Page 32
, the unit will automatically turn off at the same time everyday. 1,7 1-6 1-6 To set the off timer EXAMPLE: Turning off the TV at 11:30 PM. 1 Press MENU. Press or to select "TV SETUP", then press ENTER. MENU You can also select ON/OFF TIMER by pressing PROGRAM twice. SETUP ENTER M E N U TIMER - Toshiba MW20FN1 | Owners Manual - Page 33
but you can adjust them individually as follows: TV operation Picture control adjustment 1 1-2 CANCEL 1 To display the picture adjustment screen, press MENU. Press or to select "TV SETUP", then press ENTER. MENU SETUP ENTER M E N U TIMER REC SET TV SETUP CH SETUP AUTO REPEAT ON OFF SYSTEM - Toshiba MW20FN1 | Owners Manual - Page 34
operation Sound control adjustment Sound control adjustment 1 1-3 CANCEL 1 To display the sound adjustment screen, press MENU. Press or to select "TV SETUP", then press ENTER. MENU SETUP ENTER M E N U TIMER REC SET TV SETUP CH SETUP AUTO REPEAT ON OFF SYSTEM SETUP 〈 / /ENTER/MENU〉 4 Press or - Toshiba MW20FN1 | Owners Manual - Page 35
Playback (VCR) Loading and unloading a cassette tape Use only video cassette tapes marked . Loading Push the center of the tape until it is automatically inserted. Insert the cassette tape with its labeled side facing up and the erase prevention tab positioned at your left. An inverted - Toshiba MW20FN1 | Owners Manual - Page 36
PLAY SKIP POWER REW FF Illustration of MW20FN1/R PLAY STOP/EJECT Rewind or forward TV/VCR mode. Stop the playback or recording with STOP. To rewind the tape: Press REW on the front panel or press REV on the remote. REW REV To forward the tape: Press FF on the front panel or press FWD on the remote - Toshiba MW20FN1 | Owners Manual - Page 37
TRACKING TRK +/- Playback (VCR) Picture search Digital tracking controls Reverse picture search function Press REV once or twice during press D.TRACKING. "DIGITAL TRACK" will appear for 4 seconds on the screen. MANUAL TRACK DIGITAL TRACK Notes: • "SP" is more appropriate as less noise appeared - Toshiba MW20FN1 | Owners Manual - Page 38
〈 / /ENTER/MENU〉 2 Then press ENTER to select "ON" or "OFF". If "ON" is selected, the playback will be repeated endlessly. ENTER M E N U TIMER REC SET TV SETUP CH SETUP AUTO REPEAT ON OFF SYSTEM SETUP 〈 / /ENTER/MENU〉 3 Press MENU until the menu screen is cleared. If you press DISPLAY, " " will - Toshiba MW20FN1 | Owners Manual - Page 39
VIDEO HEADS OR SERVICE THE UNIT BY REMOVING THE REAR COVER. • Video heads may eventually wear out and should be re- placed when they fail to produce clear pictures. • To help prevent video head clogging, use only good quality VHS tapes. Discard worn out tapes. 4 Press STOP. STOP TV/VCR 9:00AM THU - Toshiba MW20FN1 | Owners Manual - Page 40
counter and SP or SLP will appear on the screen for about 4 seconds. SP/SLP RETURN Notes: • If power is switched off during recording, the TV and the DVD sections go off and the VCR continues to record. Press the STOP button to halt the recording and turn off the VCR - Toshiba MW20FN1 | Owners Manual - Page 41
STOP PAUSE/STILL To stop recording Press STOP to stop recording. " " will appear on screen for about 4 seconds. STOP Auto Rewind feature This VCR will automatically rewind the tape when the tape has ended (except during OTR and timer recording). It will also eject the tape. Note: If the erase - Toshiba MW20FN1 | Owners Manual - Page 42
00 5 times 2:00 10 times NORMAL REC REC OTR 0 : 30 CH 125 To cancel OTR 3 Set "TV" or "CATV" option to the appropriate position 26 . Press STOP. TV - VHF/UHF channels STOP CATV - CABLE TV channels 4 Press Direct channel selection buttons or CH / to select the channel to be recorded. 123 - Toshiba MW20FN1 | Owners Manual - Page 43
can be programmed on-screen with the remote control. The built-in timer allows automatic unattended recording of up to 8 programs within 1 month. TV/VCR 2-3,5 6 1 1-3,5 CANCEL Timer recording Recording (VCR) Preparation: • Press TV/VCR to select the TV/VCR mode. • Load a cassette tape with the - Toshiba MW20FN1 | Owners Manual - Page 44
Monday to Friday) Press PROGRAM once. The TV screen displays the timer program list. Press PROGRAM again. The TV screen displays the ON/OFF timer setting. below. CANCEL CLEAR ENTER/CANCEL/MENU〉 Program 1 Program 2 Program 3 Recording Control Settings 8 : 00 9 : 00 10 : 00 11 : 00 Prog.1 - Toshiba MW20FN1 | Owners Manual - Page 45
Press or to select "STABLE SOUND". Then press ENTER to select "ON". Then press MENU repeatedly until the menu screen is cleared. ENTER MENU SETUP TV SETUP V-CHIP SET ON/OFF TIMER PICTURE AUDIO SURROUND ON OFF STABLE SOUND ON OFF SAP ON OFF 〈 / /ENTER/MENU〉 To cancel the surround sound - Toshiba MW20FN1 | Owners Manual - Page 46
cable channel. In this case "STEREO" will not appear and the sound will be in mono. AUDIO SELECT Output selection When viewing an MTS stereo TV program, or playing a prerecorded VHS Hi-Fi stereo videotape, press AUDIO SELECT to select how the audio will be heard through the speakers. Normally set - Toshiba MW20FN1 | Owners Manual - Page 47
before turning on the power. TV/VCR 3 3 2 1 Duplicating a video tape Preparation: • Press TV/VCR to select the TV/VCR mode. • Load a REC/OTR TIMER REC OPEN/CLOSE VOLUME SKIP STOP PLAY SKIP POWER Illustration of MW20FN1/R To AUDIO (R) IN To AUDIO (L) IN To VIDEO IN Audio/Video cable - Toshiba MW20FN1 | Owners Manual - Page 48
the disc, then start to record. • You cannot record the disc with copy guard function. The following icon and text will show up on the TV screen for about 4 seconds. DISC IS COPY PROTECTED RETURN 2 Press DVD to select the DVD mode. DVD 3 Press PLAY to start playback. PLAY 4 Press both - Toshiba MW20FN1 | Owners Manual - Page 49
pressing POWER. 2 Press POWER on the unit or on the remote control to turn on the unit. POWER POWER • The POWER indicator will light. • Every time you press POWER, the unit starts from TV mode. • When using - Toshiba MW20FN1 | Owners Manual - Page 50
MW20FN1 label side up, align it with the guides, and place it in its proper position. unit or the remote control. • The disc tray closes automatically. On the TV screen, " ", "Region Code Error" or "Parental Error" will appear on the TV screen according instructions supplied with the DVDs. ENTER 50 - Toshiba MW20FN1 | Owners Manual - Page 51
television screen indefinitely. If you leave 3) Play a disc. the still video image or On screen display image displayed on Follow step 1-5 on page 50. your TV for an extended period of time, you risk permanent dam- • Press PLAY if the unit does not start to play a disc age to your television - Toshiba MW20FN1 | Owners Manual - Page 52
Advanced playback (DVD) Zooming/Locating desired scene DVD Number button (0-9) JUMP ZOOM ENTER CANCEL DVD VCD Zooming This unit will allow you to zoom in on the frame image. You can then make selections by switching the position of the frame. 1 Press DVD to select DVD mode. Press ZOOM during - Toshiba MW20FN1 | Owners Manual - Page 53
Repeat, Random and Program playback/Repeat A-B Number buttons (0-9) DVD VCD Repeat, Random and Program playback CD PLAY STOP CANCEL REPEAT A-B ENTER PLAY MODE Press PLAY MODE during playback or stop mode. TRK PLAY MODE Each time you press PLAY MODE, playback mode changes as follows. DVD - Toshiba MW20FN1 | Owners Manual - Page 54
Advanced playback (DVD) Changing soundtrack language/ Subtitles AUDIO SELECT SUBTITLE DVD Changing soundtrack language You can select the language when you play a multilingual disc. 1 Press AUDIO SELECT during playback. AUDIO The current soundtrack language will SELECT appear. In case of - Toshiba MW20FN1 | Owners Manual - Page 55
DVD, you may not be able to select the title. • Depending on the DVD, a "title menu" may simply be called a "menu" or "title" in the instructions supplied with the disc. Advanced playback (DVD) DVD DVD Menu Some DVDs allow you to select the disc contents using the menu. When you play - Toshiba MW20FN1 | Owners Manual - Page 56
previous menu, press or RETURN. 4 Repeat steps 2-3 for other "Language" setting. Other: (Menu/Audio/Subtitle) If you want to select another language, enter the language code (see the Language code list on page 65). Off: (subtitle) Subtitles do not appear. 56 - Toshiba MW20FN1 | Owners Manual - Page 57
or then press ENTER to select your desired screen type, or ENTER. TV Screen 16:9 4:3 4:3 /Enter/Setup/Return You have the following screen RETURN. 3 Press ENTER or ENTER to select "On" or "Off". Picture TV Screen 4:3 Display Off /Enter/Setup/Return On: On screen displays appear when you - Toshiba MW20FN1 | Owners Manual - Page 58
the dynamic range so as to achieve a suitable sound for your equipment. DVD Dynamic Range Control 1 Press DVD to select DVD mode. Press SETUP in the stop mode. Press or to select "Sound". DVD ENTER MENU SETUP Main Menu Language Picture - Toshiba MW20FN1 | Owners Manual - Page 59
changed unless you enter the correct password. • If you want to return to the previous menu, press or RETURN. 7 Press SETUP to remove the parental control screen. MENU SETUP Notes: • If each setup (P.56-60) has been completed, the unit can always be worked under the same conditions (especially with - Toshiba MW20FN1 | Owners Manual - Page 60
Function setup (DVD) DVD To change the parental level 3,8 DVD To change the parental level RETURN 1,10 ENTER CANCEL 1 Press DVD to select DVD mode. Press SETUP in the stop mode or No Disc. Press or to select "Parental", then press or ENTER. DVD ENTER MENU SETUP Main Menu Language Picture - Toshiba MW20FN1 | Owners Manual - Page 61
3 2,3 9 Press ENTER. The parental level is now changed and locked. ENTER Parental Password On Parental Level 8 10 Press SETUP to remove the parental control screen. MENU SETUP /Enter/Setup/Return • If you want to return to the previous menu, press or RETURN. Note: Do not forget the password - Toshiba MW20FN1 | Owners Manual - Page 62
TV service interrupted. TV/CATV Mode menu option is not set to the appropriate mode. UHF antenna is not connected. TV station experiencing problems. Antenna (CATV) connector is not connected or possible local interference. Possible local interference. The MUTE button is depressed. TV shuts control - Toshiba MW20FN1 | Owners Manual - Page 63
TV disc is placed upside down. The disc is not placed within the guide. The disc is dirty. The parental lock function is set. Playback TIMER REC indicator 43 is lit). Replace the tape. - Adjust tracking manually using the TRK +/- buttons on the remote control. 37 Clean the video heads. 39 - Toshiba MW20FN1 | Owners Manual - Page 64
tall buildings, hills or other large objects. Changing the direction or position of the antenna may improve the reception. SNOW If the TV/VCR/DVD is located far from the TV station, in a fringe reception area where the signal is weak, small dots may appear in the picture. If the signal is - Toshiba MW20FN1 | Owners Manual - Page 65
for the initial settings "Menu", "Audio" and/or "Subtitle" (see page 56). Language Name Code Language Name Code Language Name Code Language Name Code Abkhazian 1112 Fiji 1620 Lingala 2224 Singhalese 2919 Afar 1111 Finnish 1619 Lithuanian 2230 Slovak 2921 Afrikaans 1116 French 1628 - Toshiba MW20FN1 | Owners Manual - Page 66
consumption Weight Dimensions Operating conditions (DVD) Wow and flutter (DVD) Dynamic range (DVD) MW20FN1/R MW24FN1/R MW27FN1/R Type 20 (508mm diagonal) Type 24 1 Supplied accessories 300-75 ohm Matching Transformer 1 Remote control 1 Batteries (AAA 2 • Designs and specifications are - Toshiba MW20FN1 | Owners Manual - Page 67
replace a defective part without charge to you, except that if a defective part is replaced service charges for set installation, set up, adjustment of customer controls and installation or repair of antenna systems are not covered by this warranty. Reception problems of instructions furnished by - Toshiba MW20FN1 | Owners Manual - Page 68
instructions in this manual and checking the section "Before calling service personnel" and you still find that service is needed; ( 1 ) Call the TACP toll free number 1-800-631-3811 after you find a defective product or part to find the nearest Toshiba Authorized Service repair or replacement of any
-
 1
1 -
 2
2 -
 3
3 -
 4
4 -
 5
5 -
 6
6 -
 7
7 -
8
-
9
-
10
-
11
-
12
-
13
-
14
-
15
-
16
-
17
-
18
-
19
-
20
-
21
-
22
-
23
-
24
-
25
-
26
-
27
-
28
-
29
-
30
-
31
-
32
-
33
-
34
-
35
-
36
-
37
-
38
-
39
-
40
-
41
-
42
-
43
-
44
-
45
-
46
-
47
-
48
-
49
-
50
-
51
-
52
-
53
-
54
-
55
-
56
-
57
-
58
-
59
-
60
-
61
-
62
-
63
-
64
-
65
-
66
-
67
-
68
 |
 |
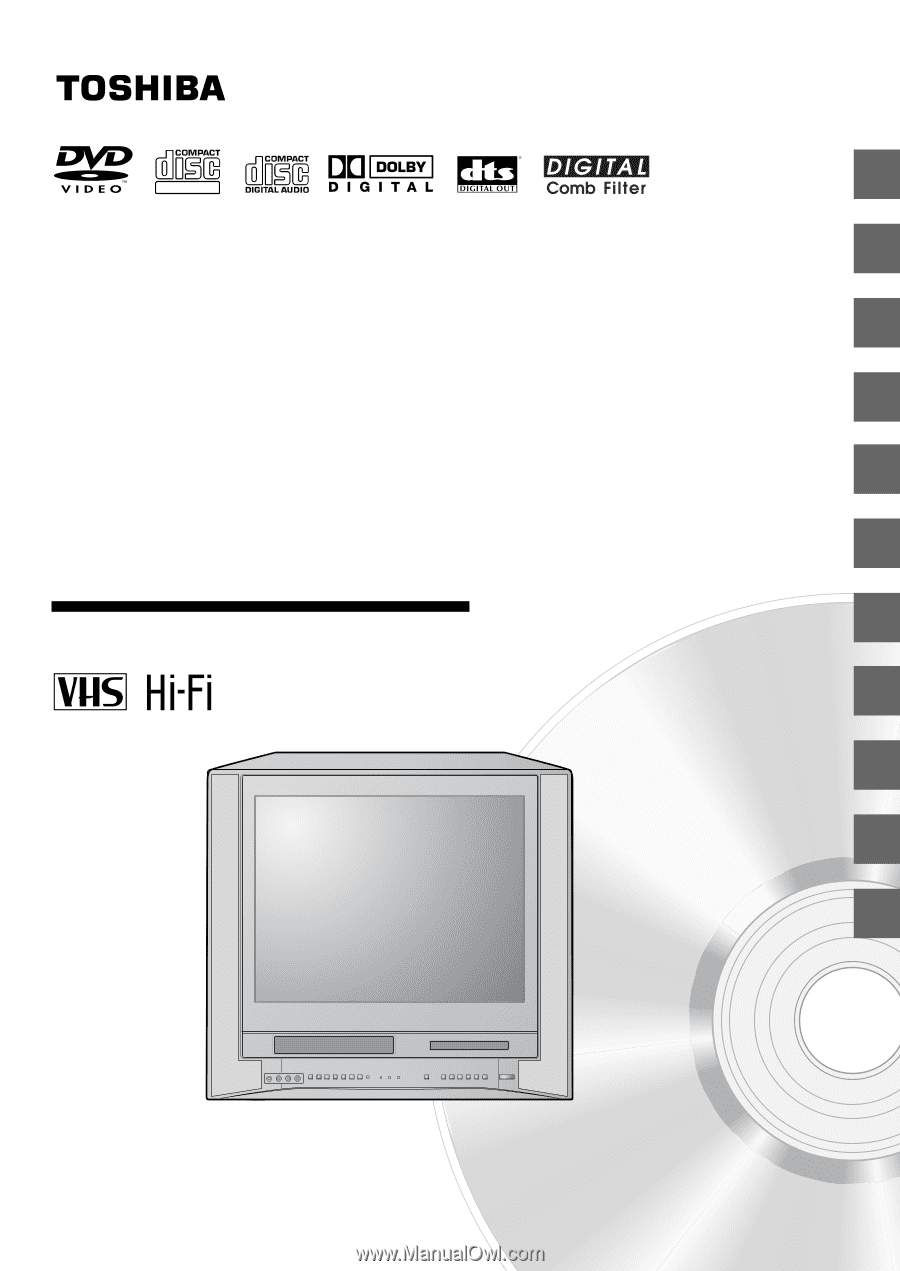
COMBINATION FLAT COLOR
TELEVISION AND VIDEO CASSETTE
RECORDER / DVD VIDEO PLAYER
MW20FN1/R
MW24FN1/R
MW27FN1/R
OWNER’S MANUAL
2
14
19
35
40
45
Introduction
Connections
Basic setup
Playback
(VCR)
Recording (VCR)
Other functions
(VCR)
DIGITAL VIDEO
©2003 Toshiba Corporation
49
52
56
62
Basic playback
(DVD)
Advanced
playback
(DVD)
Function setup
(DVD)
Others
This device does not tape-record copy protected DVD Video Discs.
23
TV operation
Illustration of MW20FN1/R