Uniden UM525 English Owners Manual - Page 36
Disabling Auto Channel Switch, Position Reply, Setting Up a WHAM - owners manual
 |
View all Uniden UM525 manuals
Add to My Manuals
Save this manual to your list of manuals |
Page 36 highlights
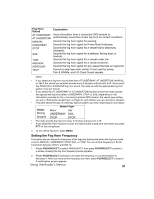
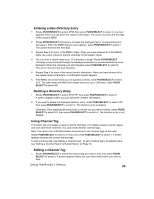
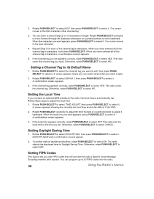
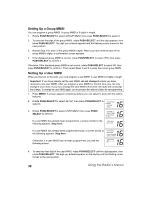
Disabling Auto Channel Switch This option lets you set the radio so it does not automatically change the channel when it receives a DSC call. If the radio receives an individual call when Auto Channel Switch is turned off, the radio replies UNATTENDED to the calling radio and does not tune to the channel requested by the calling radio. 1. Rotate PUSH/SELECT to select AUTO CH SW, then press PUSH/SELECT to select it. AUTO CH SW and ON and OFF appear. 2. To turn off auto channel switch, rotate PUSH/SELECT to select OFF, then press PUSH/ SELECT to confirm it. Auto channel switch is turned off. Otherwise, to turn on auto channel switch, rotate PUSH/SELECT to select ON, then press PUSH/SELECT to confirm it. Auto channel switch is turned on. Position Reply This option lets you set the radio so you can transmit an acknowledgement automatically or manually when it receives a Position Request Call. 1. Rotate PUSH/SELECT to select POS REPLY, then press PUSH/SELECT to select it. AUTO and MANUAL appear. 2. To set the radio to transmit an acknowledgement automatically, rotate PUSH/SELECT to select AUTO, then press PUSH/SELECT to confirm it. Otherwise, rotate PUSH/SELECT to select MANUAL, then press PUSH/SELECT to confirm it. Setting Up a WHAM This option lets you set up a WHAM or WHAM x 4 wireless microphone to work with the radio. You must set up a WHAM or WHAM x 4 microphone before it will work with the radio. Note: Refer to your WHAM microphone's owners manual for more information about connecting it to the radio. Rotate PUSH/SELECT to select WHAM, then press PUSH/SELECT to select it. If you have already connected a WHAM base unit to the radio, WHAM SETUP, BASE ID, and LINK CH appear. If you haven't connected a WHAM base unit to the radio or connected a WHAM x 4 base unit to the radio, WHAM SETUP, BASE ID, and SUB RADIO appear. To set up a WHAM Base ID, see "Setting a WHAM Base ID". To set up a WHAM link channel, see "Setting a WHAM Link Channel" on Page 37. To set up a WHAM x 4 Base ID, see "Setting a WHAM x 4 Base ID" on Page 37. To select the WHAM x 4 antenna, see "Setting the WHAM x 4 Antenna" on Page 37. Setting a WHAM Base ID The WHAM base ID for the radio and the WHAM microphone you are installing must be the same. 1. Rotate PUSH/SELECT to select BASE ID, then press PUSH/SELECT to select it. The cursor moves to the first character of the base ID. 2. Rotate PUSH/SELECT clockwise to move forward through the displayed numbers or counterclockwise to move backward. When the number you want appears, press PUSH/ SELECT to select it. The cursor moves to the next number. 3. Repeat Step 2 for each of the base ID's numbers. When you have entered all of the base ID's numbers, hold down PUSH/SELECT. A confirmation screen appears. 36 Using the Radio's Menus
-
 1
1 -
2
-
3
-
4
-
5
-
6
-
7
-
8
-
9
-
10
-
11
-
12
-
13
-
14
-
15
-
16
-
17
-
18
-
19
-
20
-
21
-
22
-
23
-
24
-
25
-
26
-
27
-
28
-
29
-
30
-
 31
31 -
 32
32 -
 33
33 -
 34
34 -
 35
35 -
 36
36 -
 37
37 -
 38
38 -
 39
39 -
 40
40 -
 41
41 -
42
-
43
-
44
-
45
-
46
-
47
-
48
-
49
-
50
-
51
-
52
-
53
-
54
-
55
-
56
-
57
-
58
-
59
-
60
-
61
-
62
-
63
-
64
-
65
-
66
-
67
-
68
-
69
-
70
-
71
-
72
-
73
-
74
-
75
-
76
-
77
-
78
-
79
-
80
-
81
-
82
-
83
-
84
-
85
-
86
-
87
-
88
-
89
-
90
-
91
-
92
-
93
-
94
-
95
-
96
-
97
-
98
-
99
-
100
-
101
-
102
-
103
-
104
-
105
-
106
-
107
-
108
-
109
-
110
-
111
-
112
-
113
-
114
-
115
-
116
-
117
-
118
-
119
-
120
-
121
-
122
-
123
-
124
-
125
-
126
-
127
-
128
-
129
-
130
-
131
-
132
-
133
-
134
-
135
-
136
-
137
-
138
-
139
-
140
-
141
-
142
-
143
-
144
-
145
-
146
-
147
-
148
-
149
-
150
-
151
-
152
-
153
-
154
-
155
-
156
-
157
 |
 |