Western Digital WDBAAF5000EBK User Manual - Page 16
Install WD SmartWare, Settings, Preferences
 |
UPC - 718037746036
View all Western Digital WDBAAF5000EBK manuals
Add to My Manuals
Save this manual to your list of manuals |
Page 16 highlights
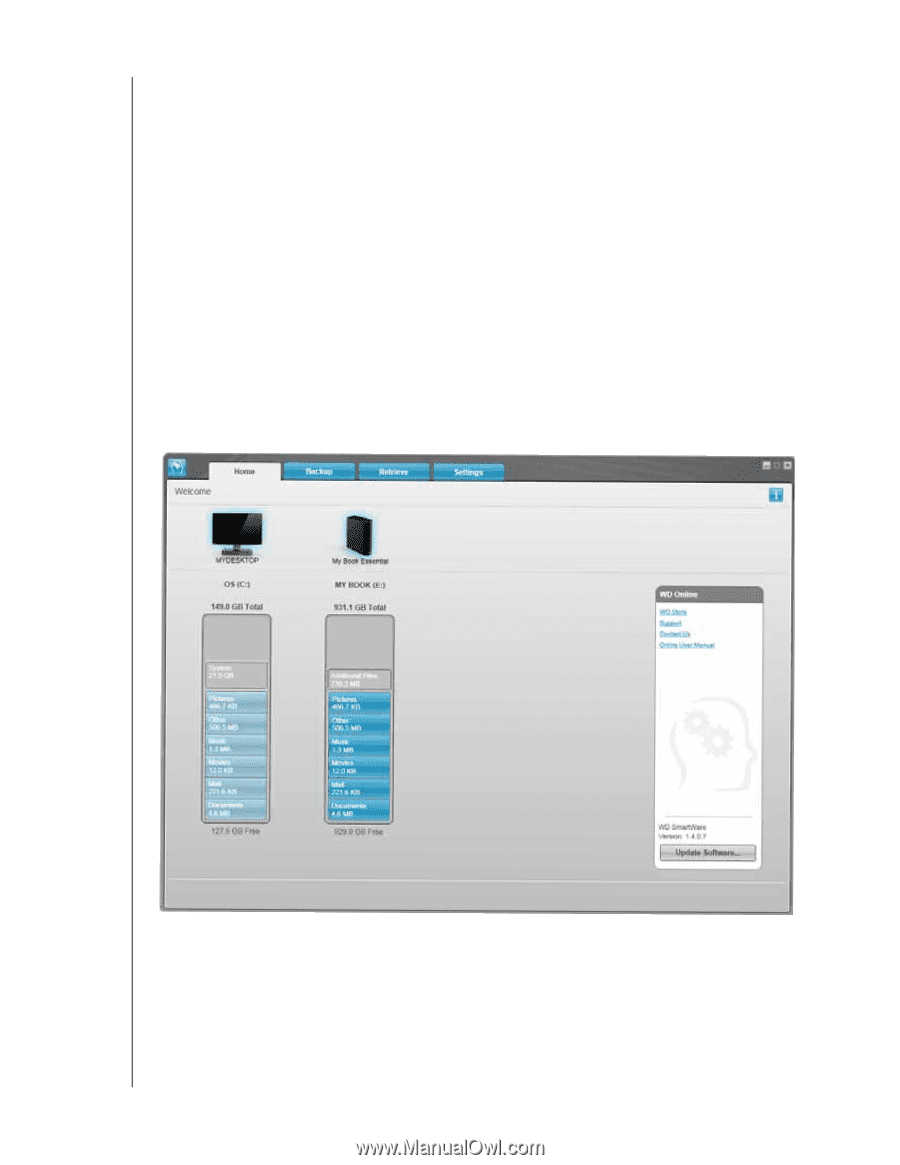
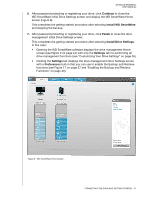
MY BOOK ESSENTIAL USER MANUAL 6. After password protecting or registering your drive, click Continue to close the WD SmartWare initial Drive Settings screen and display the WD SmartWare Home screen (Figure 8). This completes the getting started procedure after selecting Install WD SmartWare and skipping the backup. 7. After password protecting or registering your drive, click Finish to close the drive management initial Drive Settings screen. This completes the getting started procedure after selecting Install Drive Settings. In this case: • Opening the WD SmartWare software displays the drive management Home screen (see Figure 9 on page 12) with only the Settings tab for performing all drive management functions (see "Customizing Your Drive Settings" on page 35). • Clicking the Settings tab displays the drive management Drive Settings screen with a Preferences button that you can use to enable the Backup and Retrieve functions (see Figure 17 on page 27 and "Enabling the Backup and Retrieve Functions" on page 40). Figure 8. WD SmartWare Home Screen CONNECTING THE DRIVE AND GETTING STARTED - 11
-
 1
1 -
2
-
3
-
4
-
5
-
6
-
7
-
8
-
9
-
10
-
 11
11 -
 12
12 -
 13
13 -
 14
14 -
 15
15 -
 16
16 -
 17
17 -
 18
18 -
 19
19 -
 20
20 -
 21
21 -
22
-
23
-
24
-
25
-
26
-
27
-
28
-
29
-
30
-
31
-
32
-
33
-
34
-
35
-
36
-
37
-
38
-
39
-
40
-
41
-
42
-
43
-
44
-
45
-
46
-
47
-
48
-
49
-
50
-
51
-
52
-
53
-
54
-
55
-
56
-
57
-
58
-
59
-
60
-
61
-
62
-
63
-
64
-
65
-
66
-
67
-
68
-
69
-
70
-
71
-
72
-
73
-
74
-
75
-
76
-
77
-
78
 |
 |