Whirlpool MH2175XSB Service Guide - Page 38
Inner door removal, Inner door, Handle removal, Door bracket, Handle, Door bracket removal, Outer
 |
View all Whirlpool MH2175XSB manuals
Add to My Manuals
Save this manual to your list of manuals |
Page 38 highlights
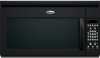
Inner door removal: This shows the screw locations for each labeled component at the top of the door bracket. The same screws are at the bottom of the bracket, in reverse order. Door bracket removal: 1. Remove two screws that secure the door bracket to the door frame. Refer to the photo in the left column for screw location. Door bracket Inner door Door Latch Removal: 1. After removing the Inner door, turn it over. 2. Each door latch is secured with one screw. Remove the screw and slide the latch out of the slot in the inner door. Handle 2. Beginning at the bottom left corner, work your way across the bottom edge to release 4 tabs. Release 3 tabs on the right edge and 2 tabs on the left edge. 3. Gently lift the inner door from the bottom edge to release the 4 clips along the top edge. Outer glass removal: 1. Press the 5 tabs at the top edge of the outer glass that secure it to the door frame. Handle removal: 1. Remove two screws from the door bracket that secure the handle to the front of the door. Refer to the photo at the top of this column for screw location. 2. Lift the glass at the top left corner just enough to slide the glass to the left and up from under the tabs on the right and bottom edges. Press tabs froSmliduenoduert 2. The handle can be replaced without regard for orientation of top and bottom. 4-20
-
 1
1 -
2
-
3
-
4
-
5
-
6
-
7
-
8
-
9
-
10
-
11
-
12
-
13
-
14
-
15
-
16
-
17
-
18
-
19
-
20
-
21
-
22
-
23
-
24
-
25
-
26
-
27
-
28
-
29
-
30
-
31
-
32
-
 33
33 -
 34
34 -
 35
35 -
 36
36 -
 37
37 -
 38
38 -
 39
39 -
 40
40 -
 41
41 -
 42
42 -
 43
43 -
44
-
45
-
46
-
47
-
48
-
49
-
50
-
51
-
52
-
53
-
54
 |
 |
