Xerox 4150S Getting Started Guide - Page 25
Sending a Fax - service manual
 |
UPC - 095205228731
View all Xerox 4150S manuals
Add to My Manuals
Save this manual to your list of manuals |
Page 25 highlights
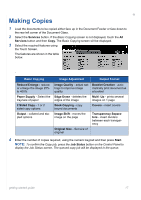
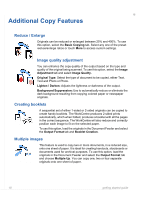
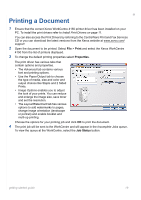
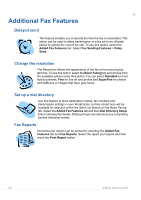
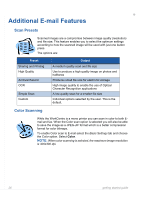
Sending a Fax 1 Load the documents to be faxed either face down on the Document Glass or face up into the Document Feeder. 2 Press the Services button on the Control Panel. Select the All Services button and choose the Fax option. This displays the Basic Fax screen. 3 Enter the recipient's fax number by: • Keypad Dial - enter the number on the numeric keypad. • Manual Dial - if a telephone handset is attached to the WorkCentre, select Manual Dial and dial the number on the handset. • Speed Dial - Select Speed Dial and enter a pre-set speed dial number. • Send List - Add several recipients to the Send List to send the same fax to several recipients. This button provides access to the dial directory for individuals and groups. 4 Select the required features for your fax job. They are shown in the following table: Basic Faxing Image Adjustment Sides Scanned - 1-sided or 2-sided Image Quality - adjust settings to originals improve image quality Resolution - sets the quality of image Color Mode - mono or color Original Size - set size of original NOTE: The Added Fax Features tab provides access to fax setup features such as creating mailboxes, adding names to a dial directory and other useful options. 5 Press Start to transmit your fax. NOTE: To confirm the Fax job, press the Job Status button on the Control Panel to display the Job Status screen. The queued job will be displayed. getting started guide 21
-
 1
1 -
2
-
3
-
4
-
5
-
6
-
7
-
8
-
9
-
10
-
11
-
12
-
13
-
14
-
15
-
16
-
17
-
18
-
19
-
 20
20 -
 21
21 -
 22
22 -
 23
23 -
 24
24 -
 25
25 -
 26
26 -
 27
27 -
 28
28 -
 29
29 -
 30
30 -
31
-
32
-
33
-
34
-
35
-
36
-
37
-
38
 |
 |
