Yamaha HTR-5935 Owners Manual - Page 82
Input Menu, My Dvd
 |
View all Yamaha HTR-5935 manuals
Add to My Manuals
Save this manual to your list of manuals |
Page 82 highlights
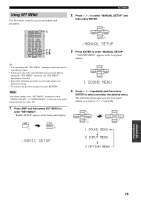
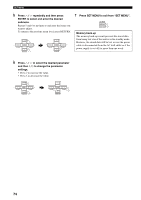
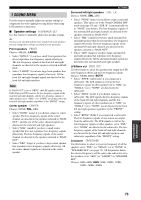
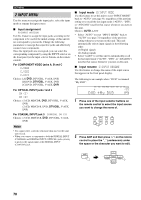
SET MENU 2 INPUT MENU Use this menu to reassign the input jacks, select the input mode or rename the input source. ■ Input assignment A)INPUT ASSIGN Use this feature to assign the input jacks according to the component to be used if the initial settings of this unit do not correspond to your needs. Change the following parameters to reassign the respective jacks and effectively connect more components. Once the input jacks are reassigned, you can select the corresponding component by using the INPUT selector on the front panel (or the input selector buttons on the remote control). For COMPONENT VIDEO jacks A, B and C C.V[A] C.V[B] C.V[C] Choices: [A] DVD, DTV/CBL, V-AUX, DVR [B] DVD, DTV/CBL, V-AUX, DVR [C] DVD, DTV/CBL, V-AUX, DVR For OPTICAL INPUT jacks 1and 2 IN (1) IN (2) Choices: (1) CD, MD/CDR, DVD, DTV/CBL, V-AUX, DVR (2) CD, MD/CD-R, DVD, DTV/CBL, V-AUX, DVR For COAXIAL INPUT jack 3 COAXIAL IN (3) Choices: (3) CD, MD/CD-R, DVD, DTV/CBL, V-AUX, DVR Notes • You cannot select a specific item more than once for the same type of jack. • When you connect a component to both the DIGITAL INPUT (COAXIAL) and DIGITAL INPUT (OPTICAL) jacks, priority is given to the signals input at the DIGITAL INPUT (COAXIAL) jack. ■ Input mode B)INPUT MODE Use this feature to set this unit to reset "INPUT MODE" back to "AUTO" (see page 31) regardless of the previous setting or to recall the last input mode ("AUTO", "DTS", or "ANALOG") used for that source whenever you turn on this unit. Choices: AUTO, LAST • Select "AUTO" to reset "INPUT MODE" back to "AUTO" (see page 31) regardless of the previous setting whenever you turn on this unit. This unit automatically selects input signals in the following order: (1) Digital signals (2) Analog signals • Select "LAST" to set this unit to automatically recall the last input mode ("AUTO", "DTS", or "ANALOG") used for that source whenever you turn on this unit. ■ Input rename C)INPUT RENAME Use this feature to change the name of the input source that appears in the front panel display. The following is an example where "DVD" is renamed "My DVD". DVR V-AUX DTV/CBL pDVD MD/CD-R TUNER CD XM VOLUME SP A dB DVD My DVD L CR SL SR 1 Press one of the input selector buttons on the remote control to select the input source you want to change the name of. CD MD/CD-R TUNER XM DVD DTV/CBL DVR V-AUX 2 Press AMP and then press j / i on the remote control to place the "_" (underscore) under the space or the character you want to edit. AMP A-E/CAT. ENTER A-E/CAT. PRESET/CH 78
-
 1
1 -
2
-
3
-
4
-
5
-
6
-
7
-
8
-
9
-
10
-
11
-
12
-
13
-
14
-
15
-
16
-
17
-
18
-
19
-
20
-
21
-
22
-
23
-
24
-
25
-
26
-
27
-
28
-
29
-
30
-
31
-
32
-
33
-
34
-
35
-
36
-
37
-
38
-
39
-
40
-
41
-
42
-
43
-
44
-
45
-
46
-
47
-
48
-
49
-
50
-
51
-
52
-
53
-
54
-
55
-
56
-
57
-
58
-
59
-
60
-
61
-
62
-
63
-
64
-
65
-
66
-
67
-
68
-
69
-
70
-
71
-
72
-
73
-
74
-
75
-
76
-
 77
77 -
 78
78 -
 79
79 -
 80
80 -
 81
81 -
 82
82 -
 83
83 -
 84
84 -
 85
85 -
 86
86 -
 87
87 -
88
-
89
-
90
-
91
-
92
-
93
-
94
-
95
-
96
-
97
-
98
-
99
 |
 |