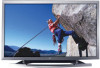
Zenith P50W26B Operating Guide - Page 5

Contents, Setup and Operation Checklist - specifications

Page 5 highlights

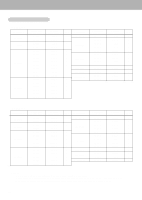
Contents Warnings 2 Safety Instructions 3~4 Step 1. Monitor Installation & Setup Controls and Connection Options 6 External Equipment Viewing Setups 7~10 Remote Control Key Functions 11 Monitor Accessories 12 Monitor Installation/Mounting Options 12 Step 2. Customize your Monitor's Features Basic Features Setup and Operation Turning on the Monitor 13 Menu Language Selection 13 Video Menu Options APC (Auto Picture Control 14 Adjusting Auto Color Control 14 Manual Color Temperature Control 14 Manual Picture Control 14 Audio Menu Options DASP (Digital Auto Sound Processing 15 AVL (Auto Volume Leveler 15 Adjusting Sound (Manual Settings 15 Time Menu Options Setting the Clock 16 Setting the On/Off Timer 16 Auto Off 16 Sleep Timer 16 Special Menu Options Key Lock 17 Orbiter 17 White Wash 17 Screen Menu Options Auto Adjustment 18 Setting Picture Format 18 Split Zoom 18 Screen Position 19 Manual Configure 19 Screen Adjustments 19 Initializing 19 PIP (Picture In Picture) Feature Watching PIP 20 PIP Size 20 PIP Aspect Ratio 20 Swapping PIP 20 Moving PIP 20 Selecting a Input Signal Source for PIP 20 Main Picture Size Adjustment 20 Main Picture Position Adjustment 20 Twin Picture Setup Options Main Picture Size Adjustment 21 Sub Picture Size Adjustment 21 Selecting a Source for the Twin Picture 21 Swapping the Twin Picture 21 Step.3 Miscellaneous External Control Device Setup 22 IR Code (NEC format 27 Maintenance 29 Troubleshooting Checklist 30 Specifications 31 Setup and Operation Checklist Setup and Operation Checklist (See page 7 for available connection and operational setup options.) 1. Unpack Monitor and all accessories. 2. Connect all external video and audio equipment. see pages 7 ~ 9. 3. Install batteries in remote control. See page 11. 4. Turn Monitor on. See page 13. 5. Turn video source equipment on. 6. Select viewing source for Monitor. See page 11. 7. Fine-tune source image and sound to personal preference or as required by source. See pages 14, and 15. 8. Additional features Setup See Table of Contents. After reading this manual, keep it handy for future reference. 5

  • 1
  • 2
  • 3
  • 4
  • 5
  • 6
  • 7
  • 8
  • 9
  • 10
  • 11
  • 12
  • 13
  • 14
  • 15
  • 16
  • 17
  • 18
  • 19
  • 20
  • 21
  • 22
  • 23
  • 24
  • 25
  • 26
  • 27
  • 28
  • 29
  • 30
  • 31
  • 32

5
After reading this manual, keep it handy for future reference.
Warnings
. . . . . . . . . . . . . . . . . . . . . . . . . . . . . . . . . . . . .2
Safety Instructions . . . . . . . . . . . . . . . . . . . . . . . . . . . . .3~4
Step 1. Monitor Installation & Setup
Controls and Connection Options . . . . . . . . . . . .6
External Equipment Viewing Setups . . . . . . .7~10
Remote Control Key Functions . . . . . . . . . . . . .11
Monitor Accessories . . . . . . . . . . . . . . . . . . . . .12
Monitor Installation/Mounting Options . . . . . . . .12
Step 2. Customize your Monitor’s Features
Basic Features Setup and Operation
Turning on the Monitor . . . . . . . . . . . . . . . . . . .13
Menu Language Selection
. . . . . . . . . . . . . . . .13
Video Menu Options
APC (Auto Picture Control) . . . . . . . . . . . . . . . .14
Adjusting Auto Color Control . . . . . . . . . . . . . . .14
Manual Color Temperature Control
. . . . . . . . . .14
Manual Picture Control . . . . . . . . . . . . . . . . . . .14
Audio Menu Options
DASP (Digital Auto Sound Processing) . . . . . . .15
AVL (Auto Volume Leveler) . . . . . . . . . . . . . . . .15
Adjusting Sound (Manual Settings) . . . . . . . . . .15
Time Menu Options
Setting the Clock
. . . . . . . . . . . . . . . . . . . . . . .16
Setting the On/Off Timer
. . . . . . . . . . . . . . . . .16
Auto Off . . . . . . . . . . . . . . . . . . . . . . . . . . . . . .16
Sleep Timer
. . . . . . . . . . . . . . . . . . . . . . . . . . .16
Special Menu Options
Key Lock
. . . . . . . . . . . . . . . . . . . . . . . . . . . . .17
Orbiter . . . . . . . . . . . . . . . . . . . . . . . . . . . . . . .17
White Wash
. . . . . . . . . . . . . . . . . . . . . . . . . . .17
Screen Menu Options
Auto Adjustment . . . . . . . . . . . . . . . . . . . . . . . .18
Setting Picture Format
. . . . . . . . . . . . . . . . . . .18
Split Zoom . . . . . . . . . . . . . . . . . . . . . . . . . . . .18
Screen Position
. . . . . . . . . . . . . . . . . . . . . . . .19
Manual Configure . . . . . . . . . . . . . . . . . . . . . . .19
Screen Adjustments . . . . . . . . . . . . . . . . . . . . .19
Initializing . . . . . . . . . . . . . . . . . . . . . . . . . . . . .19
PIP (Picture In Picture) Feature
Watching PIP . . . . . . . . . . . . . . . . . . . . . . . . . .20
PIP Size . . . . . . . . . . . . . . . . . . . . . . . . . . . . . .20
PIP Aspect Ratio . . . . . . . . . . . . . . . . . . . . . . . .20
Swapping PIP . . . . . . . . . . . . . . . . . . . . . . . . . .20
Moving PIP . . . . . . . . . . . . . . . . . . . . . . . . . . . .20
Selecting a Input Signal Source for PIP . . . . . . .20
Main Picture Size Adjustment . . . . . . . . . . . . . .20
Main Picture Position Adjustment
. . . . . . . . . . .20
Twin Picture Setup Options
Main Picture Size Adjustment . . . . . . . . . . . . . .21
Sub Picture Size Adjustment . . . . . . . . . . . . . . .21
Selecting a Source for the Twin Picture . . . . . . .21
Swapping the Twin Picture . . . . . . . . . . . . . . . .21
Step.3 Miscellaneous
External Control Device Setup
. . . . . . . . . . . . .22
IR Code (NEC format)
. . . . . . . . . . . . . . . . . . .27
Maintenance . . . . . . . . . . . . . . . . . . . . . . . . . . .29
Troubleshooting Checklist . . . . . . . . . . . . . . . . .30
Specifications . . . . . . . . . . . . . . . . . . . . . . . . . .31
Contents
Setup and Operation Checklist
(See page 7 for available connection and operational setup options.)
1.
Unpack Monitor and all accessories.
2.
Connect all external video and audio equipment.
see pages 7 ~ 9.
3.
Install batteries in remote control.
See page 11.
4.
Turn Monitor on.
See page 13.
5.
Turn video source equipment on.
6.
Select viewing source for Monitor.
See page 11.
7.
Fine-tune source image and sound to personal pref-
erence or as required by source.
See pages 14, and 15.
8.
Additional features Setup
See Table of Contents.