eMachines D620 Service Guide - Page 70
Detach the LCD with the brackets from the back cover.
 |
View all eMachines D620 manuals
Add to My Manuals
Save this manual to your list of manuals |
Page 70 highlights
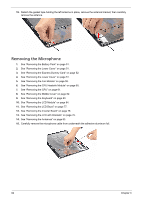
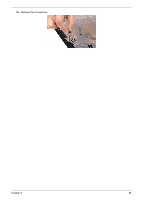
13. Detach the CCD board cable from the CCD board, then remove the board. 14. Remove the two screws (I) securing the left and right LCD brackets to the LCD back cover. Step 1~2 Size (Quantity) M2.5 x L5 (2) Color Silver 15. Carefully detach the cables from the latches on the LCD bracket as shown. Torque 2.5 kgf-cm 16. Detach the LCD with the brackets from the back cover. 80 Chapter 3
-
 1
1 -
2
-
3
-
4
-
5
-
6
-
7
-
8
-
9
-
10
-
11
-
12
-
13
-
14
-
15
-
16
-
17
-
18
-
19
-
20
-
21
-
22
-
23
-
24
-
25
-
26
-
27
-
28
-
29
-
30
-
31
-
32
-
33
-
34
-
35
-
36
-
37
-
38
-
39
-
40
-
41
-
42
-
43
-
44
-
45
-
46
-
47
-
48
-
49
-
50
-
51
-
52
-
53
-
54
-
55
-
56
-
57
-
58
-
59
-
60
-
61
-
62
-
63
-
64
-
 65
65 -
 66
66 -
 67
67 -
 68
68 -
 69
69 -
 70
70 -
 71
71 -
 72
72 -
 73
73 -
 74
74 -
 75
75 -
76
-
77
-
78
-
79
-
80
-
81
-
82
-
83
-
84
-
85
-
86
-
87
-
88
-
89
-
90
-
91
-
92
-
93
-
94
-
95
-
96
-
97
-
98
-
99
-
100
-
101
-
102
-
103
-
104
-
105
-
106
-
107
-
108
-
109
-
110
-
111
-
112
-
113
-
114
-
115
-
116
-
117
-
118
 |
 |

80
Chapter 3
13.
Detach the CCD board cable from the CCD board, then remove the board.
14.
Remove the two screws (I) securing the left and right LCD brackets to the LCD back cover.
15.
Carefully detach the cables from the latches on the LCD bracket as shown.
16.
Detach the LCD with the brackets from the back cover.
Step
Size (Quantity)
Color
Torque
1~2
M2.5 x L5 (2)
Silver
2.5 kgf-cm