eMachines D620 Service Guide - Page 78
System Check Procedures, External CD/DVD-ROM Drive Check, Keyboard or Auxiliary Input Device Check
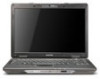 |
View all eMachines D620 manuals
Add to My Manuals
Save this manual to your list of manuals |
Page 78 highlights
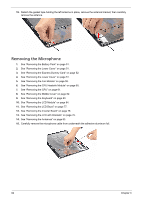
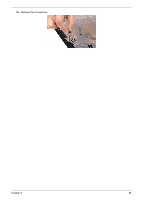
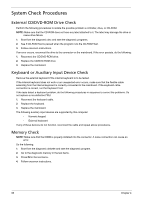
System Check Procedures External CD/DVD-ROM Drive Check Perform the following procedures to isolate the possible problem a controller, drive, or CD-ROM. NOTE: Make sure that the CD-ROM does not have any label attached to it. The label may damage the drive or cause drive failure. 1. Boot from the diagnostic disc and start the diagnostic programs. 2. See if CD-ROM Test is passed when the program runs the CD-ROM Test. 3. Follow onscreen instructions. If an error occurs, reconnect the drive to the connector on the mainboard. If the error persists, do the following: 1. Reconnect the CD/DVD-ROM drive. 2. Replace the CD/DVD-ROM drive. 3. Replace the mainboard. Keyboard or Auxiliary Input Device Check Remove the external keyboard if the internal keyboard is to be tested. If the internal keyboard does not work or an unexpected error occurs, make sure that the flexible cable extending from the internal keyboard is correctly connected to the mainboard. If the keyboard cable connection is correct, run the Keyboard Test. If the tests detect a keyboard problem, do the following procedures in sequence to correct the problems. Do not replace a non-defective FRU: 1. Reconnect the keyboard cable. 2. Replace the keyboard. 3. Replace the mainboard. The following auxiliary input devices are supported by this computer: • Numeric keypad • External keyboard If any of these devices do not function, reconnect the cable and repeat above procedures. Memory Check NOTE: Make sure that the DIMM is properly installed into the connector. A loose connection can cause an error. Do the following: 1. Boot from the diagnostic diskette and start the diagnostic program. 2. Go to the diagnostic memory in the test items. 3. Press F2 in the test items. 4. Follow onscreen instructions. 88 Chapter 4
-
 1
1 -
2
-
3
-
4
-
5
-
6
-
7
-
8
-
9
-
10
-
11
-
12
-
13
-
14
-
15
-
16
-
17
-
18
-
19
-
20
-
21
-
22
-
23
-
24
-
25
-
26
-
27
-
28
-
29
-
30
-
31
-
32
-
33
-
34
-
35
-
36
-
37
-
38
-
39
-
40
-
41
-
42
-
43
-
44
-
45
-
46
-
47
-
48
-
49
-
50
-
51
-
52
-
53
-
54
-
55
-
56
-
57
-
58
-
59
-
60
-
61
-
62
-
63
-
64
-
65
-
66
-
67
-
68
-
69
-
70
-
71
-
72
-
 73
73 -
 74
74 -
 75
75 -
 76
76 -
 77
77 -
 78
78 -
 79
79 -
 80
80 -
 81
81 -
 82
82 -
 83
83 -
84
-
85
-
86
-
87
-
88
-
89
-
90
-
91
-
92
-
93
-
94
-
95
-
96
-
97
-
98
-
99
-
100
-
101
-
102
-
103
-
104
-
105
-
106
-
107
-
108
-
109
-
110
-
111
-
112
-
113
-
114
-
115
-
116
-
117
-
118
 |
 |
