1999 Nissan Pathfinder Owner's Manual - Page 93
1999 Nissan Pathfinder Manual
Page 93 highlights
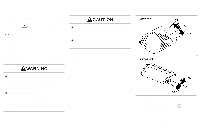
indicator light begins to flash (approximately 20 seconds). ROLLING CODE PROGRAMMING Rolling code garage door openers (or other rolling code devices) which are "code protected" and manufactured after 1996, may be determined by the following. A. Reference the garage door opener Owner's Manual for verification. B. The hand-held transmitter appears to program the Integrated HomeLink Universal Transceiver but does not activate the garage door. C. Press and hold the trained HomeLink button. If the garage door opener has the rolling code feature, the HomeLink indicator light will flash rapidly, then remains on after 2 seconds. To program the Integrated HomeLink Universal Transceiver to a garage door opener with the rolling code feature, follow these instructions after completing the "Programming HomeLink " (the aid of a second person may make the following procedures quicker and easier). 1. Locate the training button on the garage door opener motor unit. Exact location and color of the button may vary by garage door opener brand. If there is difficulty locating the training button, reference the garage door opener Owner's Manual. 2. Press the training button on the garage door opener motor unit (which may activate a training light). NOTE: Following step 2, there are 30 seconds in which to initiate step 3. 3. Firmly press and release the programmed HomeLink button. Press and release the HomeLink button a second time to complete the training process. (Some garage door openers may require you to do this procedure a third time to complete the training.) The garage door opener should now recognize the Integrated HomeLink Universal Transceiver and activate when the HomeLink button is pressed. The remaining two buttons may now be programmed (if not yet programmed, follow steps 2 through 4 in the "Programming HomeLink " procedures earlier in this section). versal Transceiver button, complete the following. 1. Press and hold the desired HomeLink button. Do not release the button until step 4 has been completed. 2. When the indicator light begins to flash slowly (after 20 seconds), position the hand-held transmitter 2 to 5 inches (50 to 127 mm) away from the HomeLink surface. 3. Press and hold the hand-held transmitter button. 4. The HomeLink indicator light will flash, first slowly and then rapidly. When the indicator light begins to flash rapidly, release both buttons. The Integrated HomeLink Universal Transceiver button has now been reprogrammed. The new device can be activated by pushing the HomeLink button that was just programmed. This procedure will not affect any other programmed HomeLink buttons. IF YOUR VEHICLE IS STOLEN If your vehicle is stolen, you should change the codes of any non-rolling code device that has been programmed into HomeLink . Consult the Owner's Manual of each device or call the REPROGRAMMING A SINGLE HomeLink BUTTON To reprogram an Integrated HomeLink Uni- 2-40 Instruments and controls
-
 1
1 -
2
-
3
-
4
-
5
-
6
-
7
-
8
-
9
-
10
-
11
-
12
-
13
-
14
-
15
-
16
-
17
-
18
-
19
-
20
-
21
-
22
-
23
-
24
-
25
-
26
-
27
-
28
-
29
-
30
-
31
-
32
-
33
-
34
-
35
-
36
-
37
-
38
-
39
-
40
-
41
-
42
-
43
-
44
-
45
-
46
-
47
-
48
-
49
-
50
-
51
-
52
-
53
-
54
-
55
-
56
-
57
-
58
-
59
-
60
-
61
-
62
-
63
-
64
-
65
-
66
-
67
-
68
-
69
-
70
-
71
-
72
-
73
-
74
-
75
-
76
-
77
-
78
-
79
-
80
-
81
-
82
-
83
-
84
-
85
-
86
-
87
-
 88
88 -
 89
89 -
 90
90 -
 91
91 -
 92
92 -
 93
93 -
 94
94 -
 95
95 -
 96
96 -
 97
97 -
 98
98 -
99
-
100
-
101
-
102
-
103
-
104
-
105
-
106
-
107
-
108
-
109
-
110
-
111
-
112
-
113
-
114
-
115
-
116
-
117
-
118
-
119
-
120
-
121
-
122
-
123
-
124
-
125
-
126
-
127
-
128
-
129
-
130
-
131
-
132
-
133
-
134
-
135
-
136
-
137
-
138
-
139
-
140
-
141
-
142
-
143
-
144
-
145
-
146
-
147
-
148
-
149
-
150
-
151
-
152
-
153
-
154
-
155
-
156
-
157
-
158
-
159
-
160
-
161
-
162
-
163
-
164
-
165
-
166
-
167
-
168
-
169
-
170
-
171
-
172
-
173
-
174
-
175
-
176
-
177
-
178
-
179
-
180
-
181
-
182
-
183
-
184
-
185
-
186
-
187
-
188
-
189
-
190
-
191
-
192
-
193
-
194
-
195
-
196
-
197
-
198
-
199
-
200
-
201
-
202
-
203
-
204
-
205
-
206
-
207
-
208
-
209
-
210
-
211
-
212
-
213
-
214
-
215
-
216
-
217
-
218
-
219
-
220
-
221
-
222
-
223
-
224
-
225
-
226
-
227
-
228
-
229
-
230
-
231
-
232
-
233
-
234
-
235
-
236
-
237
-
238
-
239
-
240
-
241
-
242
-
243
-
244
-
245
-
246
-
247
-
248
-
249
-
250
-
251
-
252
-
253
-
254
-
255
-
256
-
257
-
258
-
259
-
260
-
261
-
262
-
263
-
264
-
265
-
266
-
267
-
268
-
269
-
270
-
271
-
272
-
273
-
274
 |
 |