2013 Subaru Impreza Owner's Manual - Page 229
2013 Subaru Impreza Manual

Page 229 highlights
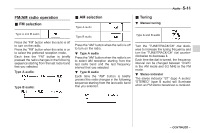
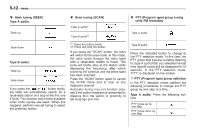
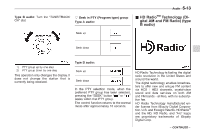
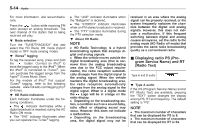
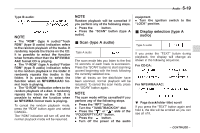
Audio 5-15 . If RT is 13 characters or longer, press and hold the "TEXT" button in order to change the page. ! Type B audio Press the "TEXT" button to show the next page when the text is not fully displayed while the PSD (Program Service Data) or RT (Radio Text) service is received. memory. NOTE . Up to six stations for each reception mode may be preset. . If the connection between the radio and battery is broken for any reason such as vehicle maintenance or radio removal, all stations stored in the preset buttons are cleared. If this occurs, it is necessary to reset the preset buttons. ! Selecting preset stations 1. Select the preferred reception mode. 2. Press the preferred preset button (from to ) briefly. ! Auto-store (type B audio) Using the Auto-store function, you can automatically store 6 stations on the current waveband (FM-AS or AM-AS) by pressing and holding the button. Use Auto-store to quickly find the strongest stations, for example when traveling through different reception areas. NOTE . When the HD Radio function is turned on, PSD provides additional information about the broadcast. Text data such as "Title" and "Artist" is displayed on the screen. . When the HD Radio function is turned off (HD Radio off mode), the radio text is displayed on the screen while receiving the broadcasting station with RBDS (Radio Broadcast Data System). vice). . When you use Auto-store, the new stations replace any stations previously stored. . Interrupting Auto-store: If you accidentally press the button, you can cancel the Auto-store function before it has been completed as follows. - switching to the other source mode - pressing the button - switching to the other band - turning the "TUNE/TRACK/CH" dial - pressing the "SCAN" button ! Displaying and selecting preset stations (type B audio) 1. Press and hold the button during AM/FM reception to display the radio screen. 2. Operate the "TUNE/TRACK/CH" dial to select the stations. & Station preset ! How to preset stations 1. Select the preferred reception mode. 2. Select the preferred station. 3. Press and hold one of the preset buttons (from to ) to store the frequency. If the button is pressed briefly, the preceding selection will remain in the NOTE . When the HD Radio function is turned on, Auto-store cannot be used while receiving a broadcasting station with SPS (Supplemental Program Ser-
-
 1
1 -
2
-
3
-
4
-
5
-
6
-
7
-
8
-
9
-
10
-
11
-
12
-
13
-
14
-
15
-
16
-
17
-
18
-
19
-
20
-
21
-
22
-
23
-
24
-
25
-
26
-
27
-
28
-
29
-
30
-
31
-
32
-
33
-
34
-
35
-
36
-
37
-
38
-
39
-
40
-
41
-
42
-
43
-
44
-
45
-
46
-
47
-
48
-
49
-
50
-
51
-
52
-
53
-
54
-
55
-
56
-
57
-
58
-
59
-
60
-
61
-
62
-
63
-
64
-
65
-
66
-
67
-
68
-
69
-
70
-
71
-
72
-
73
-
74
-
75
-
76
-
77
-
78
-
79
-
80
-
81
-
82
-
83
-
84
-
85
-
86
-
87
-
88
-
89
-
90
-
91
-
92
-
93
-
94
-
95
-
96
-
97
-
98
-
99
-
100
-
101
-
102
-
103
-
104
-
105
-
106
-
107
-
108
-
109
-
110
-
111
-
112
-
113
-
114
-
115
-
116
-
117
-
118
-
119
-
120
-
121
-
122
-
123
-
124
-
125
-
126
-
127
-
128
-
129
-
130
-
131
-
132
-
133
-
134
-
135
-
136
-
137
-
138
-
139
-
140
-
141
-
142
-
143
-
144
-
145
-
146
-
147
-
148
-
149
-
150
-
151
-
152
-
153
-
154
-
155
-
156
-
157
-
158
-
159
-
160
-
161
-
162
-
163
-
164
-
165
-
166
-
167
-
168
-
169
-
170
-
171
-
172
-
173
-
174
-
175
-
176
-
177
-
178
-
179
-
180
-
181
-
182
-
183
-
184
-
185
-
186
-
187
-
188
-
189
-
190
-
191
-
192
-
193
-
194
-
195
-
196
-
197
-
198
-
199
-
200
-
201
-
202
-
203
-
204
-
205
-
206
-
207
-
208
-
209
-
210
-
211
-
212
-
213
-
214
-
215
-
216
-
217
-
218
-
219
-
220
-
221
-
222
-
223
-
 224
224 -
 225
225 -
 226
226 -
 227
227 -
 228
228 -
 229
229 -
 230
230 -
 231
231 -
 232
232 -
 233
233 -
 234
234 -
235
-
236
-
237
-
238
-
239
-
240
-
241
-
242
-
243
-
244
-
245
-
246
-
247
-
248
-
249
-
250
-
251
-
252
-
253
-
254
-
255
-
256
-
257
-
258
-
259
-
260
-
261
-
262
-
263
-
264
-
265
-
266
-
267
-
268
-
269
-
270
-
271
-
272
-
273
-
274
-
275
-
276
-
277
-
278
-
279
-
280
-
281
-
282
-
283
-
284
-
285
-
286
-
287
-
288
-
289
-
290
-
291
-
292
-
293
-
294
-
295
-
296
-
297
-
298
-
299
-
300
-
301
-
302
-
303
-
304
-
305
-
306
-
307
-
308
-
309
-
310
-
311
-
312
-
313
-
314
-
315
-
316
-
317
-
318
-
319
-
320
-
321
-
322
-
323
-
324
-
325
-
326
-
327
-
328
-
329
-
330
-
331
-
332
-
333
-
334
-
335
-
336
-
337
-
338
-
339
-
340
-
341
-
342
-
343
-
344
-
345
-
346
-
347
-
348
-
349
-
350
-
351
-
352
-
353
-
354
-
355
-
356
-
357
-
358
-
359
-
360
-
361
-
362
-
363
-
364
-
365
-
366
-
367
-
368
-
369
-
370
-
371
-
372
-
373
-
374
-
375
-
376
-
377
-
378
-
379
-
380
-
381
-
382
-
383
-
384
-
385
-
386
-
387
-
388
-
389
-
390
-
391
-
392
-
393
-
394
-
395
-
396
-
397
-
398
-
399
-
400
-
401
-
402
-
403
-
404
-
405
-
406
-
407
-
408
-
409
-
410
-
411
-
412
-
413
-
414
-
415
-
416
-
417
-
418
-
419
-
420
-
421
-
422
-
423
-
424
-
425
-
426
-
427
-
428
-
429
-
430
-
431
-
432
-
433
-
434
-
435
-
436
-
437
-
438
-
439
-
440
-
441
-
442
-
443
-
444
-
445
-
446
-
447
-
448
-
449
-
450
-
451
-
452
-
453
-
454
-
455
-
456
-
457
-
458
-
459
-
460
-
461
-
462
-
463
 |
 |
