3Com WX2200 Hardware Installation Guide - Page 32
WARNING, Repeat for the other bracket.
 |
UPC - 662705511191
View all 3Com WX2200 manuals
Add to My Manuals
Save this manual to your list of manuals |
Page 32 highlights
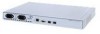
32 CHAPTER 2: INSTALLING AND CONNECTING A WX SWITCH Figure 8 WX4400 Installation-Center-Mount Equipment Rack First, attach brackets to chassis. Then, install chassis into rack. 1 Remove the four bracket screws from each side of the WX switch. 2 Align a bracket over the screw holes: „ For a front-mount equipment rack, align the bracket so that the bracket flange is flush with the WX switch's front panel and extends away from the switch. „ For a center-mount equipment rack, align the bracket so that the bracket flange is located near the center screw holes. 3 Reinsert the screws to secure the brackets to the WX switch. 4 Repeat for the other bracket. WARNING: 3Com recommends that you ask someone to assist you with the remaining steps. If you accidentally drop the WX switch, you can be injured and the switch can be damaged.
-
 1
1 -
2
-
3
-
4
-
5
-
6
-
7
-
8
-
9
-
10
-
11
-
12
-
13
-
14
-
15
-
16
-
17
-
18
-
19
-
20
-
21
-
22
-
23
-
24
-
25
-
26
-
 27
27 -
 28
28 -
 29
29 -
 30
30 -
 31
31 -
 32
32 -
 33
33 -
 34
34 -
 35
35 -
 36
36 -
 37
37 -
38
-
39
-
40
-
41
-
42
-
43
-
44
-
45
-
46
-
47
-
48
-
49
-
50
-
51
-
52
-
53
-
54
-
55
-
56
-
57
-
58
-
59
-
60
-
61
-
62
-
63
-
64
-
65
-
66
 |
 |
