3Com WX2200 Hardware Installation Guide - Page 40
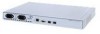
The 10/100 Ethernet ports on WXR100, WX1200, and WX2200 switches, Wireless LAN Switch - configuration guide
 |
UPC - 662705511191
View all 3Com WX2200 manuals
Add to My Manuals
Save this manual to your list of manuals |
Page 40 highlights
40 CHAPTER 2: INSTALLING AND CONNECTING A WX SWITCH For installations in Japan: Provide an earthing connection before you connect the mains plug to the mains. When disconnecting the earthing connection, make sure to disconnect only after you pull out the mains plug for the mains. Figure 12 shows how to install a Cat 5 cable for a 10/100 Ethernet port. Refer to this figure as you perform the procedure. Figure 12 10/100 Cat 5 Cable Installation Ethernet port Ethernet cable (Cat 5 cable) MAP, switch, server or other device To connect to a MAP or other 10/100 Ethernet device: 1 Insert a Cat 5 cable with a standard RJ-45 connector: „ For direct connection to a MAP access point, use a straight-through cable. „ For connection to a router or to an end station such as a PC, printer, or server, use a straight-through cable. „ For connection to another switch, use a crossover cable. (For cable requirements, see "Network Cables" on page 26.) The 10/100 Ethernet ports on WXR100, WX1200, and WX2200 switches provide automatic MDI/MDX. 2 If the cable is directly attached to a MAP access point: „ For a first-time installation, set the port type to activate the link. (For information, see "Setting the Port Type" in the Wireless LAN Switch and Controller Configuration Guide. „ If the port type is already set for a MAP access point, observe the appearance of the MAP LED for the port:
-
 1
1 -
2
-
3
-
4
-
5
-
6
-
7
-
8
-
9
-
10
-
11
-
12
-
13
-
14
-
15
-
16
-
17
-
18
-
19
-
20
-
21
-
22
-
23
-
24
-
25
-
26
-
27
-
28
-
29
-
30
-
31
-
32
-
33
-
34
-
 35
35 -
 36
36 -
 37
37 -
 38
38 -
 39
39 -
 40
40 -
 41
41 -
 42
42 -
 43
43 -
 44
44 -
 45
45 -
46
-
47
-
48
-
49
-
50
-
51
-
52
-
53
-
54
-
55
-
56
-
57
-
58
-
59
-
60
-
61
-
62
-
63
-
64
-
65
-
66
 |
 |
