3Com WX2200 Hardware Installation Guide - Page 45
Remove the network cables., To remove a mini-GBIC
 |
UPC - 662705511191
View all 3Com WX2200 manuals
Add to My Manuals
Save this manual to your list of manuals |
Page 45 highlights
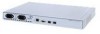
Connecting to the Network 45 To install a mini-GBIC: 1 Insert the mini-GBIC into a mini-GBIC slot on the front panel until it clicks into place. 2 Remove the protective covering(s) from the port connector(s). 3 Insert the network cable. For 1000BASE-SX or 1000BASE-LX fiber, make sure you insert the two cable ends in the proper sides (transmit or receive). Otherwise, the link does not work. 4 Observe the LED next to the mini-GBIC port: „ If the LED is green, the 1000-Mbps link is operational. „ If the LED is blinking amber, traffic is active on the 1000-Mbps link. „ If the LED is unlit, the link is not operational. Check the cable and verify that the device at the other end of the link is operational. To remove a mini-GBIC: 1 Remove the network cable(s). 2 Insert the protective covering(s) into the port connector(s). 3 Pull the bail latch on the mini-GBIC forward, away from the WX switch, to unlock it from the front panel. 4 Grasping the bail latch, pull the mini-GBIC out of the slot.
-
 1
1 -
2
-
3
-
4
-
5
-
6
-
7
-
8
-
9
-
10
-
11
-
12
-
13
-
14
-
15
-
16
-
17
-
18
-
19
-
20
-
21
-
22
-
23
-
24
-
25
-
26
-
27
-
28
-
29
-
30
-
31
-
32
-
33
-
34
-
35
-
36
-
37
-
38
-
39
-
 40
40 -
 41
41 -
 42
42 -
 43
43 -
 44
44 -
 45
45 -
 46
46 -
 47
47 -
 48
48 -
 49
49 -
 50
50 -
51
-
52
-
53
-
54
-
55
-
56
-
57
-
58
-
59
-
60
-
61
-
62
-
63
-
64
-
65
-
66
 |
 |
