ASRock ALiveDual-eSATA2 RAID Installation Guide - Page 13
Start, Settings, Control Panel, Administrative Tools, Computer Management, Disk Management
 |
View all ASRock ALiveDual-eSATA2 manuals
Add to My Manuals
Save this manual to your list of manuals |
Page 13 highlights
To create a striped array with more disks, select additional disks from the list. 8. Click Next and the following screen shot will appear. 9. Click Finish and the following screen shot will appear. The RAID 0 is created successfully. C. Initializing NVRAID Array Disks Now that the two-disk array has been created, it needs to be partitioned and formatted. 1. Click on Start → Settings → Control Panel. 2. Double click on Administrative Tools. 3. Double click on Computer Management. 4. Click on Disk Management. The following screen is displayed. 13
-
 1
1 -
2
-
3
-
4
-
5
-
6
-
7
-
 8
8 -
 9
9 -
 10
10 -
 11
11 -
 12
12 -
 13
13 -
 14
14 -
 15
15 -
 16
16 -
 17
17 -
 18
18 -
19
-
20
-
21
-
22
-
23
-
24
-
25
-
26
-
27
-
28
-
29
-
30
-
31
-
32
-
33
-
34
-
35
-
36
 |
 |

13
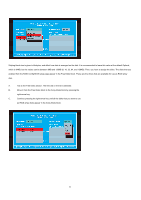
To create a striped array with more disks, select additional disks from the list.
8.
Click Next and the following screen shot will appear.
9.
Click Finish and the following screen shot will appear.
The RAID 0 is created successfully.
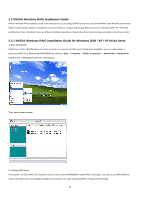
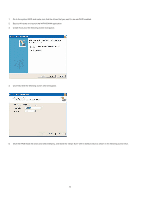
C. Initializing NVRAID Array Disks
Now that the two-disk array has been created, it needs to be partitioned and formatted.
1.
Click on
Start
→
Settings
→
Control Panel
.
2. Double click on
Administrative Tools
.
3. Double click on
Computer Management
.
4. Click on
Disk Management
. The following screen is displayed.