ASRock ALiveDual-eSATA2 RAID Installation Guide - Page 30
Creating RAID from Existing Disk, 2.1.3 Deleting RAID
 |
View all ASRock ALiveDual-eSATA2 manuals
Add to My Manuals
Save this manual to your list of manuals |
Page 30 highlights
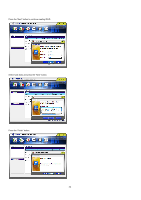
Press the "Finish" button to create a new raid array. Then the information of the created raid array will be displayed in the window. 3.2.1.2 Creating RAID from Existing Disk JMRaidTool supports the RAID creation from the existing disk. The data of the existing source disk will be kept and will not be erased when the new disk array is created. The existing source disk should be a non-RAID disk. Left-click the "Create RAID from Existing Disk" button. Then follow the instruction shown on the windows. The procedures are similar to the steps of creating RAID. 3.2.1.3 Deleting RAID This options provides a popup menu for users to delete the existing disk arrays. 30
-
 1
1 -
2
-
3
-
4
-
5
-
6
-
7
-
8
-
9
-
10
-
11
-
12
-
13
-
14
-
15
-
16
-
17
-
18
-
19
-
20
-
21
-
22
-
23
-
24
-
 25
25 -
 26
26 -
 27
27 -
 28
28 -
 29
29 -
 30
30 -
 31
31 -
 32
32 -
 33
33 -
 34
34 -
 35
35 -
36
 |
 |

30
Press the “Finish” button to create a new raid array. Then the information of the created raid array will be displayed in the window.
3.2.1.2 Creating RAID from Existing Disk
JMRaidTool supports the RAID creation from the existing disk. The data of the existing source disk will be kept and will not be erased when the
new disk array is created. The existing source disk should be a non-RAID disk.
Left-click the “Create RAID from Existing Disk” button. Then follow the instruction shown on the windows. The procedures are similar to the steps
of creating RAID.
3.2.1.3 Deleting RAID
This options provides a popup menu for users to delete the existing disk arrays.