ATI 2400 User Guide
ATI 2400 - Firemv Tm Rohs,pcie Manual
 |
UPC - 727419413282
View all ATI 2400 manuals
Add to My Manuals
Save this manual to your list of manuals |
ATI 2400 manual content summary:
- ATI 2400 | User Guide - Page 1
FireMV™ 2400 User's Guide P/N 137-50054-11 ATI - ATI 2400 | User Guide - Page 2
to change without notice. Product may not be exactly as shown in diagrams. Reproduction of this manual, or parts thereof, in any form, without the express written permission of ATI Technologies Inc. is strictly prohibited. Disclaimer While every precaution has been taken in the preparation of this - ATI 2400 | User Guide - Page 3
for use only with IBM AT or compatible UL Listed personal computers that have Installation Instructions detailing user installation of card cage accessories. • Grounding - For continued protection against risk of electric shock and fire, this accessory should be installed only in products equipped - ATI 2400 | User Guide - Page 4
iv - ATI 2400 | User Guide - Page 5
3 Uninstall Previous Graphics Card Drivers 3 Installing Hardware 5 ATI Color Tab 18 Hotkeys 21 ATI Options Tab 23 ATI Rotation Tab 24 ATI Overlay Tab 26 Theater Mode Options 28 ATI 3D Tab 29 Custom Properties Dialog 32 ATI VPU Recover Tab 34 Reference 37 Troubleshooting - ATI 2400 | User Guide - Page 6
vi Warranty Information 42 Hardware Warranty Service Statement 42 Warranty Service 42 Limitations 42 Additional Accessories 43 Compliance Gamma 52 GPU 52 HydraVision™ 53 HyperZ™ HD 53 Lighting 54 PCI Express™ (PCIe) 55 SmartShader™ HD 57 Vertex Shader 59 VGA Connector 59 - ATI 2400 | User Guide - Page 7
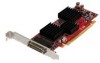
CHAPTER 1: Getting Started Your ATI FireMV™ 2400 multi-view 2D workstation graphics card is designed exclusively for the software • Direct user support • Lower power consumption • Space-efficient, low-profile design • Product longevity Features of your FireMV™ 2400 card include: • Quad display - ATI 2400 | User Guide - Page 8
• Motherboard with available X16 lane PCI Express™ slot and correct chipset driver or available PCI slot, as appropriate. • CD-ROM drive (required for installation software). • Windows® 2000 with Service Pack 1 (or higher). • Windows® XP Home or Pro with Service Pack 1 (or higher). • High-resolution - ATI 2400 | User Guide - Page 9
shown in bold above, down before installing your new ATI product. Uninstall Previous Graphics Card Drivers To ensure the successful installation of your new FireMV™ 2400 card, you must uninstall the drivers for the existing graphics card before removing it from your computer. To uninstall previous - ATI 2400 | User Guide - Page 10
4 Before You Begin - ATI 2400 | User Guide - Page 11
system administrators can follow these brief instructions for installing the FireMV™ 2400 card in the shortest possible time. Detailed hardware and software installation instructions are given in the next two sections. To perform a quick installation 1 Uninstall the drivers and software for your old - ATI 2400 | User Guide - Page 12
Installation The following instructions will take you step by step through the installation of your new FireMV™ 2400. FireMV™ 2400 Installation Diagram X PCIe Interface Connector Y PCIe Card Z PCIe Interface Connection [ Insertion Point for PCIe Card \ PCI Interface Connector ] PCI Card - ATI 2400 | User Guide - Page 13
Insertion Point for PCI Card Detailed Installation 7 1 the computer cover. If necessary, consult your computer's manual for help in removing the cover. L WARNING - ATI graphics card with the slot and press it in firmly until the card is fully seated. 7 Screw in or fasten the graphics card - ATI 2400 | User Guide - Page 14
8 Detailed Installation Connecting Your Monitors Your FireMV™ 2400 card is designed for use with a pair of VHDCI cables, which each provide support for two monitors using two DVI-I connectors. X Primary DVI-I Connector to VHDCI A. Y Secondary DVI-I Connector to VHDCI A. Z Primary DVI-I - ATI 2400 | User Guide - Page 15
installation. Once you have installed the FireMV™ 2400 drivers and software, you can use the Display Properties control panel to adjust the video settings and configure multiple monitors. Display Configurations The FireMV™ 2400 graphics card provides quad display functionality through two VHDCI-to - ATI 2400 | User Guide - Page 16
10 Detailed Installation - ATI 2400 | User Guide - Page 17
For more information consult the HydraVision™ user's guide included on the ATI Installation CD-ROM. Installing Drivers and Software in Windows® You will need to install the FireMV™ 2400 drivers and software in the following cases: • After you have installed the card in your system. • After you have - ATI 2400 | User Guide - Page 18
in English if your operating system's language is not supported. To install ATI drivers and software 1 Start your system. When the Found New to the license agreement. ATI Easy Install will start the Installation Wizard. 6 Follow the wizard's on-screen instructions to complete the installation. - ATI 2400 | User Guide - Page 19
Monitor Configuration Once the drivers and software have been the basic multi-monitor configuration settings. Note: ATI software provides many additional configuration features that can be use multiple monitors with your FireMV™ 2400 card, one monitor will always be Primary. Any additional monitors - ATI 2400 | User Guide - Page 20
CD-ROM. The ATISETUP utility will start automatically if you insert the ATI Installation CD-ROM into your optical drive after the operating system has started. To manually reinstall drivers If your CD-ROM auto-run is not enabled and the ATISETUP utility does not start automatically, follow - ATI 2400 | User Guide - Page 21
describes how to use the advanced display, multiple-monitor, and 3D graphics features in ATI's Display Properties options. Accessing the CATALYST™ Software Suite The CATALYST™ Software Suite installs the ATI display tabs into the Windows® Display Properties dialog. They are accessed through the - ATI 2400 | User Guide - Page 22
-monitor features. Here you can enable/disable display devices and swap the assignment of Primary and Secondary displays. The Displays Tab ATI Displays Tab Scheme Hotkey Displays the drop-down list of available display-device configurations that have previously been created. New configurations - ATI 2400 | User Guide - Page 23
to your graphics card. Clicking on any of these buttons opens further options to refine your display on that device. Only the type of devices supported by your graphic card will be displayed plug it in to your FireMV™ 2400 graphics card in order to view or extend your desktop display to that device. - ATI 2400 | User Guide - Page 24
Tab The ATI Color tab allows you to configure Gamma, Brightness, and Contrast color settings for both your desktop and full screen 3D environments. You can also save settings to a color profile for easy recall. In addition, you can assign unique hotkey combinations that allow you to adjust Gamma - ATI 2400 | User Guide - Page 25
19 The Color Tab ATI Color Tab Desktop radio button Full Screen 3D radio button Profiles for Profiles dropdown list Save button will only be apparent within a full-screen 3D application environment. Indicates whether the profiles in the drop-down list are for your Desktop or a full-screen 3D - ATI 2400 | User Guide - Page 26
20 ATI Color Tab ATI Color Tab Delete button All Colors checkbox Red, Green, and Blue radio buttons Gamma slider Brightness slider Contrast slide Reset buttons Color preview box Hotkeys button Defaults button Color Curve box Deletes the profile that is selected in the Profiles list box. Adjusts - ATI 2400 | User Guide - Page 27
Some 3D applications automatically load their own color settings rather than those set through the ATI Color tab. To use custom settings, you can preconfigure hotkey combinations to either adjust the individual color properties or apply profiles you have created, once the 3D application is running. - ATI 2400 | User Guide - Page 28
22 ATI Color Tab The Color Hotkeys Settings dialog To access the Color Hotkeys Settings dialog -down list box, and click OK. Once inside the 3D application, use the hotkeys to trigger the profile. Some 3D applications allow you to switch easily between full-screen mode and windowed mode and do not - ATI 2400 | User Guide - Page 29
Tab ATI Options Tab Version Information Details button WMV Acceleration Reactivate all warning messages Shows the driver build version. Gives access to the Details tab, which lists the card's hardware details and driver information. When enabled, improves the performance of .WMV format video - ATI 2400 | User Guide - Page 30
The quick resolution feature is accessible by left-clicking the ATI icon in the system tray. Checking this option disables if you are experiencing display corruption operational mode on your DVI flat panel display. ATI Rotation Tab Use the Rotation tab to rotate the image on any of your displays - ATI 2400 | User Guide - Page 31
Tab 25 The ATI Rotation Tab ATI Rotation Tab Rotation buttons Configure Hotkeys dropdown list Hotkey field Save button Defaults Rotates the display by the preset amount. Lists the rotation actions with - ATI 2400 | User Guide - Page 32
on your PC. This feature is available only through the Primary video display. The video overlay controls are automatically activated during playback of any video file type that supports overlay adjustments. Move the sliders to the right to increase the values of the various options, and to the left - ATI 2400 | User Guide - Page 33
Overlay Tab 27 The ATI Overlay Tab ATI Overlay Tab Brightness Contrast Saturation Hue Gamma Theater mode options Defaults button Adjusts the brightness of the video image. Adjusts the contrast in the video image. Adjusts the vividness of the color. Sliding it all the way to the left removes all - ATI 2400 | User Guide - Page 34
Options Theater Mode Options are available when your ATI graphics card has dual controllers to support Primary and Secondary (Clone) displays. You can access Theater Mode Options if more than one display is connected. Note: These settings apply to video content viewed when you are in dual-controller - ATI 2400 | User Guide - Page 35
video The aspect ratio of the source video video display. Full Screen Video The source video is scaled so that your display is showing full screen. Note: if the source video display device showing full screen video has the standard 4:3 video has a 16:9 aspect ratio (widescreen HDTVs). ATI 3D - ATI 2400 | User Guide - Page 36
30 ATI 3D Tab ATI 3D Tab ATI 3D Tab 3D Settings for radio buttons Performance/Quality slider Use Custom Settings checkbox Custom button Selects either Direct 3D® or OpenGL® as the format - ATI 2400 | User Guide - Page 37
ATI 3D Tab 31 ATI 3D Tab Current Settings Profiles for Compatibility Settings button Defaults Shows the current settings for either Direct 3D® or OpenGL®, whichever is selected. Allows you to save a unique profile of the custom settings you have selected. Once you have completed making your custom - ATI 2400 | User Guide - Page 38
32 ATI 3D Tab Custom Properties Dialog Custom Properties Dialog Custom Properties Dialog: OpenGL® or Direct 3D® SMOOTHVISION™ Anti-Aliasing slider SMOOTHVISION™ (Anti-Aliasing) improves image quality - ATI 2400 | User Guide - Page 39
ATI 3D Tab 33 Custom Properties Dialog: OpenGL® or Direct 3D® SMOOTHVISION™ Anisotropic always on, always off, or controlled by the application. TRUFORM™ is a technology developed by ATI that enables higher-order surface rendering through traditional triangle rendering APIs. It improves the - ATI 2400 | User Guide - Page 40
able to communicate with each other. VPU Recover enables the ATI display driver to detect when the graphics card is no longer able to respond to display driver commands. When this situation arises, the display driver will reset the graphics card. Depending on the current state of the system when VPU - ATI 2400 | User Guide - Page 41
Recover. When VPU Recover is activated a dialog will prompt you to submit an automatically generated error report to ATI. This error report will help ATI to determine the cause of the problem and help create more stable drivers. To disable this feature, deselect the Prepare an Error Report checkbox. - ATI 2400 | User Guide - Page 42
36 ATI VPU Recover Tab - ATI 2400 | User Guide - Page 43
troubleshooting information. General Troubleshooting Problem Computer Does Not Boot-Up Properly Possible Solution • Verify that the installation instructions were properly followed. • Check that the card for the interrupt assignments. • Contact ATI's Customer Care or your local technical support. - ATI 2400 | User Guide - Page 44
38 Troubleshooting General Troubleshooting Problem No Display Screen Defects Appear Possible Solution • Check that the card is seated properly in its expansion slot. • Ensure that the monitor cable is securely fastened to the card. • Make sure that the monitor and computer are plugged in and - ATI 2400 | User Guide - Page 45
Care If you require further assistance with your product, the following Customer Care options are available to you: Service Online Access ati.com/firemv-support Telephone 1-866-284-2093 US & Canada Telephone Europe +49-1803-347345 Telephone Argentina +0800-333-5277 Telephone Brazil - ATI 2400 | User Guide - Page 46
their needs and budget. • ATI Customer Care reserves the right to limit support options for products that are not registered or are at End of Life. Operating Temperature Limitations Ambient Conditions 1 Ambient Temperature The thermal management device of the Fire MV video card should be able to - ATI 2400 | User Guide - Page 47
an approaching air velocity to each heat sink in the card of 75 to 100 Linear feet per minute (LFM). The air velocity is measured in distance of 0.1 inch away from the heat sink front row of fins. 2 Temperature Gradient The video card and its thermal management device should be able to operate - ATI 2400 | User Guide - Page 48
Warranty Information Warranty Information Hardware Warranty Service Statement ATI Technologies Inc. warrants to the original purchase when required Warranty Service For warranty service instructions visit: ati.com/online/warranty or contact one of our Customer Service Representatives using one of - ATI 2400 | User Guide - Page 49
ATI Technologies. ATI reserves the right to refuse to service any product which has been altered, modified, or repaired by non-ATI service personnel. Additional Accessories Additional and replacement cables, installation CD-ROMs, manuals, and other accessories for ATI manufacturer's instructions, may - ATI 2400 | User Guide - Page 50
of the monitor to the graphics card is required to ensure compliance with NMB-003 du Canada. For further compliance information: ATI Research Inc. 4 Mount Royal Ave. Marlborough, MA The Low Voltage Directive IEC 60950-1:2001, IEC 60950:1999, 3rd Edition - Safety of Information Technology Equipment - ATI 2400 | User Guide - Page 51
Compliance Information 45 Waste Electrical and Electronic Equipment (WEEE) Directive Compliance This product was manufactured by ATI Technologies Inc. VCCI Class B ITE Compliance Information MIC Certification Information "Class B" Equipment (Household purpose info/telecommunications equipment) - ATI 2400 | User Guide - Page 52
46 Compliance Information As this equipment has undergone EMC registration for household purpose, this product can be used in any area including residential area. BSMI Certification Information - ATI 2400 | User Guide - Page 53
runs 3D images much more smoothly and quickly than was previously possible with PCI video cards; AGP runs at several times the bus speed of PCI and employs sideband addressing, so multiple data transfers between the graphics processor and the computer can take place concurrently. AGP is currently - ATI 2400 | User Guide - Page 54
and 16:9 for widescreen displays. Back Buffer A type of offscreen memory used to provide smooth video and 2D graphics acceleration. This technique uses two frame buffers, so the process is often and less distinct. This is also a problem for computer-generated images, especially for surface details. - ATI 2400 | User Guide - Page 55
not be confused with luminosity, which measures the actual light level emitted from the computer display. Buffer A name referring to portions of on-board video memory. One large buffer is always used to display images to the screen; this is the "display buffer." The rest of offscreen memory is - ATI 2400 | User Guide - Page 56
while the vertical axis represents the output value (the color value that the display driver will write to the screen). A value of 0 (in the lower left ® systems. It provides software developers with low-level access to functions on graphics cards, providing the type of performance necessary for - ATI 2400 | User Guide - Page 57
. There are three types of DVI connections: DVI-A (analog), DVI-D (digital), and DVI-I (integrated, capable of either analog or digital). It supports high-bandwidth video signals over 160 Hz, so it is most often used for high-resolution displays. Flat Shading A lighting technique that shades each - ATI 2400 | User Guide - Page 58
The portion of the memory buffer on the graphics card used to store the image being displayed. All rendering for "Graphics Processing Unit. The GPU powers the operations of a graphics card including support for 2D/3D and video. HDCP HDCP is an acronym for "High-Bandwidth Digital Copy Protection." - ATI 2400 | User Guide - Page 59
brightness or saturation values for that color. HydraVision™ HydraVision™ is ATI's multi-monitor management software, enabling users to manage the display of process, making it a major performance bottleneck. HyperZ™ HD technology reduces the memory bandwidth consumed by the Z-Buffer, thereby - ATI 2400 | User Guide - Page 60
It does this by optimizing the storage of buffer regions in the graphics card's memory buffer. Other applications are typically not adversely affected when this is enabled memory refers to all of the remaining video memory not taken up by the front buffer, which holds the contents of the - ATI 2400 | User Guide - Page 61
encompasses both integrated motherboard components (such as built-in graphical processors) and peripherals that fit into an expansion card slot, such as a separate graphics card. PCI replaced the older ISA and VESA bus standards, and was itself superseded by the AGP standard for the main graphics - ATI 2400 | User Guide - Page 62
can be depicted on screen as specified by the number of horizontal rows against the number of vertical columns. The default VGA resolution of many video cards is capable of displaying 640 rows of pixels by 480 columns. The typical resolution of current displays is set to higher values, such as - ATI 2400 | User Guide - Page 63
RGB color model, a fully saturated color exists when you have 100% brightness in one of the three channels (say, red) and these holes is called the dot pitch. SmartShader™ HD SmartShader™ HD contains advanced vertex and pixel-shading capabilities. A compression technology makes it possible to display - ATI 2400 | User Guide - Page 64
58 Specular Highlight The bright, usually small, intense light reflected from a 3D surface with a high refraction value. From the intensity and spread of this highlight users can differentiate between a "hard," smooth surface, such as metal or porcelain, or a "soft," textured surface, such as fabric - ATI 2400 | User Guide - Page 65
in three rows. The "VGA" is an acronym for "Video Graphics Array," which is also the name for the video resolution mode of 640x480 pixels, the lowest standard resolution supported by virtually all video cards. Z-buffer The portion of video memory that keeps track of which onscreen elements can be - ATI 2400 | User Guide - Page 66
60
-
 1
1 -
 2
2 -
 3
3 -
 4
4 -
 5
5 -
 6
6 -
 7
7 -
8
-
9
-
10
-
11
-
12
-
13
-
14
-
15
-
16
-
17
-
18
-
19
-
20
-
21
-
22
-
23
-
24
-
25
-
26
-
27
-
28
-
29
-
30
-
31
-
32
-
33
-
34
-
35
-
36
-
37
-
38
-
39
-
40
-
41
-
42
-
43
-
44
-
45
-
46
-
47
-
48
-
49
-
50
-
51
-
52
-
53
-
54
-
55
-
56
-
57
-
58
-
59
-
60
-
61
-
62
-
63
-
64
-
65
-
66
 |
 |

FireMV™ 2400
User’s Guide
P/N 137-50054-11