ATI 2400 User Guide - Page 13
the card is fully seated., your ATI graphics card with the slot and press - ati pci
 |
UPC - 727419413282
View all ATI 2400 manuals
Add to My Manuals
Save this manual to your list of manuals |
Page 13 highlights
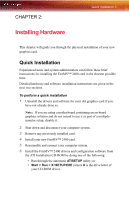
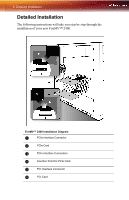
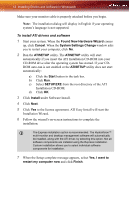
^ PCI Interface Connection _ Insertion Point for PCI Card Detailed Installation 7 1 Turn off the computer, monitor, and other peripheral devices. 2 Unplug the computer's power cord and disconnect all cables from the back of your computer. L WARNING - Wait approximately 20 seconds after unplugging the power cord before disconnecting a peripheral or removing a component from the motherboard to avoid possible damage to the motherboard. 3 Remove the computer cover. If necessary, consult your computer's manual for help in removing the cover. L WARNING - Remember to discharge your body's static electricity by touching the power supply or the metal surface of the computer chassis. 4 Unscrew or unfasten and remove any existing graphics card from your computer. Note: If your computer has an on-board graphics capability, you may need to disable it on the motherboard. For more information, see your computer documentation. 5 Locate the appropriate slot and, if necessary, remove the metal back- plate cover. 6 Align your ATI graphics card with the slot and press it in firmly until the card is fully seated. 7 Screw in or fasten the graphics card securely and replace the computer cover. 8 Reconnect any cables you have disconnected and plug in the computer's power cord. 9 Turn on the monitor and then your computer.
-
 1
1 -
2
-
3
-
4
-
5
-
6
-
7
-
 8
8 -
 9
9 -
 10
10 -
 11
11 -
 12
12 -
 13
13 -
 14
14 -
 15
15 -
 16
16 -
 17
17 -
 18
18 -
19
-
20
-
21
-
22
-
23
-
24
-
25
-
26
-
27
-
28
-
29
-
30
-
31
-
32
-
33
-
34
-
35
-
36
-
37
-
38
-
39
-
40
-
41
-
42
-
43
-
44
-
45
-
46
-
47
-
48
-
49
-
50
-
51
-
52
-
53
-
54
-
55
-
56
-
57
-
58
-
59
-
60
-
61
-
62
-
63
-
64
-
65
-
66
 |
 |
