Acer Z130 User Manual - Page 35
Taking a photo, Taking a panoramic photo, Shooting a video, Supported formats
 |
View all Acer Z130 manuals
Add to My Manuals
Save this manual to your list of manuals |
Page 35 highlights
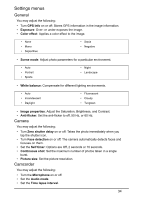
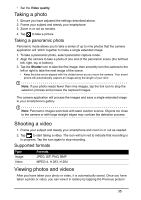
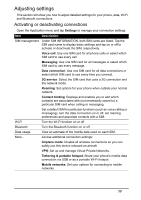
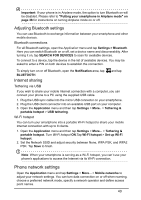
• Set the Video quality. Taking a photo 1. Ensure you have adjusted the settings described above. 2. Frame your subject and steady your smartphone. 3. Zoom in or out as needed. 4. Tap to take a picture. Taking a panoramic photo Panoramic mode allows you to take a series of up to nine photos that the camera application will 'stitch' together to make a single extended image. 1. To take a panoramic photo, select panoramic capture mode. 2. Align the camera to take a photo of one end of the panoramic scene (the furthest left, right, top or bottom). 3. Tap the Shutter icon to take the first image; then smoothly turn the camera to the left or right to take the next image of the scene. • Keep the blue arrow aligned with the dotted arrow as you move the camera. Your smartphone will automatically capture an image along the length of your shot. Note: If your photo needs fewer than nine images, tap the tick icon to stop the selection process and process the captured images. The camera application will process the images and save a single extended image to your smartphone's gallery. Note: Panoramic images work best with static outdoor scenes. Objects too close to the camera or with large straight edges may confuse the detection process. Shooting a video 1. Frame your subject and steady your smartphone and zoom in or out as needed. 2. Tap to start taking a video. The icon will turn red to indicate that recording is in progress. Tap the icon again to stop recording. Supported formats Type Image Video Formats JPEG, GIF, PNG, BMP MPEG-4, H.263, H.264 Viewing photos and videos After you have taken your photo or video, it is automatically saved. Once you have taken a photo or video, you can view it in Gallery by tapping the Previous picture/ 35
-
 1
1 -
2
-
3
-
4
-
5
-
6
-
7
-
8
-
9
-
10
-
11
-
12
-
13
-
14
-
15
-
16
-
17
-
18
-
19
-
20
-
21
-
22
-
23
-
24
-
25
-
26
-
27
-
28
-
29
-
 30
30 -
 31
31 -
 32
32 -
 33
33 -
 34
34 -
 35
35 -
 36
36 -
 37
37 -
 38
38 -
 39
39 -
 40
40 -
41
-
42
-
43
-
44
-
45
-
46
-
47
-
48
-
49
-
50
-
51
-
52
-
53
-
54
-
55
-
56
-
57
-
58
-
59
-
60
-
61
-
62
-
63
-
64
-
65
 |
 |