Adobe 65024500 User Guide - Page 10
Inserting Guides, Snap To Guides, Hiding Guides
 |
UPC - 883919166476
View all Adobe 65024500 manuals
Add to My Manuals
Save this manual to your list of manuals |
Page 10 highlights
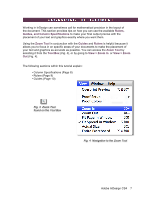
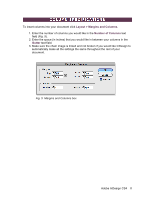
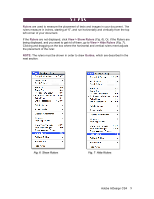
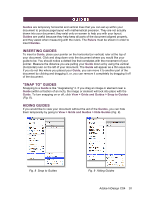
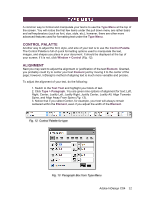
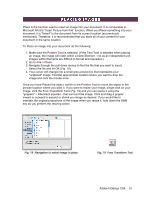
Guides are temporary horizontal and vertical lines that you can set up within your document to produce page layout with mathematical precision. They are not actually drawn into your document; they exist only on-screen to help you with your layout. Guides are useful because they help keep all parts of the document aligned properly, and they assist when measuring with the rulers. The Rulers must be shown in order to insert Guides. INSERTING GUIDES To insert a Guide, place your pointer on the horizontal (or vertical) ruler at the top of your document. Click and drag down onto the document where you would like your guide to be. You should notice a dotted line that correlates with the movement of your pointer. Measure the distance you are pulling your Guide down at by using the vertical (horizontal) ruler on the left of your document. The Guide will appear as a thin aqua line. If you do not like where you placed your Guide, you can move it to another part of the document by clicking and dragging it, or, you can remove it completely by dragging it off of the document. "SNAP TO" GUIDES Snapping to a Guide is like "magnetizing" it. If you drag an image or element near a Guide (within a fraction of an inch), the image or element will lock into place with the Guide. To turn snapping on or off, click View > Grids and Guides > Snap to Guides (Fig. 8). HIDING GUIDES If you would like to view your document without the aid of the Guides, you can hide them temporarily by going to View > Grids and Guides > Hide Guides (Fig. 9). Fig. 8 Snap to Guides Fig. 9 Hiding Guides Adobe InDesign CS4 10
-
 1
1 -
2
-
3
-
4
-
 5
5 -
 6
6 -
 7
7 -
 8
8 -
 9
9 -
 10
10 -
 11
11 -
 12
12 -
 13
13 -
 14
14 -
 15
15 -
16
-
17
-
18
-
19
-
20
-
21
 |
 |