Adobe 65024500 User Guide - Page 17
Object > Arrange > Bring to Front
 |
UPC - 883919166476
View all Adobe 65024500 manuals
Add to My Manuals
Save this manual to your list of manuals |
Page 17 highlights
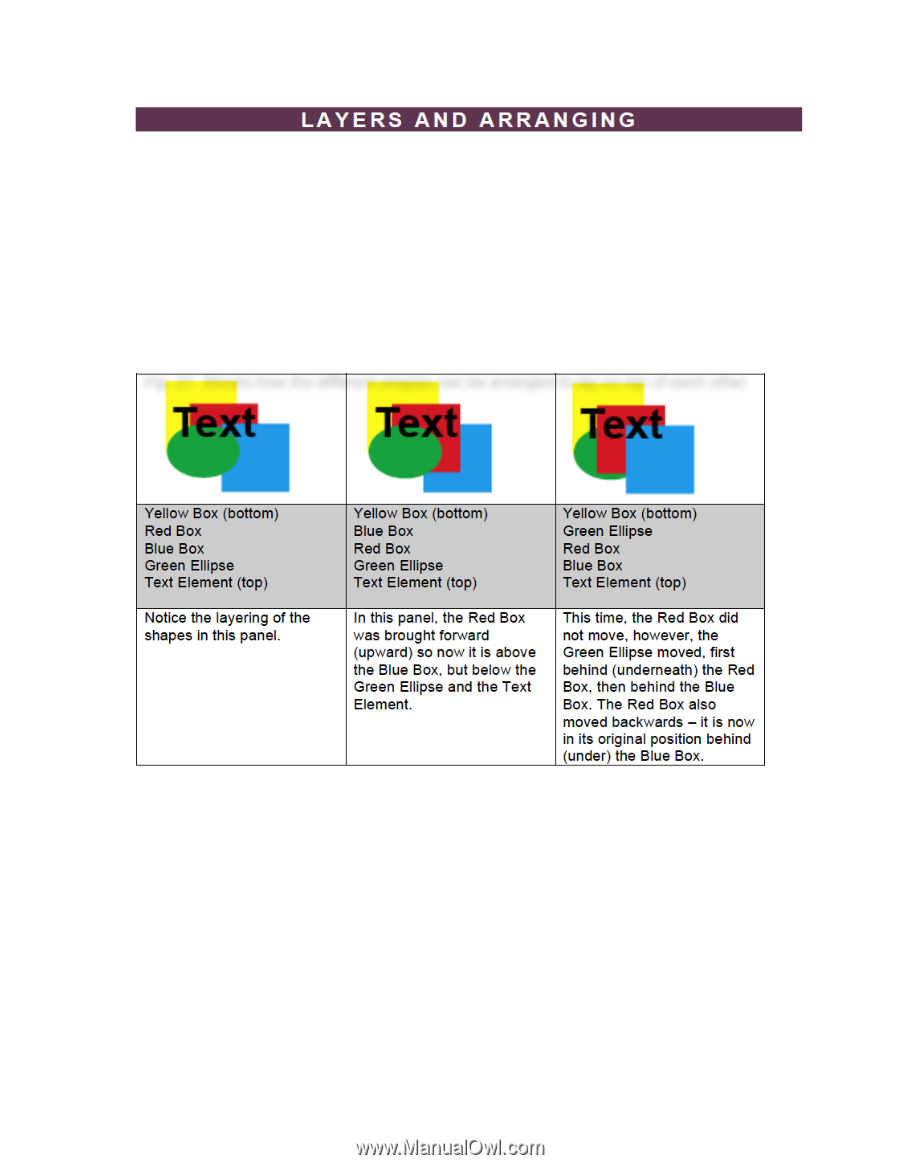
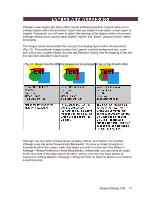
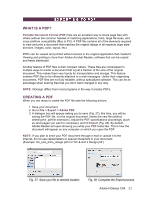
InDesign uses Layers like many other current software programs. Layers allow you to overlap objects within the document. Each time you create a new object, a new Layer is created. Frequently, you will want to adjust the layering of the objects within a document. InDesign allows you to quickly stack objects "above" and "below" using a function called Arranging. The images below demonstrate the concept of arranging layers within the document (Fig. 21). This particular image contains five Layers: a yellow background box, a red box, a blue box, a green ellipse, and the text Element. Notice how the layering of the red box has been adjusted in each panel. Fig. 21 Shows how the different shapes can be arranged to lay on top of each other Although you may think of these layers as being "above" and "below" one another, InDesign uses the terms Forward and Backward. To move an object forwards or backwards within the Layers, select the object you wish to move and click Object > Arrange > Bring Forward (or Send Backwards). Additionally, you can move an object to the very front of the page (above all other Layers), or to the very back (below all Layers) by clicking Object > Arrange > Bring to Front (or Send to Back to put it below everything else). Adobe InDesign CS4 17
-
 1
1 -
2
-
3
-
4
-
5
-
6
-
7
-
8
-
9
-
10
-
11
-
 12
12 -
 13
13 -
 14
14 -
 15
15 -
 16
16 -
 17
17 -
 18
18 -
 19
19 -
 20
20 -
 21
21
 |
 |