Adobe 65024500 User Guide - Page 11
Text Tool, Pointer Tool, Element
 |
UPC - 883919166476
View all Adobe 65024500 manuals
Add to My Manuals
Save this manual to your list of manuals |
Page 11 highlights
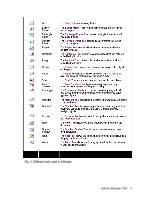
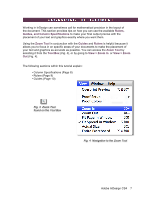
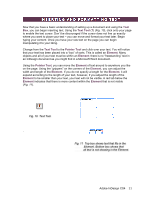
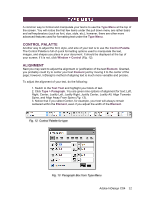
Now that you have a basic understanding of setting up a document and using the Tool Box, you can begin inserting text. Using the Text Tool (T) (Fig. 10), click onto your page to enable the text cursor. Don't be discouraged if the cursor does not line up exactly where you want to place your text - you can move and format your text later. Begin typing your content. Once you have your raw text on the page you can begin manipulating it to your liking. Change from the Text Tool to the Pointer Tool and click over your text. You will notice that your text has been placed into a "box" of sorts. This is called an Element. Many objects and all of your text must be within an Element; there is no "freestanding" text in an InDesign document as you might find in a Microsoft Word document. Using the Pointer Tool, you can move the Element of text around to anywhere you like on the page. Using the "grippers" on the corners of the Element, you can adjust the width and length of the Element. If you do not specify a length for the Element, it will expand according to the length of your text, however, if you adjust the length of the Element to be smaller than your text, your text will not be visible. A red tab below the Element indicates that there is more content within the Element that is not visible (Fig. 11). Fig. 10 Text Tool ` Fig. 11 Top box shows text that fits in the ..........Element. Bottom box shows that ..........all text is not showing in the Element. Adobe InDesign CS4 11
-
 1
1 -
2
-
3
-
4
-
5
-
 6
6 -
 7
7 -
 8
8 -
 9
9 -
 10
10 -
 11
11 -
 12
12 -
 13
13 -
 14
14 -
 15
15 -
 16
16 -
17
-
18
-
19
-
20
-
21
 |
 |