Apple M9628LL Service Guide - Page 145
Install the replacement bezel brace with clutch assembly, and reassemble and test
 |
UPC - 718908812761
View all Apple M9628LL manuals
Add to My Manuals
Save this manual to your list of manuals |
Page 145 highlights
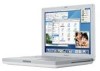
5. Lift the 3-sided bezel brace with clutch assembly off of the bezel. 6. Install the replacement bezel brace with clutch assembly, and reassemble and test the computer. Bezel Brace with Clutch Assembly iBook G4 (14.1 LCD) Take Apart - 144
-
 1
1 -
2
-
3
-
4
-
5
-
6
-
7
-
8
-
9
-
10
-
11
-
12
-
13
-
14
-
15
-
16
-
17
-
18
-
19
-
20
-
21
-
22
-
23
-
24
-
25
-
26
-
27
-
28
-
29
-
30
-
31
-
32
-
33
-
34
-
35
-
36
-
37
-
38
-
39
-
40
-
41
-
42
-
43
-
44
-
45
-
46
-
47
-
48
-
49
-
50
-
51
-
52
-
53
-
54
-
55
-
56
-
57
-
58
-
59
-
60
-
61
-
62
-
63
-
64
-
65
-
66
-
67
-
68
-
69
-
70
-
71
-
72
-
73
-
74
-
75
-
76
-
77
-
78
-
79
-
80
-
81
-
82
-
83
-
84
-
85
-
86
-
87
-
88
-
89
-
90
-
91
-
92
-
93
-
94
-
95
-
96
-
97
-
98
-
99
-
100
-
101
-
102
-
103
-
104
-
105
-
106
-
107
-
108
-
109
-
110
-
111
-
112
-
113
-
114
-
115
-
116
-
117
-
118
-
119
-
120
-
121
-
122
-
123
-
124
-
125
-
126
-
127
-
128
-
129
-
130
-
131
-
132
-
133
-
134
-
135
-
136
-
137
-
138
-
139
-
 140
140 -
 141
141 -
 142
142 -
 143
143 -
 144
144 -
 145
145 -
 146
146 -
 147
147 -
 148
148 -
 149
149 -
 150
150 -
151
-
152
-
153
-
154
-
155
-
156
-
157
-
158
-
159
-
160
 |
 |

iBook G4 (14.1 LCD) Take Apart -
144
Bezel Brace with Clutch Assembly
5.
Lift the 3-sided bezel brace with clutch assembly off of the bezel.
6.
Install the replacement bezel brace with clutch assembly, and reassemble and test the
computer.