Apple iPod Nano User Guide - Page 10
Basics, Using Multi-Touch
 |
UPC - 047223412616
View all Apple iPod Nano manuals
Add to My Manuals
Save this manual to your list of manuals |
Page 10 highlights
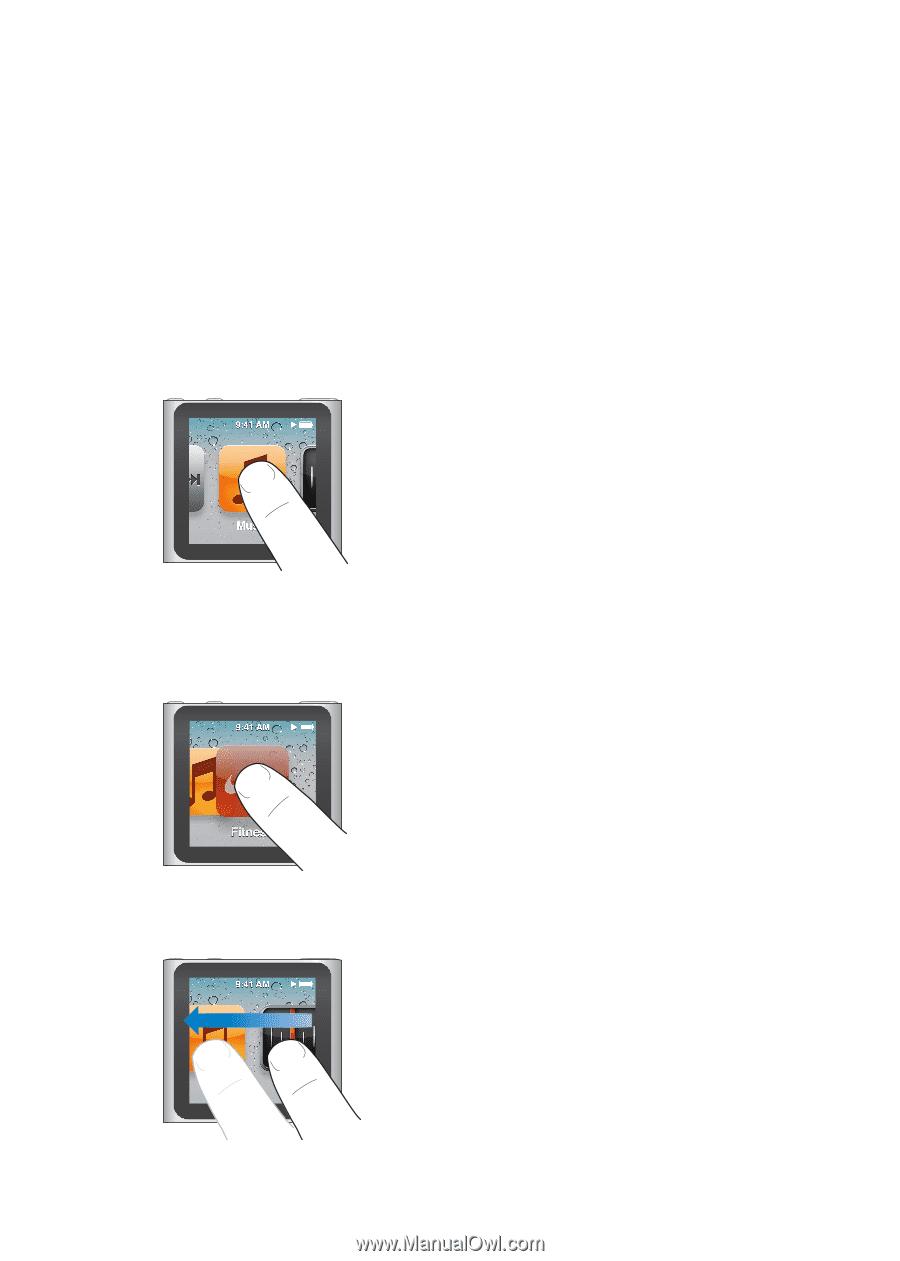
Basics 3 Using Multi-Touch The Multi-Touch screen and simple finger gestures make it easy to use iPod nano. Tap and double-tap Tap an icon to open it, or to select an item in a menu or list. Tap a photo twice quickly to zoom in, then double-tap again to quickly zoom out. Touch and hold Touch and hold anywhere on the screen (except on an icon or control) to return to the Home screen. Touch and hold an icon to rearrange icons on Home screens-when the icons begin to jiggle, drag them into a new order, then press the Sleep/Wake button to save. Swipe Swipe sideways to move to the next or previous screen. 10
-
 1
1 -
2
-
3
-
4
-
 5
5 -
 6
6 -
 7
7 -
 8
8 -
 9
9 -
 10
10 -
 11
11 -
 12
12 -
 13
13 -
 14
14 -
 15
15 -
16
-
17
-
18
-
19
-
20
-
21
-
22
-
23
-
24
-
25
-
26
-
27
-
28
-
29
-
30
-
31
-
32
-
33
-
34
-
35
-
36
-
37
-
38
-
39
-
40
-
41
-
42
-
43
-
44
-
45
-
46
-
47
-
48
-
49
-
50
-
51
-
52
-
53
-
54
-
55
-
56
-
57
-
58
-
59
-
60
-
61
-
62
-
63
-
64
-
65
-
66
 |
 |
Basics
3
Using Multi-Touch
The Multi-Touch screen and simple finger gestures make it easy to use iPod nano.
Tap and double-tap
Tap an icon to open it, or to select an item in a menu or list. Tap a photo twice quickly to zoom in,
then double-tap again to quickly zoom out.
Touch and hold
Touch and hold anywhere on the screen (except on an icon or control) to return to the Home
screen. Touch and hold an icon to rearrange icons on Home screens—when the icons begin to
jiggle, drag them into a new order, then press the Sleep/Wake button to save.
Swipe
Swipe sideways to move to the next or previous screen.
10