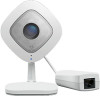
Arlo Q Plus User Manual - Page 11
Remove Device, Add Device, Continue, Arlo servers. - led lights
 |
View all Arlo Q Plus manuals
Add to My Manuals
Save this manual to your list of manuals |
Page 11 highlights
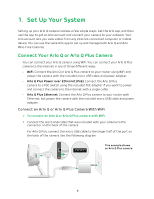
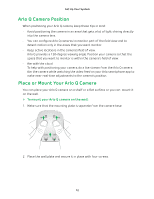
Set Up Your System The settings for the camera display. 6. Scroll down and click the Remove Device button. The camera is removed from your account. 7. Log out of the Arlo app. 8. Log in to your current Arlo account. 9. Tap or click Add Device. 10. Tap or click the image of the Arlo Q camera. 11. Plug in your camera and wait until the light is blinking amber. A slow blinking amber LED indicates that the camera is powered on and is ready for setup. 12. Tap or click Continue. 13. Enter the name and password for the WiFi network that you want your camera to connect to. 14. Tap or click Continue. 15. Press the Sync button on your camera until the blue light starts blinking. A slow blinking blue LED indicates that the camera is connecting to a WiFi network. A fast blinking blue LED indicates that the camera is connecting to Arlo servers. 16. Tap or click Continue. Your monitor or mobile device displays a QR code. 17. Hold your camera in front of your monitor or hold your smartphone or mobile device in front of your camera until you hear a chime sound. 18. If you hear a chime sound, tap or click Yes. 19. If you do not hear a chime sound, tap or click No and follow the onscreen instructions. 11
-
 1
1 -
2
-
3
-
4
-
5
-
 6
6 -
 7
7 -
 8
8 -
 9
9 -
 10
10 -
 11
11 -
 12
12 -
 13
13 -
 14
14 -
 15
15 -
 16
16 -
17
-
18
-
19
-
20
-
21
-
22
-
23
-
24
-
25
-
26
-
27
-
28
-
29
-
30
-
31
-
32
-
33
-
34
-
35
-
36
-
37
-
38
-
39
-
40
-
41
-
42
-
43
-
44
-
45
-
46
-
47
-
48
-
49
-
50
-
51
-
52
-
53
-
54
-
55
-
56
-
57
-
58
-
59
-
60
-
61
-
62
-
63
-
64
-
65
-
66
-
67
-
68
-
69
-
70
-
71
 |
 |
