Asus ET2301IUTH User's Manual for English Edition - Page 25
Using the On Screen Display (OSD) Menu, Using the OSD Menu
 |
View all Asus ET2301IUTH manuals
Add to My Manuals
Save this manual to your list of manuals |
Page 25 highlights
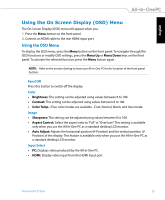
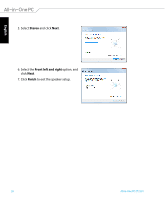
English Using the On Screen Display (OSD) Menu The On Screen Display (OSD) menu will appear when you: 1. Press the Menu button on the front panel. 2. Connect an HDMI cable to the rear HDMI input port. Using the OSD Menu To display the OSD menu, press the Menu button on the front panel. To navigate through the OSD functions or modify OSD settings, press the Menu Up or Menu Down keys on the front panel. To activate the selected function, press the Menu button again. NOTE: Refer to the section Getting to know your All-in-One PC for the location of the front panel buttons. Panel Off Press this button to switch off the display. Color • Brightness: This setting can be adjusted using values between 0 to 100. • Contrast: This setting can be adjusted using values between 0 to 100. • Color Temp. : Four color modes are available - Cool, Normal, Warm, and User mode. Image • Sharpness: This setting can be adjusted using values between 0 to 100. • Aspect Control: Select the aspect ratio to "Full" or "OverScan". This setting is available only when you use the All-in-One PC as a standard desktop LCD monitor. • Auto Adjust: Adjusts the horizontal position (H-Position) and the vertical position (V- Position) of the display. This feature is available only when you use the All-in-One PC as a standard desktop LCD monitor. Input Select • PC: Displays video produced by the All-in-One PC. • HDMI: Display video input from the HDMI Input port. All-in-One PC ET2301 25
-
 1
1 -
2
-
3
-
4
-
5
-
6
-
7
-
8
-
9
-
10
-
11
-
12
-
13
-
14
-
15
-
16
-
17
-
18
-
19
-
 20
20 -
 21
21 -
 22
22 -
 23
23 -
 24
24 -
 25
25 -
 26
26 -
 27
27 -
 28
28 -
 29
29 -
 30
30 -
31
-
32
-
33
-
34
-
35
-
36
-
37
-
38
-
39
-
40
-
41
-
42
-
43
-
44
-
45
-
46
-
47
-
48
-
49
-
50
-
51
-
52
-
53
-
54
-
55
-
56
-
57
-
58
-
59
-
60
-
61
-
62
-
63
-
64
-
65
-
66
 |
 |
