Asus P4P800-E DELUXE P4P800-E Deluxe User's manual for English Version E1867 - Page 140
Reset RAID Data
 |
View all Asus P4P800-E DELUXE manuals
Add to My Manuals
Save this manual to your list of manuals |
Page 140 highlights
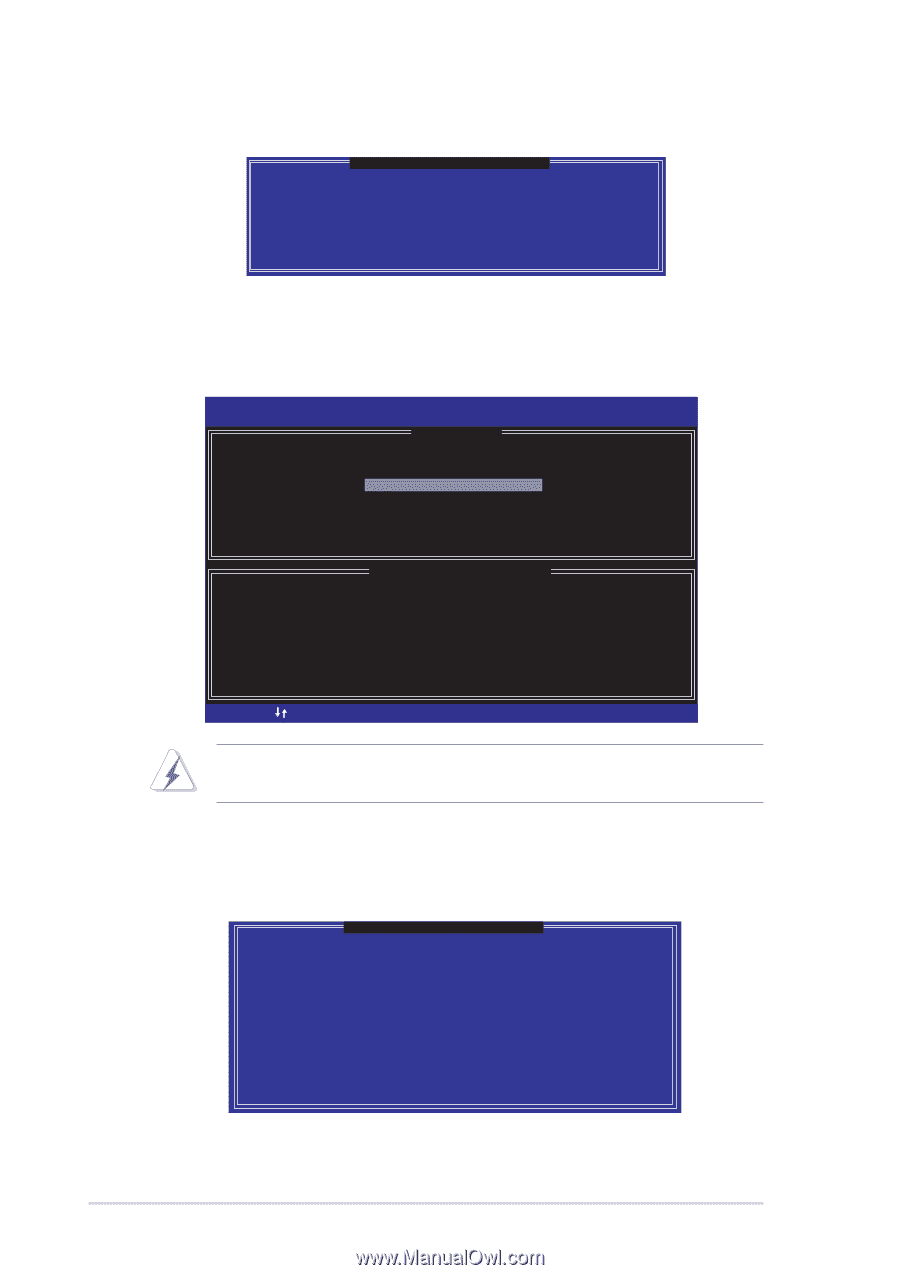
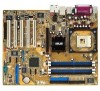
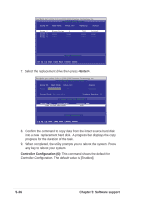
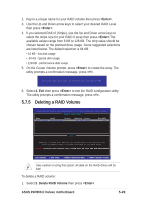
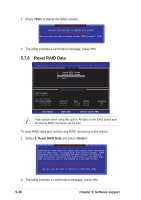
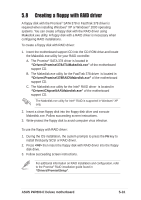
2. Press to delete the RAID volume. [ VOLUME DELETE VERIFICATION ] Are you sure you want to delete this volume? ALL DATA IN THE VOLUME WILL BE LOST!! Are you sure you want to delete volume "RAID_Volume1"? (Y/N) 3. The utility prompts a verification message, press . 5.7.6 Reset RAID Data Copyright(C) 2003 Intel Corporation. All Rights Reserved. v3.x.x.xxxx [ MAIN MENU ] 1. Create RAID Volume 2. Delete RAID Volume 3. Reset Disks to Non-RaID 4. Exit RAID Volumes: None defined. Non-RAID Disks: Port Drive Model 0 ST380013AS 1 ST380013AS [ DISK/VOLUME INFORMATION ] Serial # xxxxxxxx xxxxxxxx Size 74.5GB 74.5GB Status Normal Normal Bootable Yes Yes [ ]-Select [ESC] Exit [Enter]-Select Menu Take caution when using this option. All data on the RAID drives and all internal RAID structures will be lost! To reset RAID data and remove any RAID structures in the drives: 1. Select 3. Reset RAID Data and press . [ RESET ALL DATA RAID DATA ] Resetting all RAID data will remove any internal RAID structures from all RAID disks, including disks with working volumes. These structures are used to maintain the RAID volumes. By removing these structures, the drive will revert back to a Non-RAID disk that can then be used or reallocated to a new RAID volume. WARNING: Selecting "Yes" will cause all data on any RAID disk (RAID Volume or Other RAID Disk) to be lost. Are you sure you want to destroy all RAID data (Y/N): 2. The utility prompts a confirmation message, press . 5-30 Chapter 5: Software support
-
 1
1 -
2
-
3
-
4
-
5
-
6
-
7
-
8
-
9
-
10
-
11
-
12
-
13
-
14
-
15
-
16
-
17
-
18
-
19
-
20
-
21
-
22
-
23
-
24
-
25
-
26
-
27
-
28
-
29
-
30
-
31
-
32
-
33
-
34
-
35
-
36
-
37
-
38
-
39
-
40
-
41
-
42
-
43
-
44
-
45
-
46
-
47
-
48
-
49
-
50
-
51
-
52
-
53
-
54
-
55
-
56
-
57
-
58
-
59
-
60
-
61
-
62
-
63
-
64
-
65
-
66
-
67
-
68
-
69
-
70
-
71
-
72
-
73
-
74
-
75
-
76
-
77
-
78
-
79
-
80
-
81
-
82
-
83
-
84
-
85
-
86
-
87
-
88
-
89
-
90
-
91
-
92
-
93
-
94
-
95
-
96
-
97
-
98
-
99
-
100
-
101
-
102
-
103
-
104
-
105
-
106
-
107
-
108
-
109
-
110
-
111
-
112
-
113
-
114
-
115
-
116
-
117
-
118
-
119
-
120
-
121
-
122
-
123
-
124
-
125
-
126
-
127
-
128
-
129
-
130
-
131
-
132
-
133
-
134
-
 135
135 -
 136
136 -
 137
137 -
 138
138 -
 139
139 -
 140
140 -
 141
141 -
 142
142 -
 143
143
 |
 |