Asus Terminator C3 Terminator C3V User Manual - Page 73
Primary and Secondary Master/Slave
 |
View all Asus Terminator C3 manuals
Add to My Manuals
Save this manual to your list of manuals |
Page 73 highlights
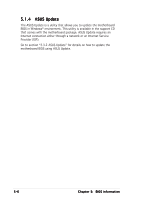
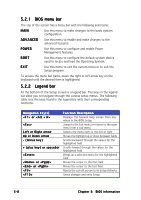
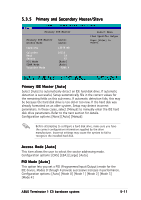
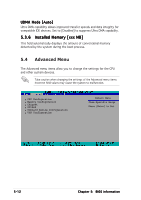
5.3.5 Primary and Secondary Master/Slave Primary IDE Master Primary IDE Master Access Mode Capacity Cylinder Head Sector PIO Mode UDMA Mode Transfer Mode [Auto] [Auto] 13579 MB 26310 16 63 [Auto] [Auto] UDMA 4 Select Menu Item Specific Help Press [Enter] to select. Primary IDE Master [Auto] Select [Auto] to automatically detect an IDE hard disk drive. If automatic detection is successful, Setup automatically fills in the correct values for the remaining fields on this sub-menu. If automatic detection fails, this may be because the hard disk drive is too old or too new. If the hard disk was already formatted on an older system, Setup may detect incorrect parameters. In these cases, select [Manual] to manually enter the IDE hard disk drive parameters. Refer to the next section for details. Configuration options: [None] [Auto] [Manual] Before attempting to configure a hard disk drive, make sure you have the correct configuration information supplied by the drive manufacturer. Incorrect settings may cause the system to fail to recognize the installed hard disk. Access Mode [Auto] This item allows the user to select the sector addressing mode. Configuration options: [CHS] [LBA] [Large] [Auto] PIO Mode [Auto] This option lets you set a PIO (Programmed Input/Output) mode for the IDE device. Modes 0 through 4 provide successive increase in performance. Configuration options: [Auto] [Mode 0] [Mode 1] [Mode 2] [Mode 3] [Mode 4] ASUS Terminator 1 C3 barebone system 5-11
-
 1
1 -
2
-
3
-
4
-
5
-
6
-
7
-
8
-
9
-
10
-
11
-
12
-
13
-
14
-
15
-
16
-
17
-
18
-
19
-
20
-
21
-
22
-
23
-
24
-
25
-
26
-
27
-
28
-
29
-
30
-
31
-
32
-
33
-
34
-
35
-
36
-
37
-
38
-
39
-
40
-
41
-
42
-
43
-
44
-
45
-
46
-
47
-
48
-
49
-
50
-
51
-
52
-
53
-
54
-
55
-
56
-
57
-
58
-
59
-
60
-
61
-
62
-
63
-
64
-
65
-
66
-
67
-
 68
68 -
 69
69 -
 70
70 -
 71
71 -
 72
72 -
 73
73 -
 74
74 -
 75
75 -
 76
76 -
 77
77 -
 78
78 -
79
-
80
-
81
-
82
-
83
-
84
-
85
-
86
-
87
-
88
-
89
-
90
-
91
-
92
-
93
-
94
 |
 |
