Bernina Bernette 56 Instruction Manual - Page 36
Draad Inrugen - bobbins
 |
View all Bernina Bernette 56 manuals
Add to My Manuals
Save this manual to your list of manuals |
Page 36 highlights
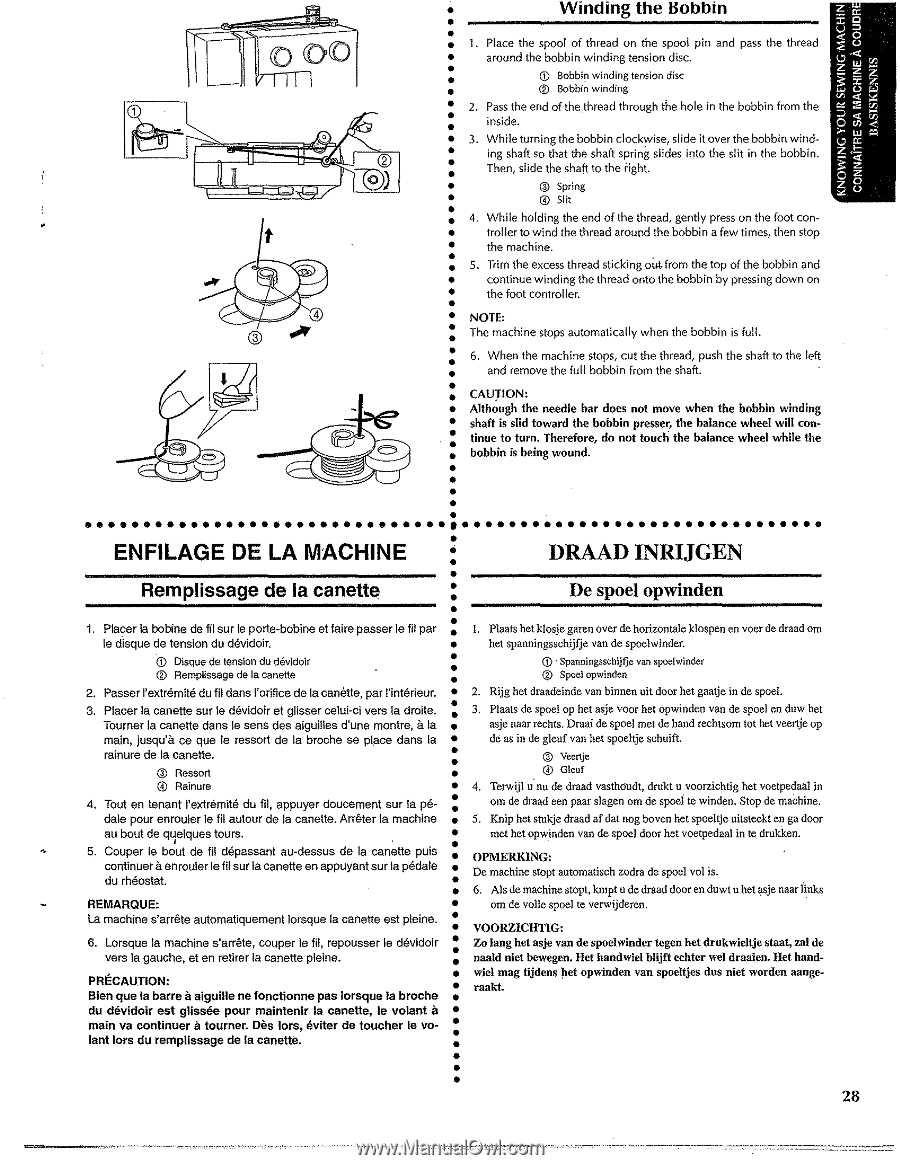
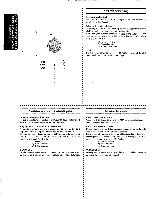
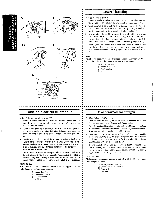
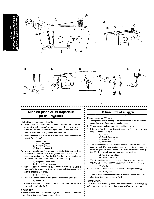
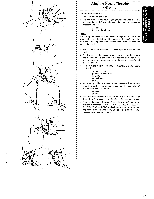
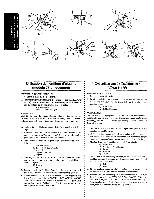
Winding the Bobbin 1. Place the spool of thread on the spool pin and pass the thread around the bobbin winding tension disc. G) Bobbin winding tension disc ® Bobbi~ winding 2. Pass the end of the .thread through the hole in the bobbin from the inside. 3. While turning the bobbin clockwise, slide it over the bobbin wind- • ing shaft so that the shaft spring slides into the slit in the bobbin . • Then, slide the shaft to the fight. •• ® Spring • @Slit • 4. While holding the end of the thread, gently press on the foot con• troller to wind the thread around the bobbin a few times, then stop t •• the machine. • 5. Trim the excess thread sticking oUt from the top of the bobbin and • continue winding the thread onto the bobbin by pressing down on •• the foot controller. •• NOTE: • The machine stops automatically when the bobbin is fulL •• 6. When the machine stops, cut the thread, push the shaft to the left • and remove the full bobbin from the shaft. •• CAUTION: • Although the needle bar does not move when the bobbin winding •• shaft is slid toward the bobbin presser, the balance wheel will con- • tinue to turn. Therefore, do not touch the balance wheel while the • bobbin is being wound. •••E•N•R•F•eIL•mA•p•Gli•sE•sa•Dg•Ee••dL•eA•I•aM•c•Aa•nC•eH•tt•eIN••E D••RD•Ae•As•p•Do•elI•oN•p•Rw•Ui•n•Gde•En•N 1. Placer Ia bobine de til sur le porte~bobine et faire passer le fi! par • !e disque de tension du d8vidoir. •• Q) Disque de tension du devidoir • ® Remp!lssage de Ia canette • 2. Passer l'extr€mite du fil dans !'orifice de Ia can9tte, par !'int8rieur. •• 3. Placer Ia canette sur le d8vidoir et glisser celuiMci vers Ia droite. a • Tourner Ia canette dans le sens des aiguilles d'une montre, Ia • main, jusqu'a ce que le ressort de Ia broche se place dans Ia •• rainure de Ia canette. • @ Ressort • @ Rainure •• 4. Tout en tenant l'extremit6 du fil, appuyer doucement sur Ia pe~ • dale pour enrouler le fil auteur de Ia canette. Arr6ter Ia machine • au bout de qyetques tours. •• 5. Couper le bout de fil d6passant au-dessus de Ia canette puis a continuer enrouler le fil sur Ia canette en appuyant sur Ia p6dale l. Plaats bet klosje garen over de horizontale klospen en voer de draad om het spanningsschijfje van de spoelwinder. Q) · Spanningsschijfje van spoelwinder ® Spoel opwinden 2. Rijg het draadeinde van binnen uit door het gaatje in de spoel. 3. Plaats de spoel op het asje voor het opwinden van de spoel en duw het asje naar rechts. Draai de spoel met de hand rechtsom tot bet veertje op de as in de gleuf van het spoeltje schuift. ® Veertje @ G!euf 4. Terwijl u· nude draad vasthOudt, drukt u voorzichtig het voetpedaal in om de draad een paar slagen om de spoei te winden. Stop de machine. 5. Knip het stukje draad af dat nag boven het spoeltje uitsteekt en ga door met het opwinden van de spoel door het voetpedaal in te drukken. OPMERKING: De machine stopt automatisch zodra de spoel val is. du rheostat. 6. Als de machine stopt, kmpt u de draad door en duwt u het ~sje naar links REMARQUE: om de valle spoel te verwijderen. La machine s'arr€te automatiquement lorsque Ia canette est p!eine. VOORZICHTIG: 6. Lorsque Ia machine s'arr&te, couper le fil, repousser le dSvidoir Zo lang bet asje van de spoelwinder tegen bet drukwieltje staat, zal de vers !a gauche, et en retirer Ia canette pleine. naald niet bewegen. Het bandwiel blijft echter wei draaien. Het hand- wiel mag tijdens ~et opwinden van spoeltjes dus niet worden aange- PRECAUTION: a Bien que Ia barre aiguille ne fonctionne pas lorsque Ia broche raakt. a du devidoir est glissee pour maintenir Ia canette, le volant a main va continuer tourner. oes lors, eviter de toucher le vo- lant lors du remplissage de Ia canette. 28
-
 1
1 -
2
-
3
-
4
-
5
-
6
-
7
-
8
-
9
-
10
-
11
-
12
-
13
-
14
-
15
-
16
-
17
-
18
-
19
-
20
-
21
-
22
-
23
-
24
-
25
-
26
-
27
-
28
-
29
-
30
-
 31
31 -
 32
32 -
 33
33 -
 34
34 -
 35
35 -
 36
36 -
 37
37 -
 38
38 -
 39
39 -
 40
40 -
 41
41 -
42
-
43
-
44
-
45
-
46
-
47
-
48
-
49
-
50
-
51
-
52
-
53
-
54
-
55
-
56
-
57
-
58
-
59
-
60
-
61
-
62
-
63
-
64
-
65
-
66
-
67
-
68
-
69
-
70
-
71
-
72
-
73
-
74
-
75
-
76
-
77
-
78
-
79
-
80
-
81
-
82
-
83
-
84
-
85
-
86
 |
 |