Brother International DB2-B737 Network Users Manual - English - Page 26
Troubleshooting
 |
View all Brother International DB2-B737 manuals
Add to My Manuals
Save this manual to your list of manuals |
Page 26 highlights
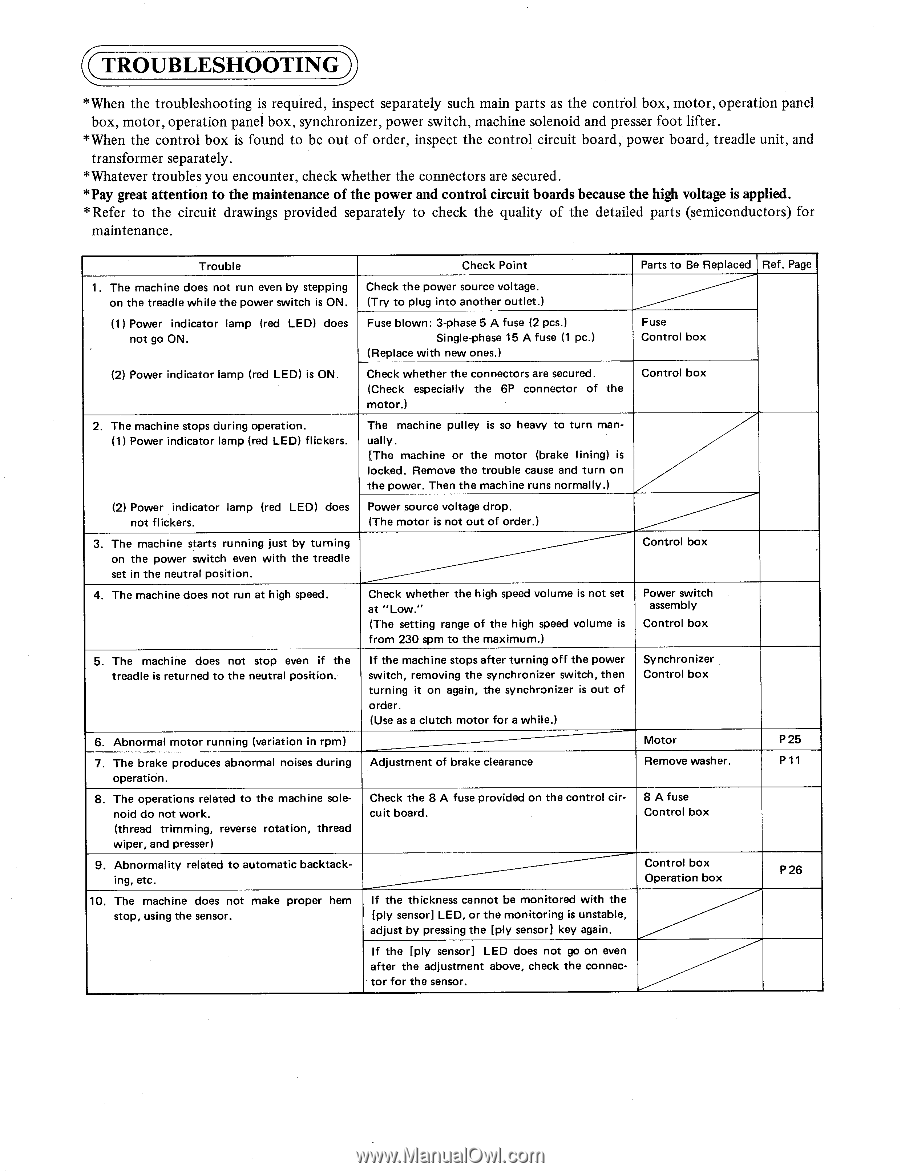
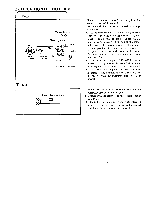
TROUBLESHOOTING) * When the troubleshooting is required, inspect separately such main parts as the condo] box, motor, operation panel box, motor, operation panel box, synchronizer, power switch, machine solenoid and presser foot lifter. *When the control box is found to be out of order, inspect the control circuit board, power board, treadle unit, and transformer separately. *Whatever troubles you encounter, check whether the connectors are secured. *Pay great attention to the maintenance of the power and control circuit boards because the high voltage is applied. * Refer to the circuit drawings provided separately to check the quality of the detailed parts (semiconductors) for maintenance. Trouble Check Point Parts to Be Replaced Ref. Page 1. The machine does not run even by stepping on the treadle while the power switch is ON. (1) Power indicator lamp (red LED) does not go ON. Check the power source voltage. (Try to plug into another outlet.) Fuse blown: 3-phase 5 A fuse (2 pcs.) Single-phase 15 A fuse (1 pc.) (Replace with new ones.) Fuse Control box (2) Power indicator lamp (red LED) is ON. Check whether the connectors are secured. (Check especially the 6P connector of the motor.) Control box 2. The machine stops during operation. (1) Power indicator lamp (red LED) flickers. The machine pulley is so heavy to turn manually. [The machine or the motor (brake lining) is locked. Remove the trouble cause and turn on the power. Then the machine runs normally.) (2) Power indicator lamp (red LED) does not flickers. 3. The machine starts running just by turning on the power switch even with the treadle set in the neutral position. 4. The machine does not run at high speed. Power source voltage drop. (The motor is not out of order.) Check whether the high speed volume is not set at "tow." (The setting range of the high speed volume is from 230 spm to the maximum.► Control box Power switch assembly Control box 5. The machine does not stop even if the treadle is returned to the neutral position. 6. Abnormal motor running (variation in rpm) 7. The brake produces abnormal noises during operation. 8. The operations related to the machine sole- noid do not work. (thread trimming, reverse rotation, thread wiper, and presser) 9. Abnormality related to automatic backtacking, etc. 10. The machine does not make proper hem stop, using the sensor. If the machine stops after turning off the power switch, removing the synchronizer switch, then turning it on again, the synchronizer is out of order. (Use as a clutch motor for a while.) Adjustment of brake clearance Check the 8 A fuse provided on the control circuit board. If the thickness cannot be monitored with the [ply sensor] LED, or the monitoring is unstable, adjust by pressing the [ply sensor] key again. Synchronizer Control box Motor Remove washer. 8 A fuse Control box Control box Operation box P25 P 11 P26 If the [ply sensor] LED does not go on even after the adjustment above, check the connector for the sensor.
-
 1
1 -
2
-
3
-
4
-
5
-
6
-
7
-
8
-
9
-
10
-
11
-
12
-
13
-
14
-
15
-
16
-
17
-
18
-
19
-
20
-
 21
21 -
 22
22 -
 23
23 -
 24
24 -
 25
25 -
 26
26 -
 27
27 -
 28
28 -
 29
29 -
 30
30 -
 31
31 -
32
 |
 |