Brother International DCP 330C Quick Setup Guide - English - Page 21
Start/All Programs Programs/Brother, DCP-XXXX, For Windows, XP SP2 users, Start, Control Panel
 |
View all Brother International DCP 330C manuals
Add to My Manuals
Save this manual to your list of manuals |
Page 21 highlights
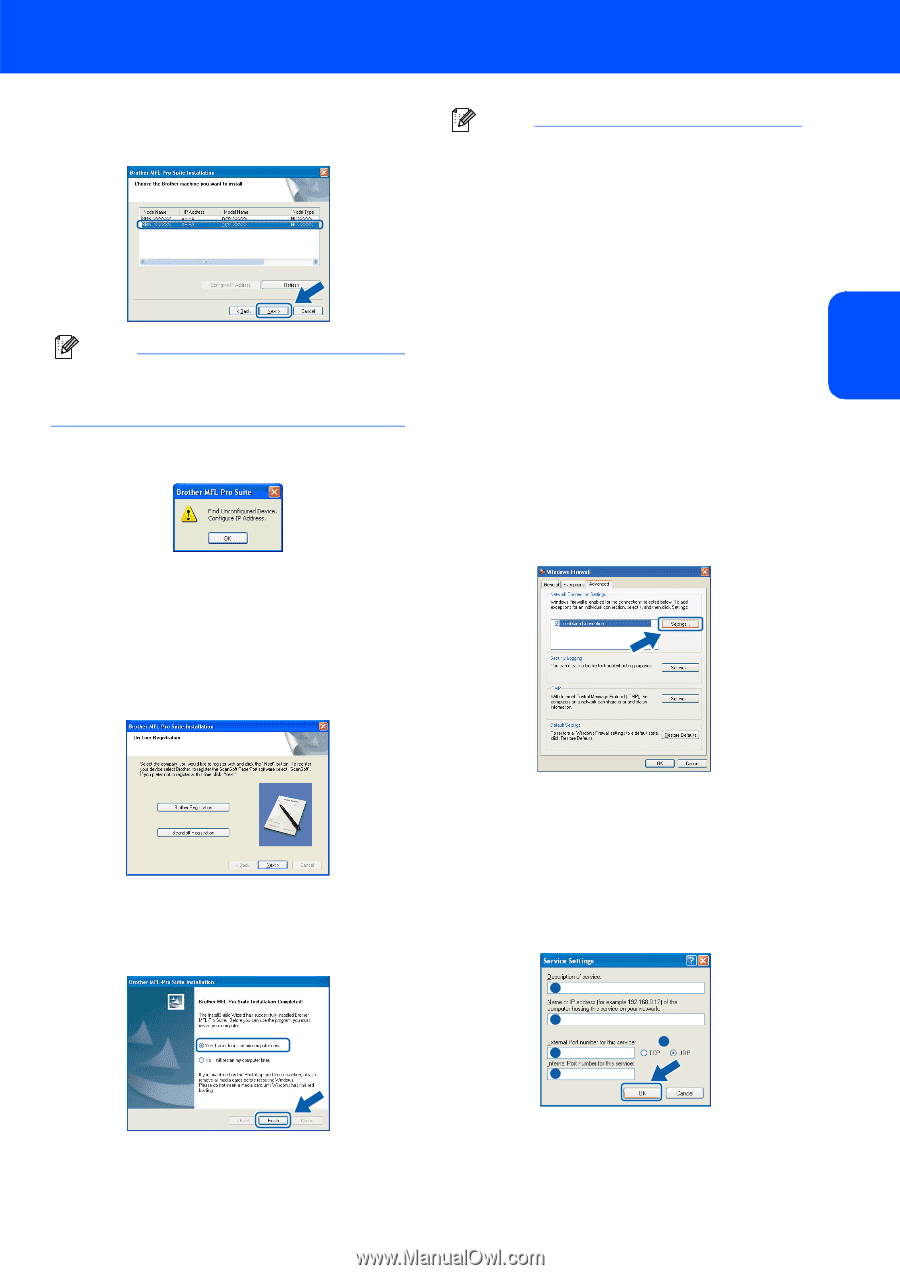
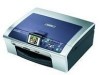
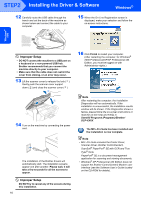
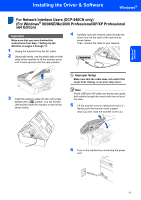
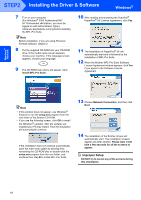
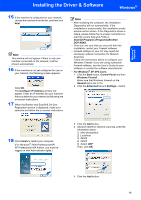
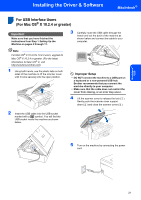
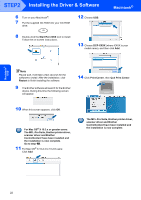
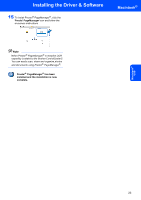
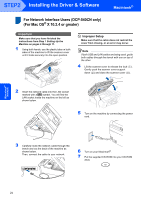
Installing the Driver & Software Windows® Windows® Network 15 If the machine is configured for your network, choose the machine from the list, and then click Next. Note This window will not appear if there is only one machine connected on the network, it will be chosen automatically. 16 If the machine is not yet configured for use on your network, the following screen appears. Click OK. The Configure IP Address window will appear. Enter an IP address for your machine that is suitable for your network by following the on-screen instructions. 17 When the Brother and ScanSoft On-Line Registration screen is displayed, make your selection and follow the on-screen instructions. Note • After restarting the computer, the Installation Diagnostics will run automatically. If the installation is unsuccessful, the installation results window will be shown. If the Diagnostics shows a failure, please follow the on-screen instructions or read the on-line help and FAQs in Start/All Programs (Programs)/Brother/ DCP-XXXX. • Once you are sure that you can print after the installation, restart your Firewall software. • Firewall settings on your PC may reject the necessary network connection for Network Scanning. Follow the instructions below to configure your Windows Firewall. If you are using a personal Firewall software, see the User's Guide for your software or contact the software manufacturer. • For Windows® XP SP2 users: 1 Click the Start button, Control Panel and then Windows Firewall. Make sure that Windows Firewall on the General tab is set to On. 2 Click the Advanced tab and Settings... button. 18 Click Finish to restart your computer. (For Windows® 2000 Professional/XP/ XP Professional x64 Edition, you must be logged on with Administrator rights.) 3 Click the Add button. 4 Add port 54925 for network scanning, enter the information below: 1) (Any description) 2) Localhost 3) 54925 4) 54925 5) Select UDP Then, click OK. 1 2 5 3 4 5 Click the Add button. 19
-
 1
1 -
2
-
3
-
4
-
5
-
6
-
7
-
8
-
9
-
10
-
11
-
12
-
13
-
14
-
15
-
 16
16 -
 17
17 -
 18
18 -
 19
19 -
 20
20 -
 21
21 -
 22
22 -
 23
23 -
 24
24 -
 25
25 -
 26
26 -
27
-
28
-
29
-
30
-
31
-
32
-
33
 |
 |