Brother International DCP 330C Quick Setup Guide - English - Page 9
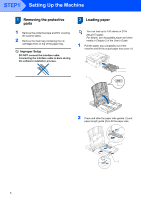
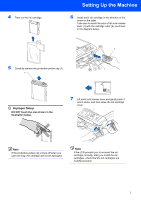
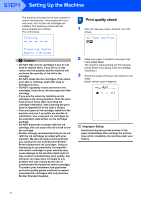
Improper Setup, DO NOT touch the area shown in the, illustration below.
 |
View all Brother International DCP 330C manuals
Add to My Manuals
Save this manual to your list of manuals |
Page 9 highlights
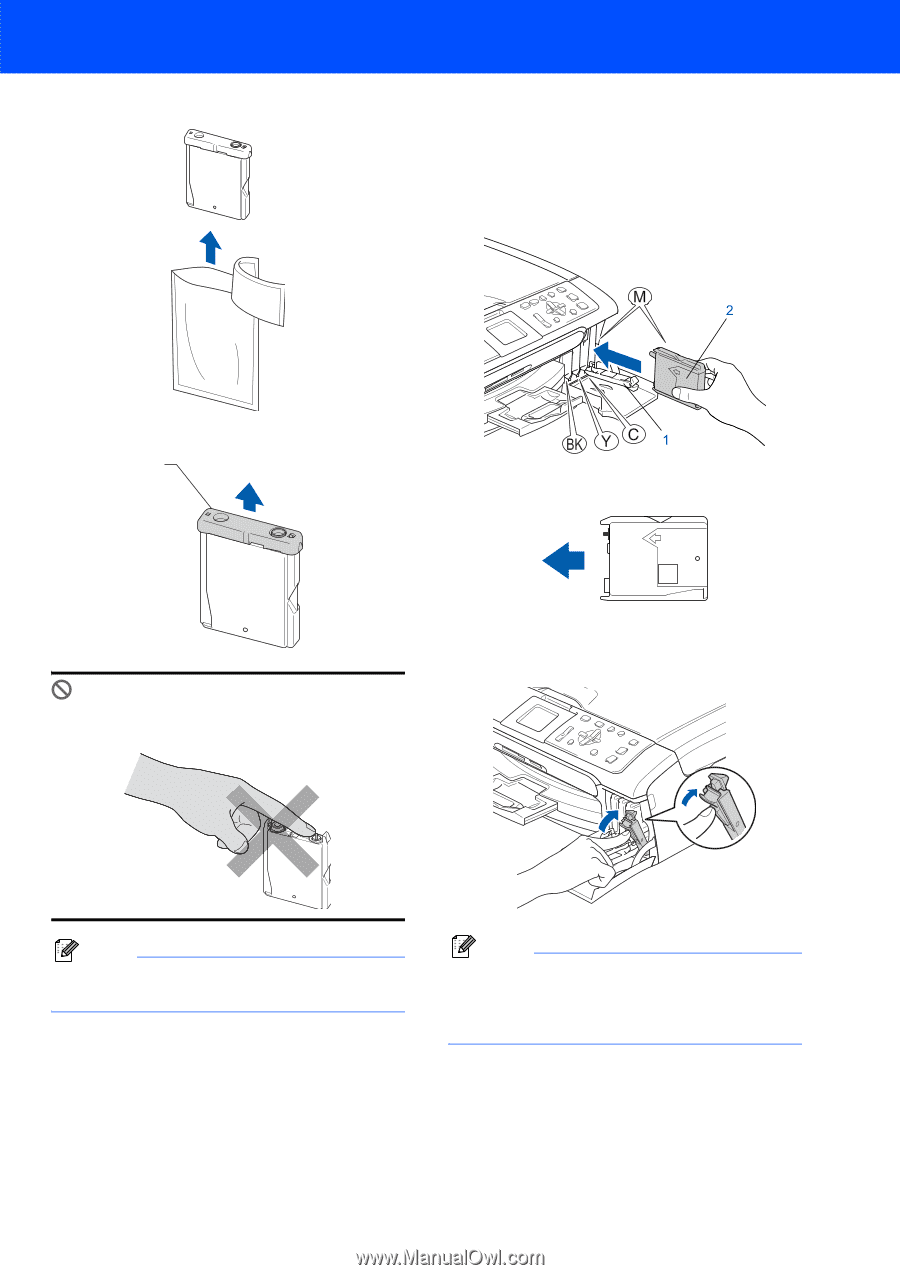
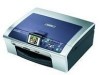
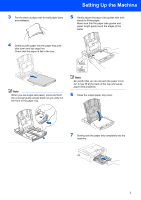
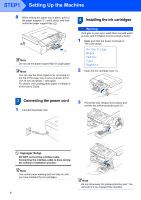
4 Take out the ink cartridge. Setting Up the Machine 6 Install each ink cartridge in the direction of the arrow on the label. Take care to match the color of the lock release lever (1) with the cartridge color (2), as shown in the diagram below. 5 Carefully remove the protective yellow cap (1). 1 Improper Setup DO NOT touch the area shown in the illustration below. M brother XXXX 7 Lift each lock release lever and gently push it until it clicks, and then close the ink cartridge cover. Note If the protective yellow cap comes off when you open the bag, the cartridge will not be damaged. Note If the LCD prompts you to re-insert the ink cartridge correctly, after you install the ink cartridges, check that the ink cartridges are installed properly. 7
-
 1
1 -
2
-
3
-
 4
4 -
 5
5 -
 6
6 -
 7
7 -
 8
8 -
 9
9 -
 10
10 -
 11
11 -
 12
12 -
 13
13 -
 14
14 -
15
-
16
-
17
-
18
-
19
-
20
-
21
-
22
-
23
-
24
-
25
-
26
-
27
-
28
-
29
-
30
-
31
-
32
-
33
 |
 |