Brother International GT-381 Instruction Manual - English - Page 126
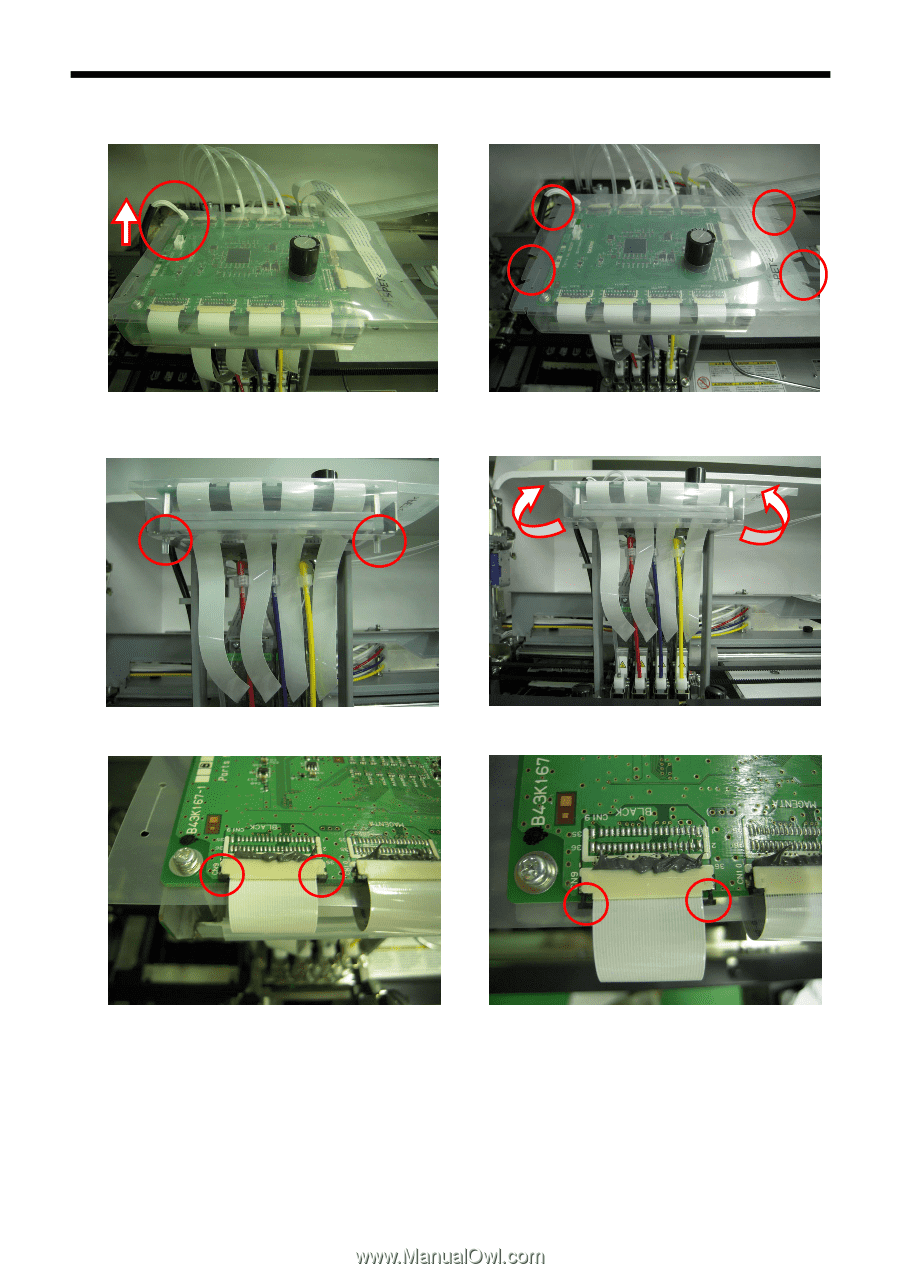
Pull out the black tabs at the both edges of Flat Cable of the Print Head to the front side of the printer, and remove the Flat
 |
View all Brother International GT-381 manuals
Add to My Manuals
Save this manual to your list of manuals |
Page 126 highlights
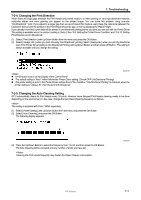
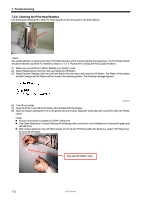
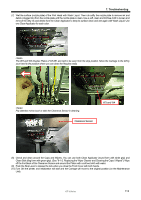
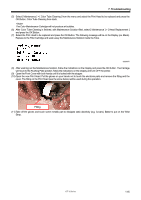
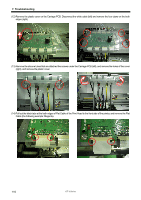
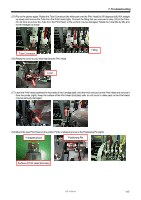
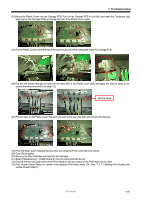
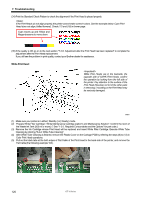
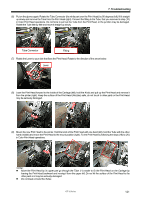
7. Troubleshooting (12) Remove the plastic cover on the Carriage PCB. Disconnect the white cable (left) and remove the four claws on the both edges (right). (13) Remove the silicone tubes that are attached the screws under the Carriage PCB (left), and remove the holes of the cover (right), and remove the plastic cover. (14) Pull out the black tabs at the both edges of Flat Cable of the Print Head to the front side of the printer, and remove the Flat Cable (the following example: Magenta). 116 GT-3 Series
-
 1
1 -
2
-
3
-
4
-
5
-
6
-
7
-
8
-
9
-
10
-
11
-
12
-
13
-
14
-
15
-
16
-
17
-
18
-
19
-
20
-
21
-
22
-
23
-
24
-
25
-
26
-
27
-
28
-
29
-
30
-
31
-
32
-
33
-
34
-
35
-
36
-
37
-
38
-
39
-
40
-
41
-
42
-
43
-
44
-
45
-
46
-
47
-
48
-
49
-
50
-
51
-
52
-
53
-
54
-
55
-
56
-
57
-
58
-
59
-
60
-
61
-
62
-
63
-
64
-
65
-
66
-
67
-
68
-
69
-
70
-
71
-
72
-
73
-
74
-
75
-
76
-
77
-
78
-
79
-
80
-
81
-
82
-
83
-
84
-
85
-
86
-
87
-
88
-
89
-
90
-
91
-
92
-
93
-
94
-
95
-
96
-
97
-
98
-
99
-
100
-
101
-
102
-
103
-
104
-
105
-
106
-
107
-
108
-
109
-
110
-
111
-
112
-
113
-
114
-
115
-
116
-
117
-
118
-
119
-
120
-
 121
121 -
 122
122 -
 123
123 -
 124
124 -
 125
125 -
 126
126 -
 127
127 -
 128
128 -
 129
129 -
 130
130 -
 131
131 -
132
-
133
-
134
-
135
-
136
-
137
-
138
-
139
-
140
-
141
-
142
-
143
-
144
-
145
-
146
-
147
-
148
 |
 |
GT-3 Series
7. Troubleshooting
116
(12) Remove the plastic cover on the Carriage PCB. Disconnect the white cable (left) and remove the four claws on the both
edges (right).
(13) Remove the silicone tubes that are attached the screws under the Carriage PCB (left), and remove the holes of the cover
(right), and remove the plastic cover.
(14) Pull out the black tabs at the both edges of Flat Cable of the Print Head to the front side of the printer, and remove the Flat
Cable (the following example: Magenta).