Brother International HL 5280DW Quick Setup Guide - English - Page 13
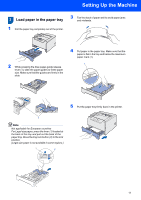
Load paper in the paper tray
 |
UPC - 012502614456
View all Brother International HL 5280DW manuals
Add to My Manuals
Save this manual to your list of manuals |
Page 13 highlights
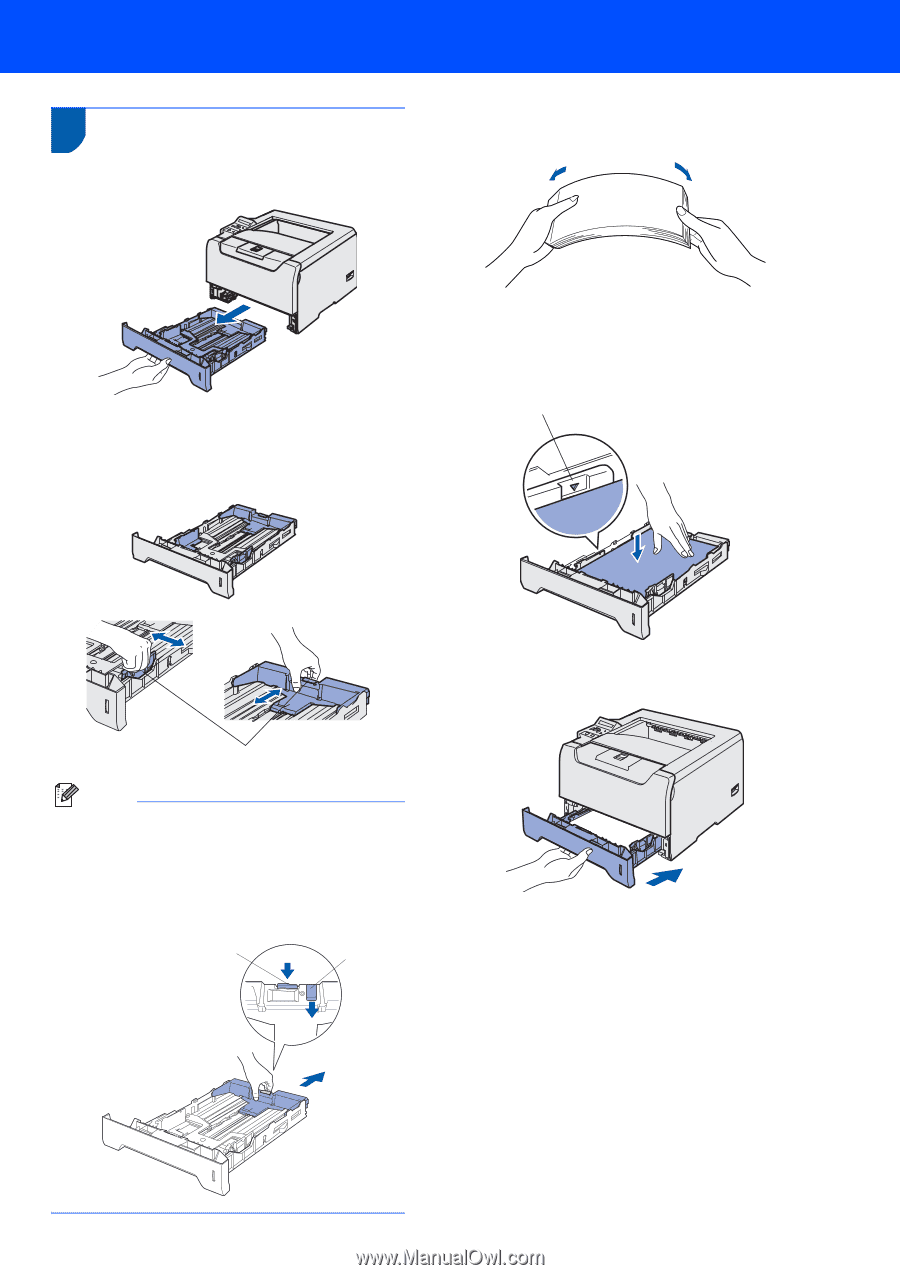
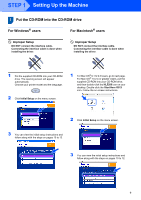
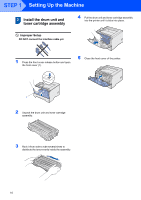
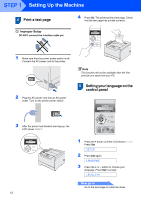
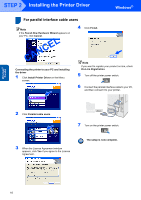
Setting Up the Machine 3 Load paper in the paper tray 1 Pull the paper tray completely out of the printer. 3 Fan the stack of paper well to avoid paper jams and misfeeds. 2 While pressing the blue paper-guide release lever (1), slide the paper guides to fit the paper size. Make sure that the guides are firmly in the slots. 4 Put paper in the paper tray. Make sure that the paper is flat in the tray and below the maximum paper mark (1). 1 5 Put the paper tray firmly back in the printer. 1 Note Not applicable for European countries For Legal size paper, press the lever (1) located at the back of the tray and pull out the back of the paper tray. Move the tray lock button (2) to the lock position. (Legal size paper is not available in some regions.) 1 2 11
-
 1
1 -
2
-
3
-
4
-
5
-
6
-
7
-
 8
8 -
 9
9 -
 10
10 -
 11
11 -
 12
12 -
 13
13 -
 14
14 -
 15
15 -
 16
16 -
 17
17 -
 18
18 -
19
-
20
-
21
-
22
-
23
-
24
-
25
-
26
-
27
-
28
-
29
-
30
-
31
-
32
-
33
-
34
-
35
-
36
-
37
-
38
-
39
-
40
-
41
-
42
-
43
-
44
-
45
-
46
-
47
-
48
-
49
-
50
-
51
-
52
-
53
-
54
-
55
-
56
 |
 |