Brother International HL 5280DW Quick Setup Guide - English - Page 24
Installation temporarily using a network cable - reset
 |
UPC - 012502614456
View all Brother International HL 5280DW manuals
Add to My Manuals
Save this manual to your list of manuals |
Page 24 highlights
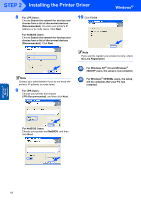
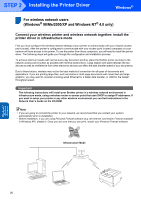
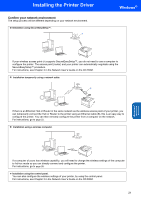
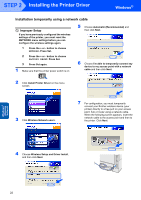
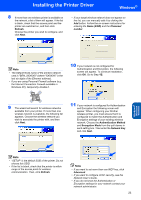
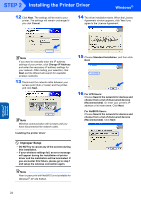
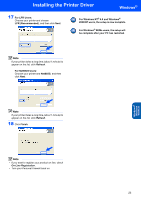
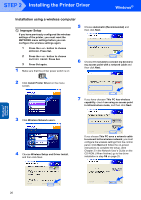
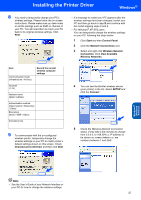
STEP 2 Installing the Printer Driver Windows® Installation temporarily using a network cable Improper Setup If you have previously configured the wireless settings of the printer, you must reset the NETWORK menu settings before you can configure the wireless settings again. 1 Press the + or - button to choose NETWORK. Press Set. 2 Press the + or - button to choose FACTORY RESET. Press Set. 3 Press Set again. 1 Make sure that the printer power switch is on. 5 Choose Automatic (Recommended) and then click Next. 6 Choose I'm able to temporarily connect my device to my access point with a network cable and then click Next. 2 Click Install Printer Driver on the menu screen. 3 Click Wireless Network users. 7 For configuration, you must temporarily connect your Brother wireless device (your printer) directly to a free port on your access point, hub or router using a network cable. When the following screen appears, insert the network cable to the access point and then to the printer. Click Next. 4 Choose Wireless Setup and Driver Install, and then click Next. Windows® Wireless Network 22
-
 1
1 -
2
-
3
-
4
-
5
-
6
-
7
-
8
-
9
-
10
-
11
-
12
-
13
-
14
-
15
-
16
-
17
-
18
-
 19
19 -
 20
20 -
 21
21 -
 22
22 -
 23
23 -
 24
24 -
 25
25 -
 26
26 -
 27
27 -
 28
28 -
 29
29 -
30
-
31
-
32
-
33
-
34
-
35
-
36
-
37
-
38
-
39
-
40
-
41
-
42
-
43
-
44
-
45
-
46
-
47
-
48
-
49
-
50
-
51
-
52
-
53
-
54
-
55
-
56
 |
 |