Brother International HL 5280DW Quick Setup Guide - English - Page 42
Network User's Guide.
 |
UPC - 012502614456
View all Brother International HL 5280DW manuals
Add to My Manuals
Save this manual to your list of manuals |
Page 42 highlights
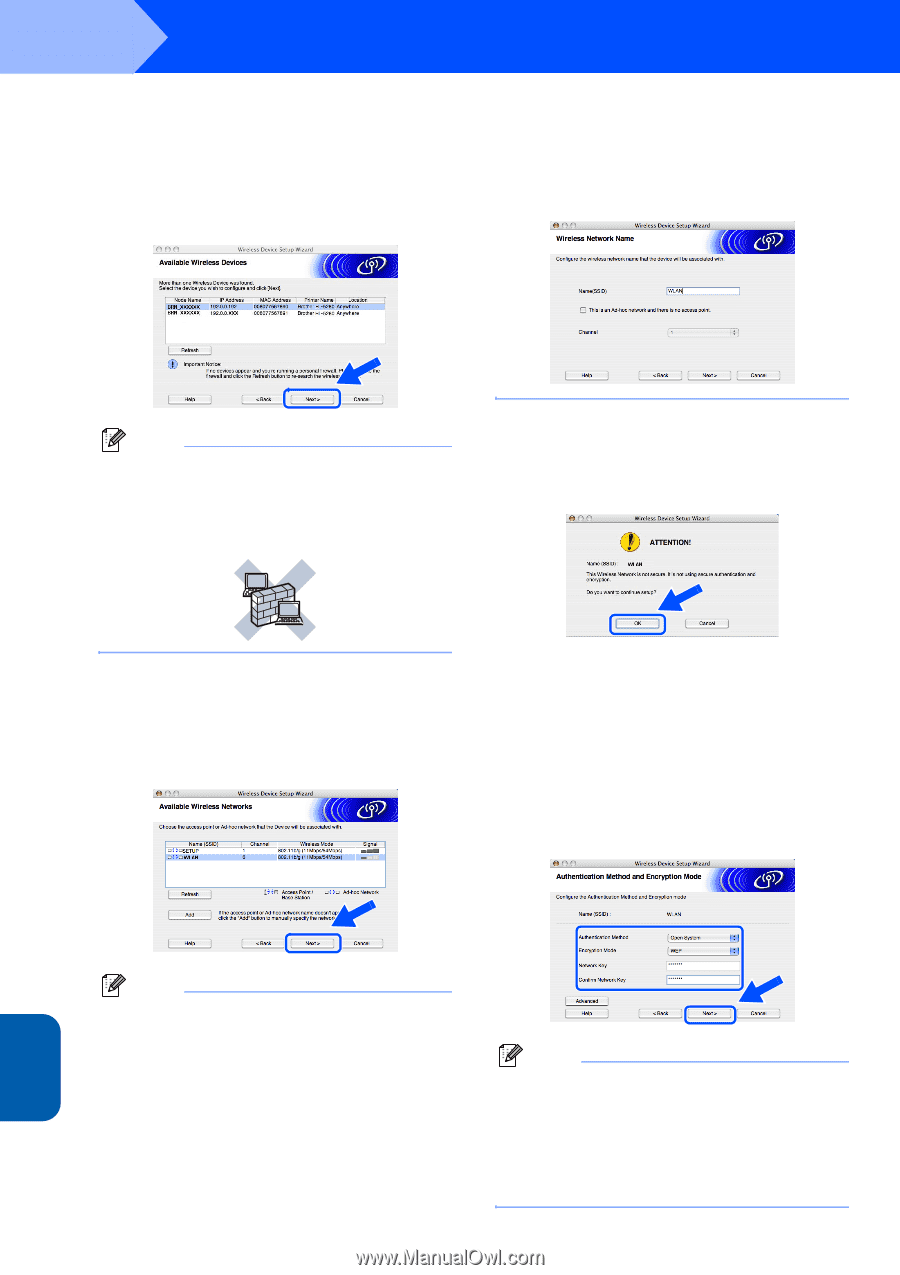
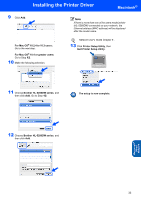
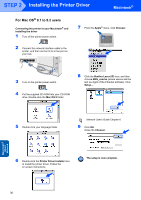
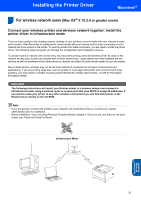
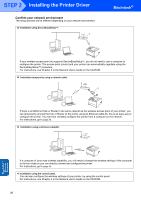
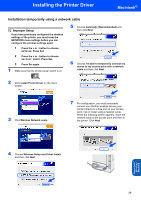
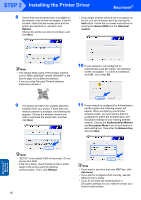
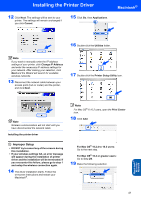
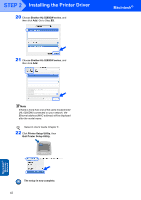
STEP 2 Installing the Printer Driver Macintosh® 8 If more than one wireless printer is available on the network, a list of them will appear. If the list is blank, check that the access point and the printer are switched on, and then click Refresh. Choose the printer you wish to configure, and click Next. • If your target wireless network does not appear on the list, you can manually add it by clicking the Add button. Follow the on-screen instructions for entering the Name (SSID) and the Channnel number. Note • The Default Node name of the printers network card is "BRN_XXXXXX" (where "XXXXXX" is the last six digits of the Ethernet address). • If you are using Personal Firewall software, temporarily disable it. 10 If your network is not configured for Authentication and Encryption, the following screen will appear. To continue installation, click OK. Go to Step 12. 9 The wizard will search for wireless networks available from your printer. If more than one wireless network is available, the following list appears. Choose the wireless network you wish to associate the printer with, and then click Next. 11 If your network is configured for Authentication and Encryption the following screen will appear. When configuring your Brother wireless printer, you must ensure that it is configured to match the Authentication and Encryption settings of your existing wireless network. Choose the Authentication Method and Encryption Mode from the pull-downs in each setting box. Then enter the Network Key and click Next. Note • "SETUP" is the default SSID of the printer. Do not choose this SSID. • If the list is blank, check that the printer is within range of the access point for wireless communication. Then, click Refresh. 40 Note • If you want to set more than one WEP key, click Advanced. • If you want to configure LEAP security, see the Network User's Guide. • If you do not know the Authentication or Encryption settings for your network contact your network administrator. Macintosh® Wireless Network
-
 1
1 -
2
-
3
-
4
-
5
-
6
-
7
-
8
-
9
-
10
-
11
-
12
-
13
-
14
-
15
-
16
-
17
-
18
-
19
-
20
-
21
-
22
-
23
-
24
-
25
-
26
-
27
-
28
-
29
-
30
-
31
-
32
-
33
-
34
-
35
-
36
-
 37
37 -
 38
38 -
 39
39 -
 40
40 -
 41
41 -
 42
42 -
 43
43 -
 44
44 -
 45
45 -
 46
46 -
 47
47 -
48
-
49
-
50
-
51
-
52
-
53
-
54
-
55
-
56
 |
 |