Brother International HL-7050N Quick Setup Guide - English - Page 12
For USB Interface Cable Users, 1. Installing the Driver and Connecting the Printer to Your PC
 |
UPC - 012502603375
View all Brother International HL-7050N manuals
Add to My Manuals
Save this manual to your list of manuals |
Page 12 highlights
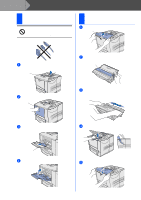
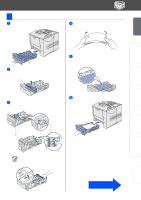
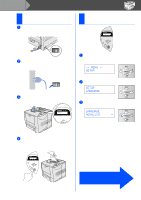
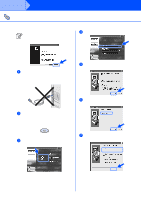
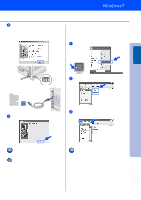
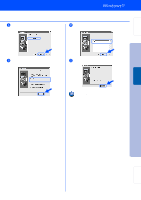
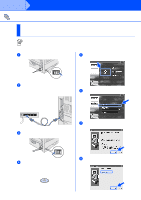
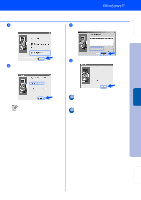
Step 2 Installing the Driver For USB Interface Cable Users 1. Installing the Driver and Connecting the Printer to Your PC When the "Found New Hardware Wizard" appears on your PC, click the Cancel button. 4 Click "Printer Driver." CANCEL 1 Make sure the USB interface cable is NOT connected to the printer, and then begin installing the driver. If you have already connected the cable, remove it. 5 Click the Next button. Follow the instructions on the screen. 2 Insert the CD-ROM into your CD-ROM drive. The opening screen will appear automatically. Follow the instructions on the screen. 3 Click "Install Software" icon on the Menu screen. 6 Select "Standard Installation," and then click the Next button. 7 Select "Local Printer with USB cable," and then click the Next button. 10
-
 1
1 -
2
-
3
-
4
-
5
-
6
-
 7
7 -
 8
8 -
 9
9 -
 10
10 -
 11
11 -
 12
12 -
 13
13 -
 14
14 -
 15
15 -
 16
16 -
 17
17 -
18
-
19
-
20
-
21
-
22
-
23
-
24
-
25
-
26
-
27
-
28
-
29
-
30
-
31
-
32
-
33
-
34
-
35
 |
 |
