Brother International HL-7050N Quick Setup Guide - English - Page 8
Setting Up Your Printer, Remove the Protective Parts, Install the Drum Unit Assembly
 |
UPC - 012502603375
View all Brother International HL-7050N manuals
Add to My Manuals
Save this manual to your list of manuals |
Page 8 highlights
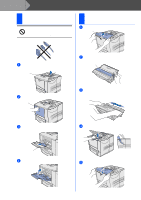
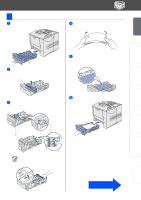
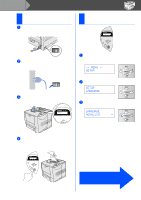
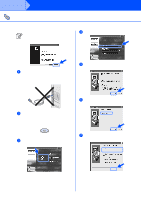
Step 1 Setting Up Your Printer 1 Remove the Protective Parts Do NOT connect the interface cable. Connecting the Interface cable is done when installing the driver. 2 Install the Drum Unit Assembly 1 Open the top cover of the printer. Top cover 1 Remove the protective part from the paper exit of the printer. Paper exit Protective part 2 Unpack the drum unit assembly. Remove the protective part. Protective part Drum unit assembly 2 Open the multi-purpose tray and lower it gently. Multi-purpose tray 3 Rock it from side to side several times to distribute the toner evenly inside the assembly. 3 Remove the protective part from in the multi-purpose tray. 4 Put the drum unit assembly into the printer. Protective part 4 Close the multi-purpose tray. 5 Close the top cover of the printer. 6
-
 1
1 -
2
-
 3
3 -
 4
4 -
 5
5 -
 6
6 -
 7
7 -
 8
8 -
 9
9 -
 10
10 -
 11
11 -
 12
12 -
 13
13 -
14
-
15
-
16
-
17
-
18
-
19
-
20
-
21
-
22
-
23
-
24
-
25
-
26
-
27
-
28
-
29
-
30
-
31
-
32
-
33
-
34
-
35
 |
 |
