Brother International LS2300PRW Users Manual - English and Spanish - Page 33
and sew on the button as previously explained. - how to thread bobbin
 |
View all Brother International LS2300PRW manuals
Add to My Manuals
Save this manual to your list of manuals |
Page 33 highlights
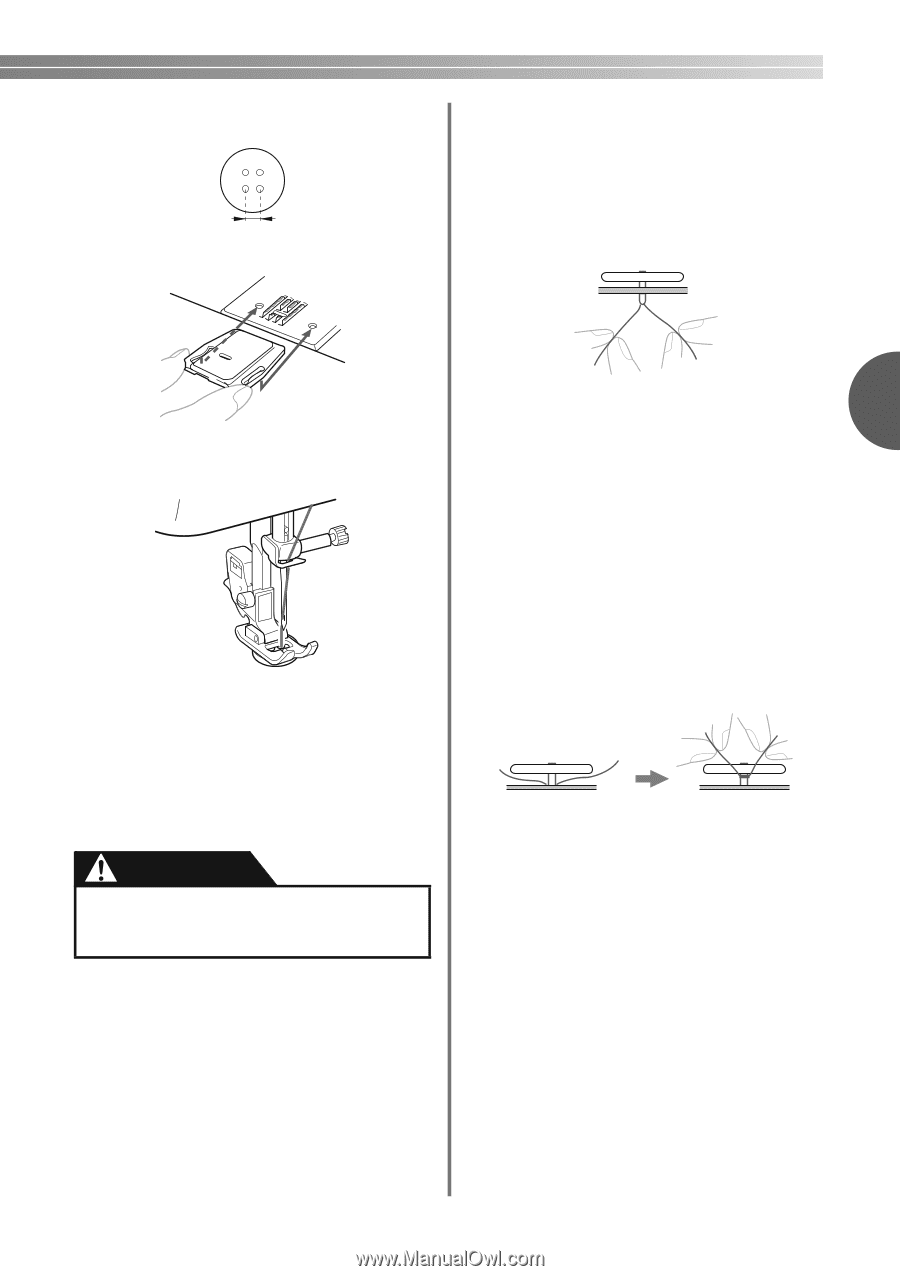
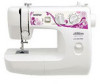
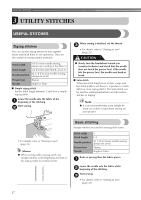
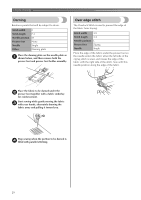
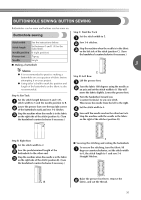
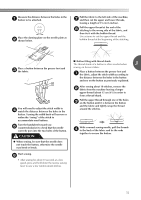
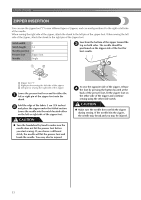
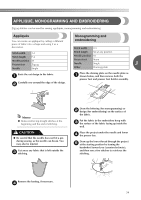
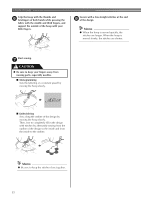
Measure the distance between the holes in the a button to be attached. Place the darning plate on the needle plate as b shown below. Pull the fabric to the left side of the machine, g and then cut the upper and lower threads, leaving a length of 15 cm (6 inches). Pull the upper thread at the end of the h stitching to the wrong side of the fabric, and then tie it with the bobbin thread. Use scissors to cut the upper thread and the bobbin thread at the beginning of the stitching. Place a button between the presser foot and c the fabric. ■ Button fitting with thread shank The thread shank of a button is often needed when 3 sewing on heavier fabric. Place a button between the presser foot and a the fabric, adjust the stitch width according to the distance between the holes in the button and sew on the button as previously explained. You will need to adjust the stitch width to d match the distance between the holes in the button. Turning the width knob will narrow or widen the "swing" of the stitch to accommodate most buttons. Turn the handwheel toward you e (counterclockwise) to check that the needle correctly goes into the two holes of the button. CAUTION ● When sewing, be sure that the needle does not touch the button, otherwise the needle may bend or break. After sewing about 10 stitches, remove the b fabric from the machine leaving a longer upper thread (about 15 cm (6")) in order to form a thread shank. Pull the upper thread through one of the holes c on the button until it is between the button and the fabric and tightly wrap the thread around the stitches. With a normal sewing needle, pull the threads d to the back of the fabric and tie the ends together to secure the button. Start sewing. f • After sewing for about 10 seconds at a low speed, press and hold down the reverse sewing lever to sew a few reinforcement stitches. 32
-
 1
1 -
2
-
3
-
4
-
5
-
6
-
7
-
8
-
9
-
10
-
11
-
12
-
13
-
14
-
15
-
16
-
17
-
18
-
19
-
20
-
21
-
22
-
23
-
24
-
25
-
26
-
27
-
 28
28 -
 29
29 -
 30
30 -
 31
31 -
 32
32 -
 33
33 -
 34
34 -
 35
35 -
 36
36 -
 37
37 -
 38
38 -
39
-
40
-
41
-
42
-
43
-
44
-
45
-
46
-
47
-
48
-
49
-
50
-
51
-
52
-
53
-
54
-
55
-
56
-
57
-
58
-
59
-
60
-
61
-
62
-
63
-
64
-
65
-
66
-
67
-
68
-
69
-
70
-
71
-
72
-
73
-
74
-
75
-
76
-
77
-
78
-
79
-
80
-
81
-
82
-
83
-
84
-
85
-
86
-
87
-
88
-
89
-
90
-
91
-
92
-
93
-
94
-
95
-
96
 |
 |