Brother International LS2300PRW Users Manual - English and Spanish - Page 42
Bobbin case tension, adjustment
 |
View all Brother International LS2300PRW manuals
Add to My Manuals
Save this manual to your list of manuals |
Page 42 highlights
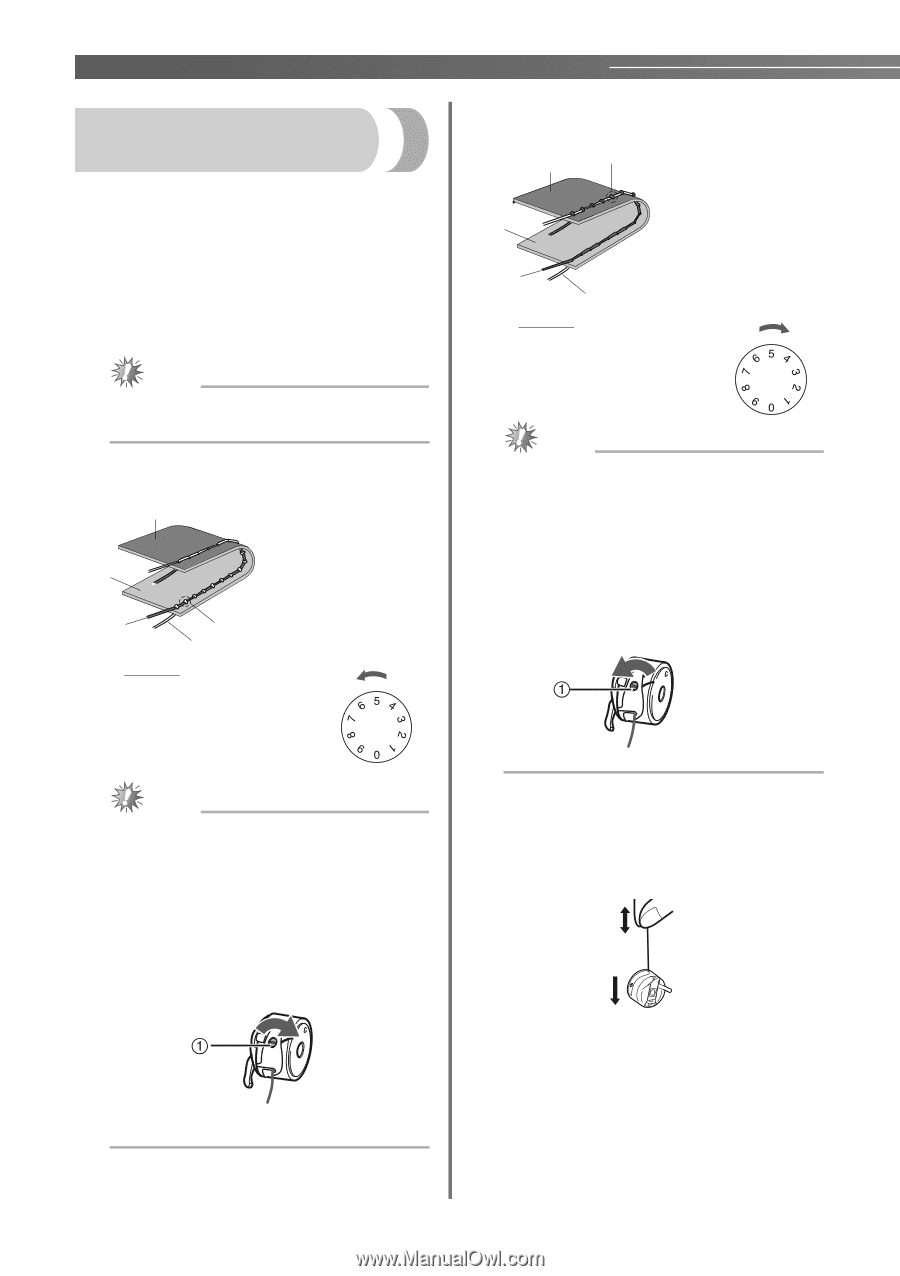
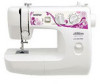
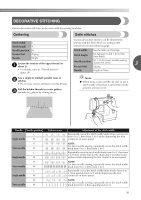
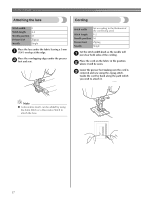
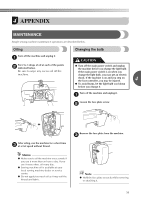
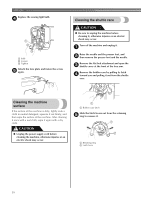
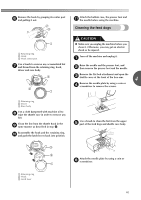
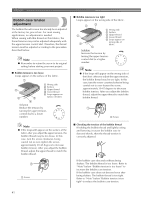
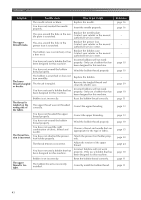
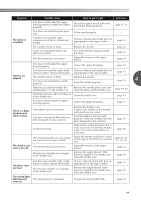
APPENDIX Bobbin case tension adjustment The bobbin thread tension has already been adjusted at the factory for general use. For most sewing applications, no adjustment is needed. When sewing with thin thread on thin fabrics, the thread tension may not be adjusted adequately with the upper tension control dial. Therefore, the thread tension must be adjusted according to the procedure described below. Note ● Remember to return the screw to its original setting before starting your next project. ■ Bobbin tension is too loose Loops appear on the surface of the fabric. 1 2 3 a Wrong side b Surface c Upper thread d Lower thread e Loops appear on 5 surface of fabric 4 Solution Reduce the tension by turning the upper tensioncontrol dial to a lower number. ■ Bobbin tension is too tight Loops appear on the wrong side of the fabric. 1 5 2 3 4 a Wrong side b Surface c Upper thread d Lower thread e Loops appear on wrong side of fabric Solution Increase the tension by turning the upper tension- control dial to a higher number. Note ● If the loops still appear on the wrong side of the fabric after you adjust the upper tension, the bobbin thread may be too tight. In this case, turn the screw counterclockwise being careful not to over-loosen the screw, approximately 30-45 degrees to decrease bobbin tension. After you adjust the bobbin thread, adjust the upper thread to match the bobbin thread. a Screw Note ● If the loops still appear on the surface of the fabric after you adjust the upper tension, the bobbin thread may be too loose. In this case, turn the screw clockwise, being careful not to over-tighten the screw, approximately 30-45 degrees to increase bobbin tension. After you adjust the bobbin thread, adjust the upper thread to match the bobbin thread. a Screw ■ Checking the tension of the bobbin thread If holding the bobbin thread and lightly raising and lowering it causes the bobbin case to descend slowly, then the thread tension is correctly adjusted. If the bobbin case descends without being shaken: The bobbin thread is too loose. Refer to "Note" below "Bobbin tension is too loose" to increase the bobbin case tension. If the bobbin case does not descend even after being shaken: The bobbin thread is too tight. Refer to "Note" below "Bobbin tension is too tight" to reduce the bobbin case tension. 41
-
 1
1 -
2
-
3
-
4
-
5
-
6
-
7
-
8
-
9
-
10
-
11
-
12
-
13
-
14
-
15
-
16
-
17
-
18
-
19
-
20
-
21
-
22
-
23
-
24
-
25
-
26
-
27
-
28
-
29
-
30
-
31
-
32
-
33
-
34
-
35
-
36
-
 37
37 -
 38
38 -
 39
39 -
 40
40 -
 41
41 -
 42
42 -
 43
43 -
 44
44 -
 45
45 -
 46
46 -
 47
47 -
48
-
49
-
50
-
51
-
52
-
53
-
54
-
55
-
56
-
57
-
58
-
59
-
60
-
61
-
62
-
63
-
64
-
65
-
66
-
67
-
68
-
69
-
70
-
71
-
72
-
73
-
74
-
75
-
76
-
77
-
78
-
79
-
80
-
81
-
82
-
83
-
84
-
85
-
86
-
87
-
88
-
89
-
90
-
91
-
92
-
93
-
94
-
95
-
96
 |
 |