Brother International PE-400D Users Manual - English - Page 88
Embroidering from a specific starting point
 |
View all Brother International PE-400D manuals
Add to My Manuals
Save this manual to your list of manuals |
Page 88 highlights
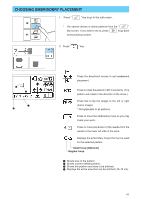
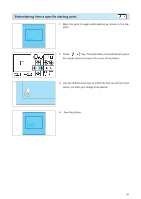
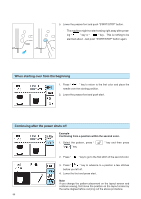
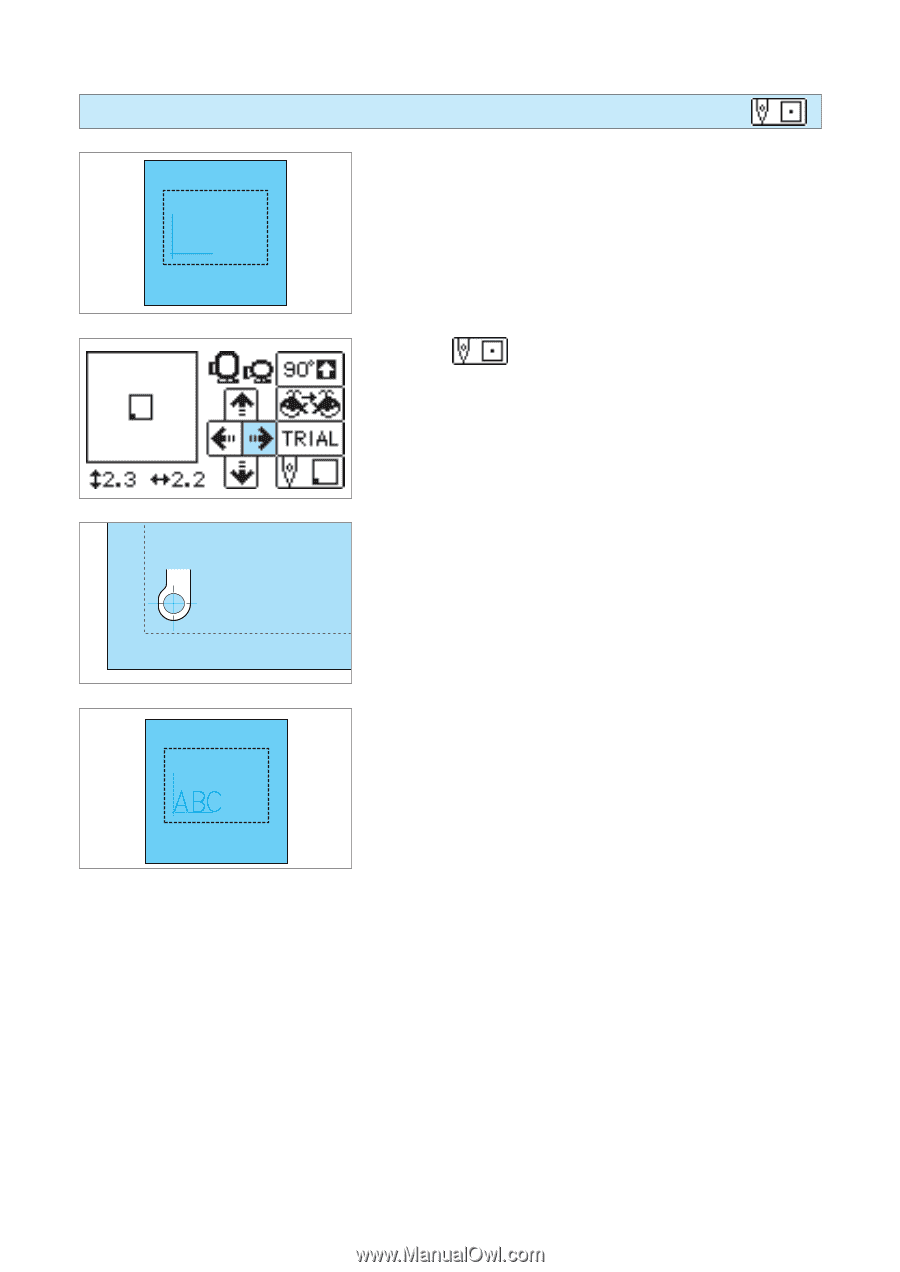
Embroidering from a specific starting point 1. Mark the point to begin embroidering as shown in the diagram. 2. Press " " key. The embroidery hoop will move to place the needle above the lower left corner of the pattern. 3. Use the directional arrows to match the foot up with the mark where you wish your design to be placed. 4. Sew the pattern. 85
-
 1
1 -
2
-
3
-
4
-
5
-
6
-
7
-
8
-
9
-
10
-
11
-
12
-
13
-
14
-
15
-
16
-
17
-
18
-
19
-
20
-
21
-
22
-
23
-
24
-
25
-
26
-
27
-
28
-
29
-
30
-
31
-
32
-
33
-
34
-
35
-
36
-
37
-
38
-
39
-
40
-
41
-
42
-
43
-
44
-
45
-
46
-
47
-
48
-
49
-
50
-
51
-
52
-
53
-
54
-
55
-
56
-
57
-
58
-
59
-
60
-
61
-
62
-
63
-
64
-
65
-
66
-
67
-
68
-
69
-
70
-
71
-
72
-
73
-
74
-
75
-
76
-
77
-
78
-
79
-
80
-
81
-
82
-
 83
83 -
 84
84 -
 85
85 -
 86
86 -
 87
87 -
 88
88 -
 89
89 -
 90
90 -
 91
91 -
 92
92 -
 93
93 -
94
-
95
-
96
-
97
-
98
-
99
-
100
-
101
-
102
-
103
-
104
-
105
-
106
-
107
-
108
-
109
-
110
-
111
-
112
 |
 |
85
Embroidering from a specific starting point
1.
Mark the point to begin embroidering as shown in the dia-
gram.
2.
Press
“
”
key.
The embroidery hoop will move to place
the needle above the lower left corner of the pattern.
3.
Use the directional arrows to match the foot up with the mark
where you wish your design to be placed.
4.
Sew the pattern.