Canon CanoScan D1250U2F CanoScan D1250U2F Quick Start Guide - Page 15
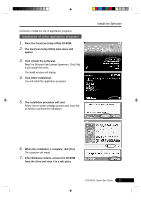
Click [Scan].
 |
View all Canon CanoScan D1250U2F manuals
Add to My Manuals
Save this manual to your list of manuals |
Page 15 highlights
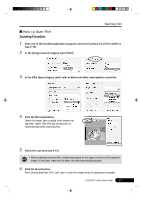
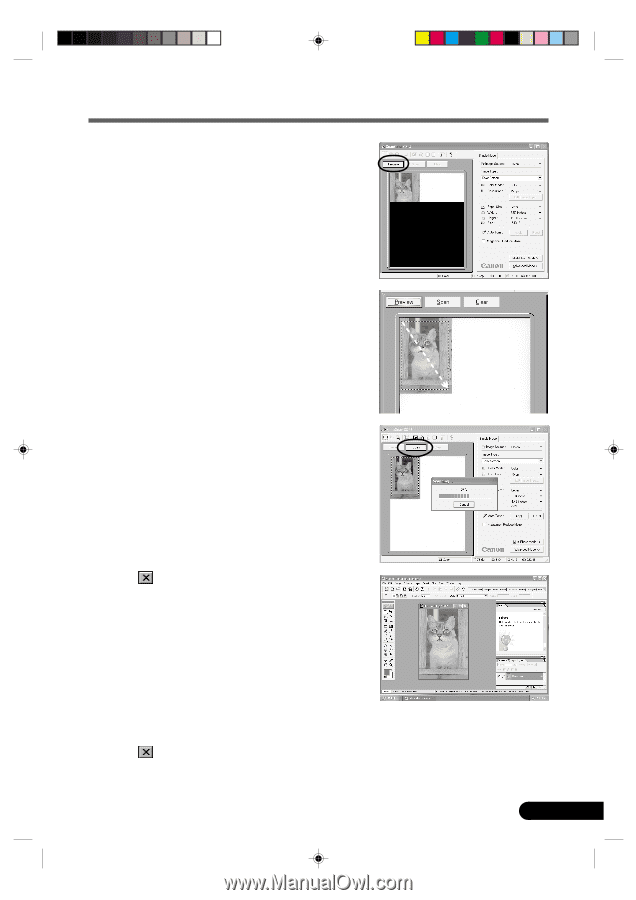
4. Click [Preview]. The preview scan will start and gradually display the image. 5. Drag the mouse diagonally to select the area you want to scan. 6. Click [Scan]. The final scan will start. Try Scanning 7. Click (close box) in the ScanGear CS-U window to close it. The scanned image will appear in the Adobe Photoshop Elements window. 8. Save the scanned image. Click the [File] menu and select [Save As]. Select the folder where you wish to store the image file, enter a file name and select a file type, and click [Save]. 9. Click (close box) in the Adobe Photoshop Elements window to close it. D1250U2F Quick Start Guide 13 *D1250U2F_QSG_E 13 11/24/01, 7:19 AM
-
 1
1 -
2
-
3
-
4
-
5
-
6
-
7
-
8
-
9
-
 10
10 -
 11
11 -
 12
12 -
 13
13 -
 14
14 -
 15
15 -
 16
16 -
 17
17 -
 18
18 -
 19
19 -
 20
20 -
21
-
22
-
23
-
24
-
25
-
26
-
27
-
28
-
29
-
30
 |
 |
13
D1250U2F
Quick Start Guide
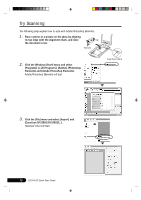
Try Scanning
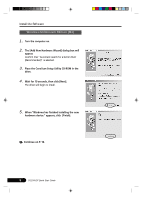
4.
Click [Preview].
The preview scan will start and gradually display the
image.
5.
Drag the mouse diagonally to select the area you
want to scan.
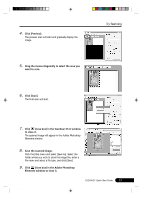
6.
Click [Scan].
The final scan will start.
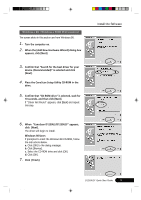
7.
Click
(close box) in the ScanGear CS-U window
to close it.
The scanned image will appear in the Adobe Photoshop
Elements window.
8.
Save the scanned image.
Click the [File] menu and select [Save As]. Select the
folder where you wish to store the image file, enter a
file name and select a file type, and click [Save].
9.
Click
(close box) in the Adobe Photoshop
Elements window to close it.
*D1250U2F_QSG_E
11/24/01, 7:19 AM
13