Canon D1250U2F CanoScan N670U/N676U/N1240U Toolbox3.1 for Win Guide - Page 17
Settings Common to the Dialogs 5/6
 |
UPC - 013803010756
View all Canon D1250U2F manuals
Add to My Manuals
Save this manual to your list of manuals |
Page 17 highlights
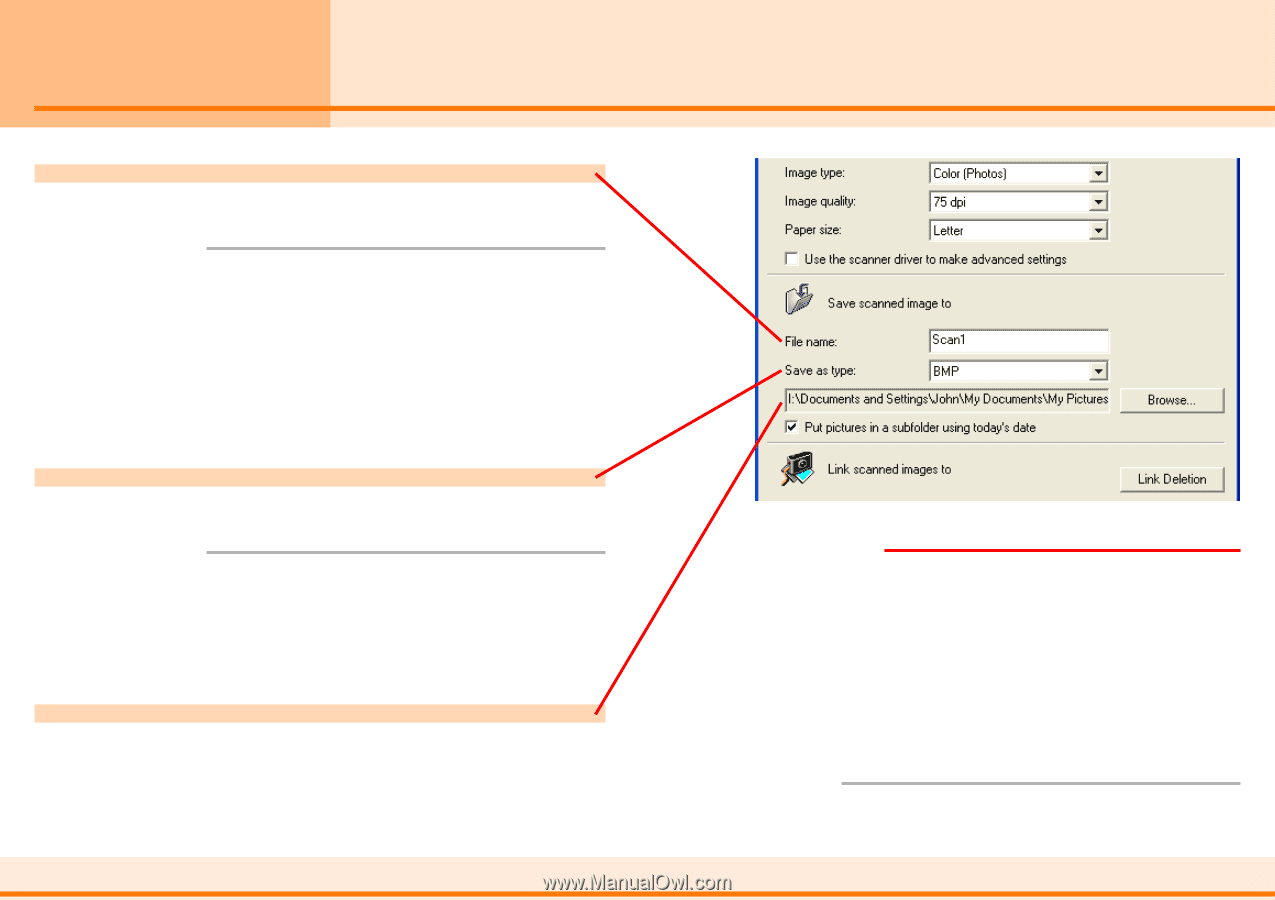
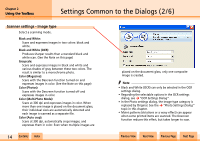
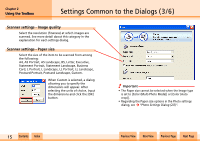
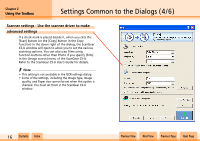
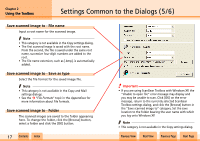
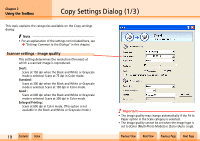
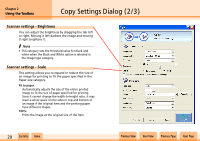
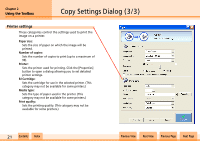
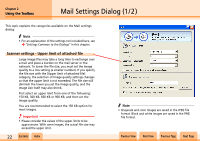
Chapter 2 Using the Toolbox Settings Common to the Dialogs (5/6) Save scanned image to - File name Input a root name for the scanned image. f Note • This category is not available in the Copy settings dialog. • The first scanned image is saved with the root name. From the second, the file is saved under the same root name, successive four-digit numbers are added to the root. • The file name extension, such as [.bmp], is automatically added. Save scanned image to - Save as type Select the file format for the saved image file. f Note • This category is not available in the Copy and Mail settings dialogs. • See the j "File Formats" topic in the Appendices for more information about file formats. Save scanned image to - Folder The scanned images are saved to the folder appearing here. To change the folder, click the [Browse] button, select a folder and click the [OK] button. w w 17 Contents Index e Important • If you are using ScanGear Toolbox with Windows XP, the "Unable to open file" error message may display and you may be unable to scan. Click [OK] on the error message, return to the currently selected ScanGear Toolbox settings dialog, and click the [Browse] button in the "Save scanned image to" category. Set the save location to the folder bearing the user name with which you log onto Windows XP. f Note • This category is not available in the Copy settings dialog. Previous View Next View Previous Page Next Page
-
 1
1 -
2
-
3
-
4
-
5
-
6
-
7
-
8
-
9
-
10
-
11
-
 12
12 -
 13
13 -
 14
14 -
 15
15 -
 16
16 -
 17
17 -
 18
18 -
 19
19 -
 20
20 -
 21
21 -
 22
22 -
23
-
24
-
25
-
26
-
27
-
28
-
29
-
30
-
31
-
32
-
33
-
34
-
35
-
36
-
37
-
38
-
39
-
40
 |
 |