Canon D1250U2F CanoScan N670U/N676U/N1240U Toolbox3.1 for Win Guide - Page 18
Settings Common to the Dialogs 6/6
 |
UPC - 013803010756
View all Canon D1250U2F manuals
Add to My Manuals
Save this manual to your list of manuals |
Page 18 highlights
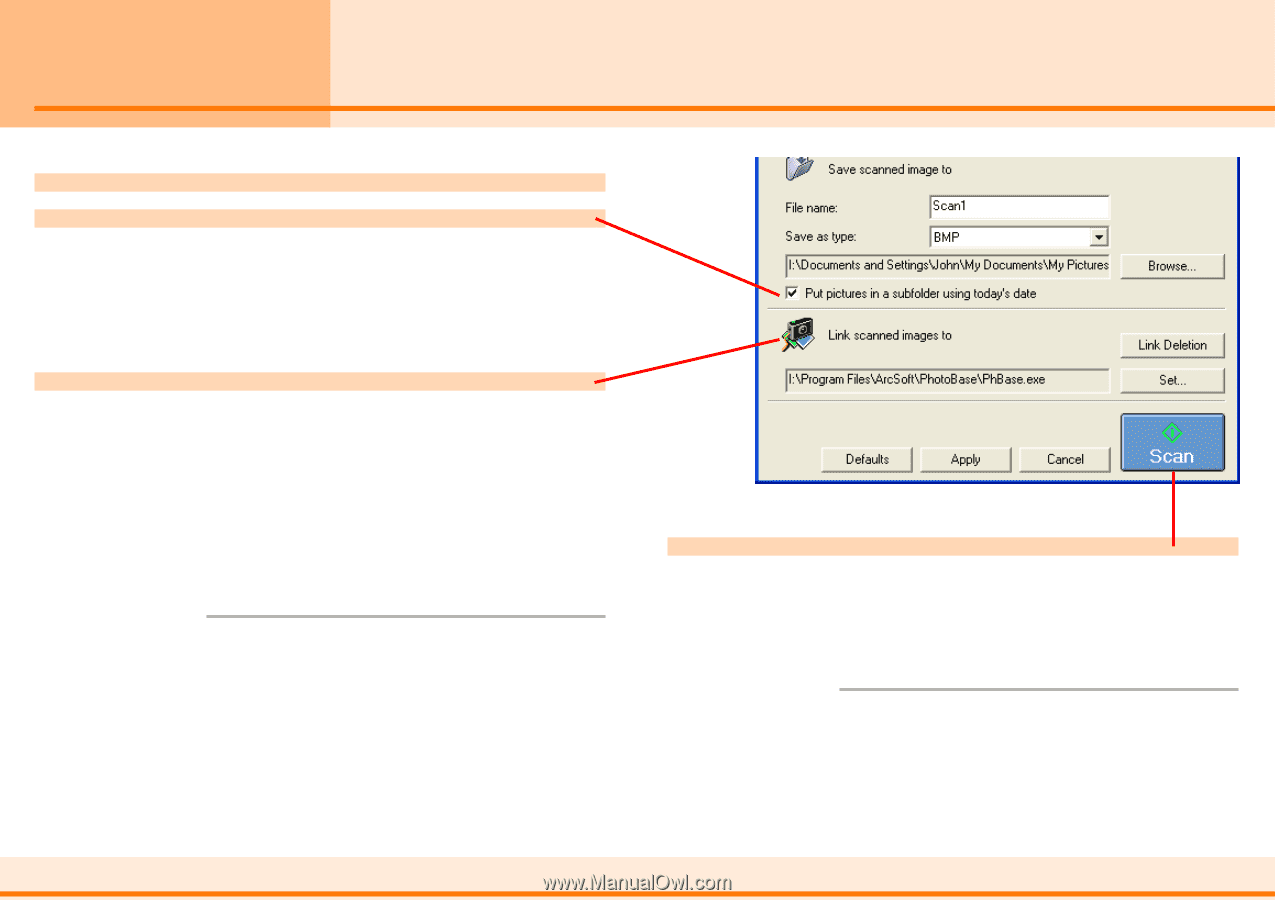
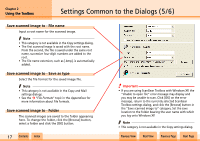
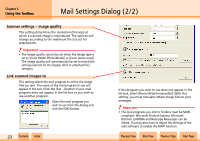
Chapter 2 Using the Toolbox Settings Common to the Dialogs (6/6) Save scanned image to - Put pictures in a subfolder using today's date If this setting has a check mark beside it, a subfolder bearing the scanning date (2001-05-03, for example) is automatically created within the selected folder and the scanned images are saved to the subfolder. Link scanned images to Select the application program linked to the button. The name of the linked program appears in the box in this category. To link to another program, click [Set...], select the program, and click the [OK] button. This procedure is explained in detail in j"Linking to Other Application Programs" in Chapter 4. f Note • See the j"Mail Settings Dialog" section in this chapter for setting this category in the Mail settings dialog. w w 18 Contents Index Scan Button Click the [Scan] button to start scanning. In the Copy settings dialog, this button is called the Copy button. The selected action will automatically take place once the scan is complete. f Note • Click the [Defaults] button to reset all the categories to the default settings. • Click the [Apply] button to save the selected settings. • Click the [Cancel] button to return to the Toolbox's main window. Previous View Next View Previous Page Next Page
-
 1
1 -
2
-
3
-
4
-
5
-
6
-
7
-
8
-
9
-
10
-
11
-
12
-
 13
13 -
 14
14 -
 15
15 -
 16
16 -
 17
17 -
 18
18 -
 19
19 -
 20
20 -
 21
21 -
 22
22 -
 23
23 -
24
-
25
-
26
-
27
-
28
-
29
-
30
-
31
-
32
-
33
-
34
-
35
-
36
-
37
-
38
-
39
-
40
 |
 |