Canon D1250U2F CanoScan N670U/N676U/N1240U Toolbox3.1 for Win Guide - Page 31
Using the Scanner Buttons 3/3
 |
UPC - 013803010756
View all Canon D1250U2F manuals
Add to My Manuals
Save this manual to your list of manuals |
Page 31 highlights
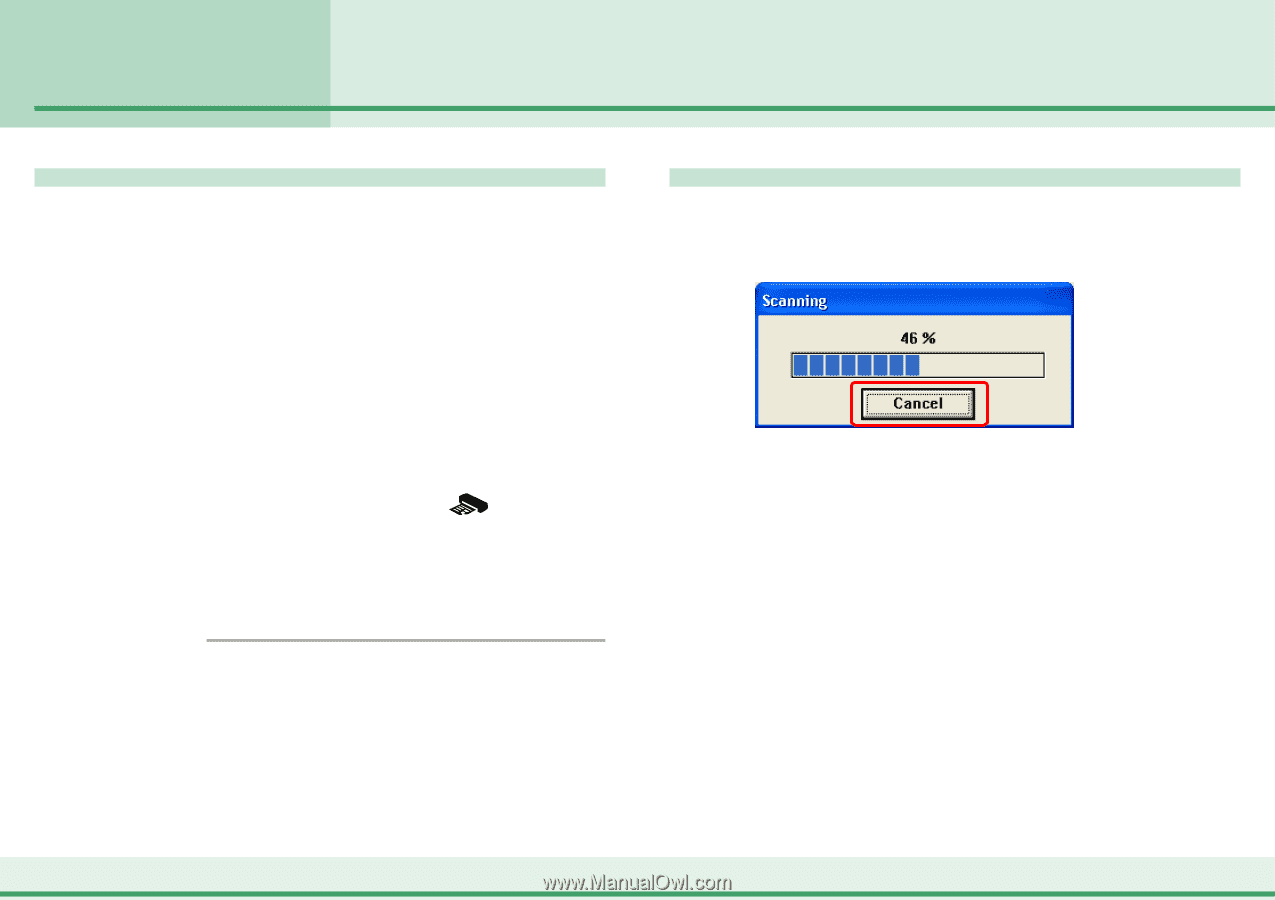
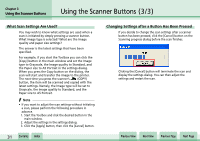
Chapter 3 Using the Scanner Buttons Using the Scanner Buttons (3/3) What Scan Settings Are Used? You may wish to know what settings are used when a scan is initiated by simply pressing a scanner button. What image type is selected? What are the Image quality and paper size settings? The answer is the latest settings that have been specified. For example, if you start the Toolbox you can click the [Copy] button in the main window and set the Image type to Grayscale, the Image quality to Standard, and the Paper size to A5 Portrait in the settings dialog. When you press the Copy button on the dialog, the scan will start and transfer the image to the printer. The next time you press the scanner's (COPY) button, the item will be scanned and copied with the latest settings. Namely, the Image type will be set to Grayscale, the Image quality to Standard, and the Paper size to A5 Portrait. f Note • If you want to adjust the scan settings without initiating a scan, please perform the following procedure in advance. 1. Start the Toolbox and click the desired button in the main window. 2. Adjust the settings in the settings dialog. 3. Click the [Apply] button, then click the [Cancel] button. w w 31 Contents Index Changing Settings after a Button Has Been Pressed If you decide to change the scan settings after a scanner button has been pressed, click the [Cancel] button on the Scanning progress dialog before the scan finishes. Clicking the [Cancel] button will terminate the scan and display the settings dialog. You can then adjust the settings and restart the scan. Previous View Next View Previous Page Next Page
-
 1
1 -
2
-
3
-
4
-
5
-
6
-
7
-
8
-
9
-
10
-
11
-
12
-
13
-
14
-
15
-
16
-
17
-
18
-
19
-
20
-
21
-
22
-
23
-
24
-
25
-
 26
26 -
 27
27 -
 28
28 -
 29
29 -
 30
30 -
 31
31 -
 32
32 -
 33
33 -
 34
34 -
 35
35 -
 36
36 -
37
-
38
-
39
-
40
 |
 |