Canon EOS 70D User Manual - Page 119
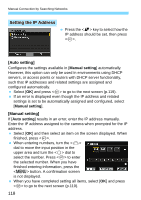
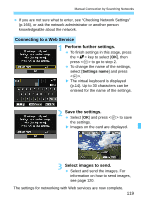
Perform further settings., Save the settings., Select images to send., Connecting to a Web Service
 |
View all Canon EOS 70D manuals
Add to My Manuals
Save this manual to your list of manuals |
Page 119 highlights
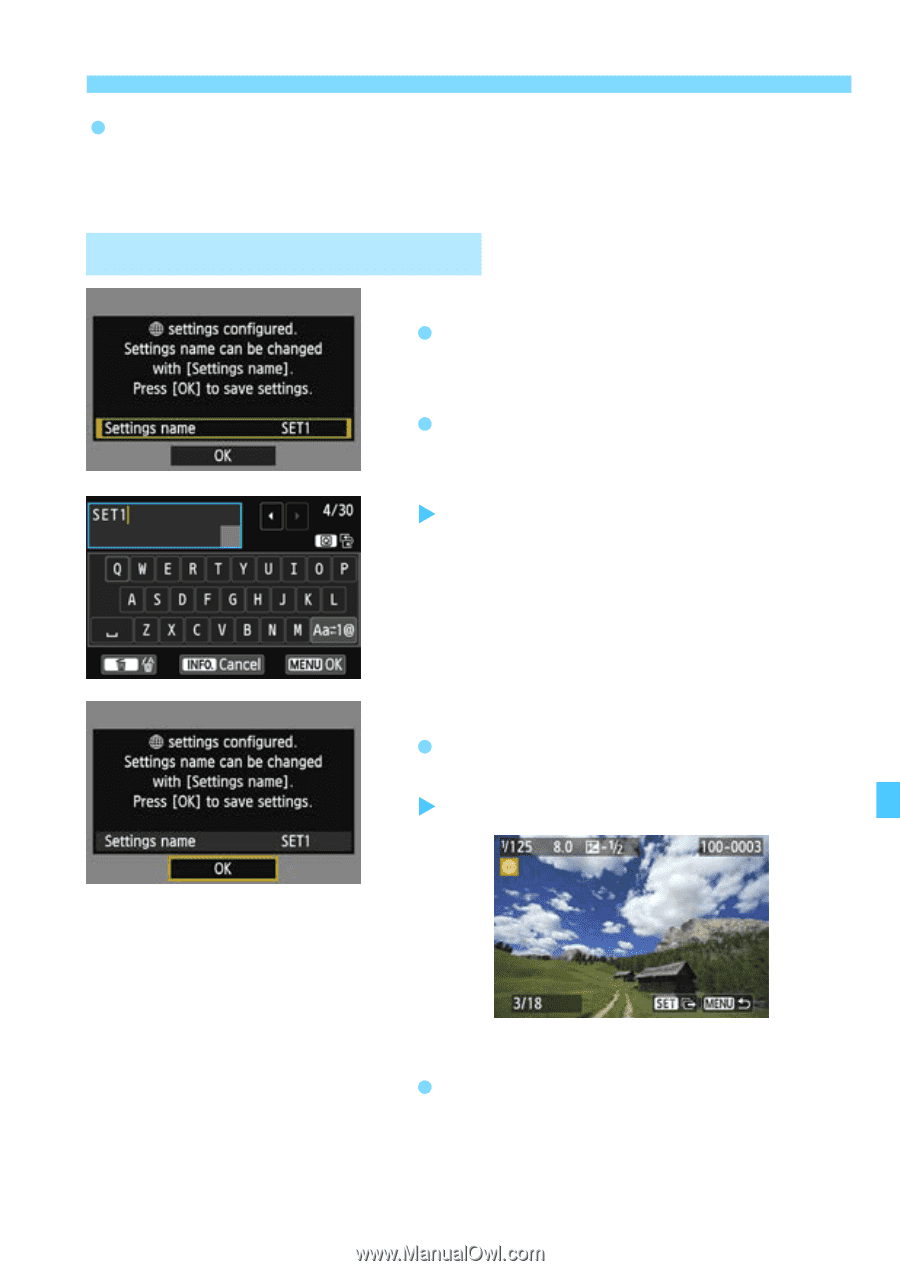
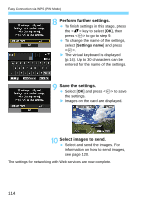
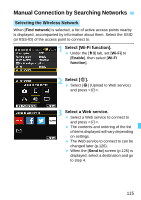
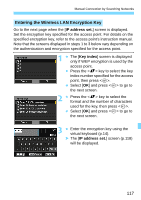
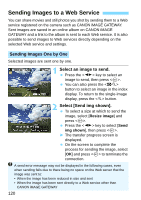
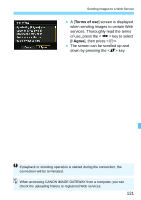
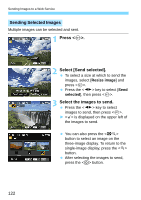
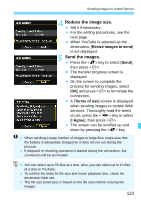
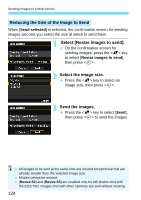
Manual Connection by Searching Networks If you are not sure what to enter, see "Checking Network Settings" (p.166), or ask the network administrator or another person knowledgeable about the network. Connecting to a Web Service 1 Perform further settings. To finish settings in this stage, press the key to select [OK], then press to go to step 2. To change the name of the settings, select [Settings name] and press . X The virtual keyboard is displayed (p.14). Up to 30 characters can be entered for the name of the settings. 2 Save the settings. Select [OK] and press to save the settings. X Images on the card are displayed. 3 Select images to send. Select and send the images. For information on how to send images, see page 120. The settings for networking with Web services are now complete. 119
-
 1
1 -
2
-
3
-
4
-
5
-
6
-
7
-
8
-
9
-
10
-
11
-
12
-
13
-
14
-
15
-
16
-
17
-
18
-
19
-
20
-
21
-
22
-
23
-
24
-
25
-
26
-
27
-
28
-
29
-
30
-
31
-
32
-
33
-
34
-
35
-
36
-
37
-
38
-
39
-
40
-
41
-
42
-
43
-
44
-
45
-
46
-
47
-
48
-
49
-
50
-
51
-
52
-
53
-
54
-
55
-
56
-
57
-
58
-
59
-
60
-
61
-
62
-
63
-
64
-
65
-
66
-
67
-
68
-
69
-
70
-
71
-
72
-
73
-
74
-
75
-
76
-
77
-
78
-
79
-
80
-
81
-
82
-
83
-
84
-
85
-
86
-
87
-
88
-
89
-
90
-
91
-
92
-
93
-
94
-
95
-
96
-
97
-
98
-
99
-
100
-
101
-
102
-
103
-
104
-
105
-
106
-
107
-
108
-
109
-
110
-
111
-
112
-
113
-
 114
114 -
 115
115 -
 116
116 -
 117
117 -
 118
118 -
 119
119 -
 120
120 -
 121
121 -
 122
122 -
 123
123 -
 124
124 -
125
-
126
-
127
-
128
-
129
-
130
-
131
-
132
-
133
-
134
-
135
-
136
-
137
-
138
-
139
-
140
-
141
-
142
-
143
-
144
-
145
-
146
-
147
-
148
-
149
-
150
-
151
-
152
-
153
-
154
-
155
-
156
-
157
-
158
-
159
-
160
-
161
-
162
-
163
-
164
-
165
-
166
-
167
-
168
-
169
-
170
-
171
-
172
-
173
-
174
 |
 |