Canon MX850 Quick Start Guide - Page 118
When Printing Becomes Faint or Colors Are Incorrect - print head problems
 |
UPC - 013803087871
View all Canon MX850 manuals
Add to My Manuals
Save this manual to your list of manuals |
Page 118 highlights
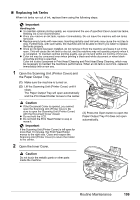
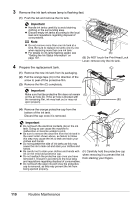
When Printing Becomes Faint or Colors Are Incorrect When printing becomes faint or colors are incorrect even if ink remains in the ink tanks, the print head nozzles are probably clogged. Print the nozzle check pattern to confirm the condition of the nozzles and then perform Print Head Cleaning. If print results are not satisfactory, performing Print Head Alignment may improve print quality. Note Before performing maintenance z Open the Scanning Unit (Printer Cover) and make sure that all lamps for the ink tanks are lit red. If not, see "Getting the Ink Status Information" on page 107 and take the appropriate action. z Increase the Print Quality setting in the printer driver settings. For details, refer to the PC Printing Guide on-screen manual. Step 1 See "Printing the Nozzle Check Pattern" on page 115. If lines are missing or if white streaks appear Step 2 See "Print Head Cleaning" on page 117. If the problem is not resolved after performing Print Head Cleaning twice After cleaning the Print Head, print and examine the nozzle check pattern. Step 3 See "Print Head Deep Cleaning" on page 118. Note If Print Head Deep Cleaning does not resolve the problem, turn off the machine and perform another Print Head Deep Cleaning after 24 hours. If the problem is still not resolved, the Print Head may be damaged. Contact your Canon service representative. z If the Ruled Lines Are Shifted See "Aligning the Print Head" on page 119. Note You can also perform the maintenance operation from your computer. For details, refer to the PC Printing Guide on-screen manual. 114 Routine Maintenance
-
 1
1 -
2
-
3
-
4
-
5
-
6
-
7
-
8
-
9
-
10
-
11
-
12
-
13
-
14
-
15
-
16
-
17
-
18
-
19
-
20
-
21
-
22
-
23
-
24
-
25
-
26
-
27
-
28
-
29
-
30
-
31
-
32
-
33
-
34
-
35
-
36
-
37
-
38
-
39
-
40
-
41
-
42
-
43
-
44
-
45
-
46
-
47
-
48
-
49
-
50
-
51
-
52
-
53
-
54
-
55
-
56
-
57
-
58
-
59
-
60
-
61
-
62
-
63
-
64
-
65
-
66
-
67
-
68
-
69
-
70
-
71
-
72
-
73
-
74
-
75
-
76
-
77
-
78
-
79
-
80
-
81
-
82
-
83
-
84
-
85
-
86
-
87
-
88
-
89
-
90
-
91
-
92
-
93
-
94
-
95
-
96
-
97
-
98
-
99
-
100
-
101
-
102
-
103
-
104
-
105
-
106
-
107
-
108
-
109
-
110
-
111
-
112
-
 113
113 -
 114
114 -
 115
115 -
 116
116 -
 117
117 -
 118
118 -
 119
119 -
 120
120 -
 121
121 -
 122
122 -
 123
123 -
124
-
125
-
126
-
127
-
128
-
129
-
130
-
131
-
132
-
133
-
134
-
135
-
136
-
137
-
138
-
139
-
140
-
141
-
142
-
143
-
144
-
145
-
146
-
147
-
148
-
149
-
150
-
151
-
152
-
153
-
154
-
155
-
156
-
157
-
158
-
159
-
160
-
161
-
162
-
163
-
164
-
165
-
166
-
167
-
168
-
169
-
170
-
171
-
172
-
173
-
174
-
175
-
176
-
177
-
178
-
179
-
180
-
181
-
182
-
183
-
184
-
185
-
186
-
187
-
188
 |
 |