Canon PIXMA MP960 Quick Start Guide - Page 23
Paper Feed Switch, Cassette, Load the paper with the print side facing, DOWN.
 |
View all Canon PIXMA MP960 manuals
Add to My Manuals
Save this manual to your list of manuals |
Page 23 highlights
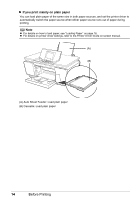
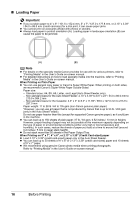
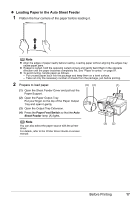
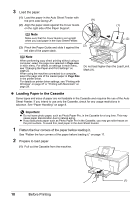
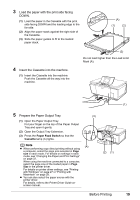
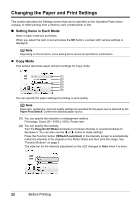
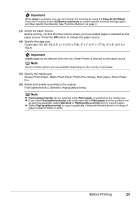
3 Load the paper with the print side facing DOWN. (1) Load the paper in the Cassette with the print side facing DOWN and the leading edge to the far side. (2) Align the paper stack against the right side of the Cassette. (3) Slide the paper guides to fit to the loaded paper stack. (A) (1) (2) 4 Insert the Cassette into the machine. (1) Insert the Cassette into the machine. Push the Cassette all the way into the machine. (3) Do not load higher than the Load Limit Mark (A). 5 Prepare the Paper Output Tray. (1) Open the Paper Output Tray. Put your finger on the top of the Paper Output Tray and open it gently. (2) Open the Output Tray Extension. (3) Press the Paper Feed Switch so that the Cassette lamp (A) lights. Note z When performing copy direct printing without using a computer, select the page size selected in Page size in each mode. For details on settings in each mode, see "Changing the Paper and Print Settings" on page 22. When using the machine connected to a computer, select the page size of the loaded paper in Page Size in the printer driver. For details on printer driver settings, see "Printing with Windows" on page 27 or "Printing with Macintosh" on page 28. z You can also select the paper source with the printer driver. For details, refer to the Printer Driver Guide onscreen manual. (3) (A) (2) (1) Before Printing (1) 19
-
 1
1 -
2
-
3
-
4
-
5
-
6
-
7
-
8
-
9
-
10
-
11
-
12
-
13
-
14
-
15
-
16
-
17
-
 18
18 -
 19
19 -
 20
20 -
 21
21 -
 22
22 -
 23
23 -
 24
24 -
 25
25 -
 26
26 -
 27
27 -
 28
28 -
29
-
30
-
31
-
32
-
33
-
34
-
35
-
36
-
37
-
38
-
39
-
40
-
41
-
42
-
43
-
44
-
45
-
46
-
47
-
48
-
49
-
50
-
51
-
52
-
53
-
54
-
55
-
56
-
57
-
58
-
59
-
60
-
61
-
62
-
63
-
64
-
65
-
66
-
67
-
68
-
69
-
70
-
71
-
72
-
73
-
74
-
75
-
76
-
77
-
78
-
79
-
80
-
81
-
82
-
83
-
84
-
85
-
86
-
87
-
88
-
89
-
90
-
91
-
92
-
93
-
94
-
95
-
96
-
97
-
98
-
99
-
100
-
101
-
102
-
103
-
104
-
105
-
106
-
107
-
108
-
109
-
110
-
111
-
112
-
113
-
114
-
115
-
116
 |
 |
