Canon PIXMA MP960 Quick Start Guide - Page 44
Mounting 35 mm Slides, Blank areas on the film guide, Setting the Filler Sheet for slides
 |
View all Canon PIXMA MP960 manuals
Add to My Manuals
Save this manual to your list of manuals |
Page 44 highlights
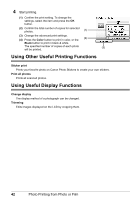
z Mounting 35 mm Slides (1) Load the film guide with its sides to the right and left grooves of the Platen Glass. (2) Mount the slides in the film guide with the front side (the side showing the correct image) face down, the frame order running from left to right, and with the image upside down. Load the slides, making sure they are not loose in the film guide. Note Mount the slides in numerical order from the left side (1 to 4, and 5 to 8) making sure blank areas between the slides. Blank areas on the film guide If there is a blank area on the film guide, parts of the images around this area may appear pale. In this case, set the Filler Sheet for slides (B) over the blank area (positions 5 to 8) to shield it. Setting the Filler Sheet for slides z Mounting slides in positions 1 to 3 of the film guide: Set the Filler Sheet for slides (B) over the blank area (positions 5 to 8) to shield it as illustrated. You do not have to shield position 4, even though there is no slide mounted in it. z Mounting slides in positions 1 to 6 of the film guide: Set the Filler Sheet for slides (B) over the blank area (positions 7 to 8) to shield it as illustrated. Load the film guide on the Platen Glass as is, even though the Filler Sheet sticks out of the film guide. 40 Photo Printing from Photo or Film (B) (B) (B)
-
 1
1 -
2
-
3
-
4
-
5
-
6
-
7
-
8
-
9
-
10
-
11
-
12
-
13
-
14
-
15
-
16
-
17
-
18
-
19
-
20
-
21
-
22
-
23
-
24
-
25
-
26
-
27
-
28
-
29
-
30
-
31
-
32
-
33
-
34
-
35
-
36
-
37
-
38
-
 39
39 -
 40
40 -
 41
41 -
 42
42 -
 43
43 -
 44
44 -
 45
45 -
 46
46 -
 47
47 -
 48
48 -
 49
49 -
50
-
51
-
52
-
53
-
54
-
55
-
56
-
57
-
58
-
59
-
60
-
61
-
62
-
63
-
64
-
65
-
66
-
67
-
68
-
69
-
70
-
71
-
72
-
73
-
74
-
75
-
76
-
77
-
78
-
79
-
80
-
81
-
82
-
83
-
84
-
85
-
86
-
87
-
88
-
89
-
90
-
91
-
92
-
93
-
94
-
95
-
96
-
97
-
98
-
99
-
100
-
101
-
102
-
103
-
104
-
105
-
106
-
107
-
108
-
109
-
110
-
111
-
112
-
113
-
114
-
115
-
116
 |
 |
