Canon PowerShot G3 Software Starter Guide DC SD Ver.11 - Page 82
Mac OS X
 |
View all Canon PowerShot G3 manuals
Add to My Manuals
Save this manual to your list of manuals |
Page 82 highlights
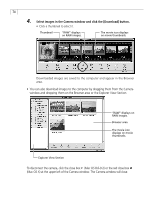
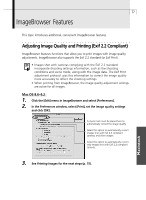
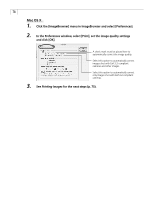
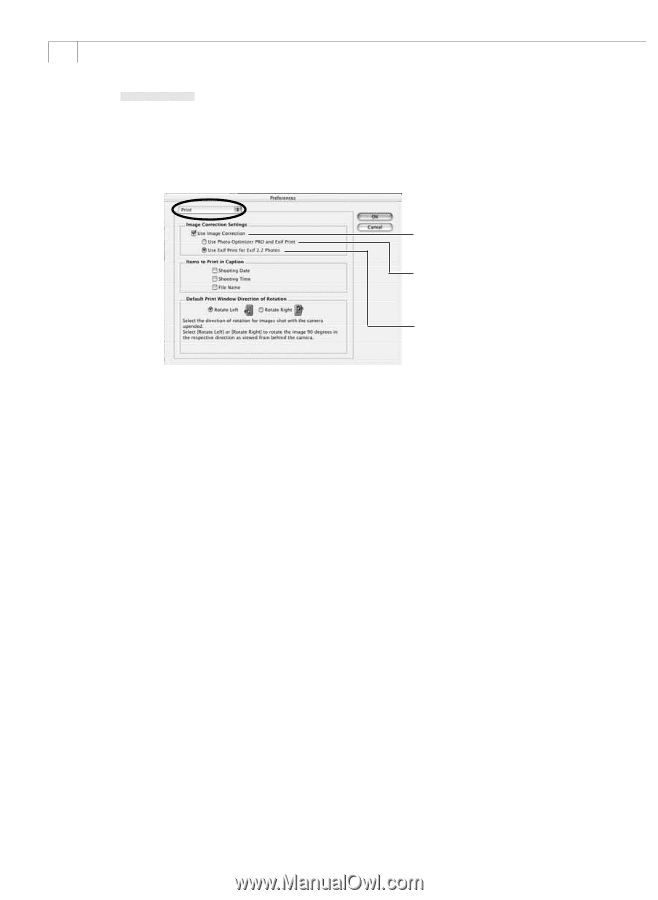
78 Mac OS X 1. Click the [ImageBrowser] menu in ImageBrowser and select [Preferences]. 2. In the Preferences window, select [Print], set the image quality settings and click [OK]. A check mark must be placed here to automatically correct the image quality. Select this option to automatically correct images shot with Exif 2.2 compliant cameras and other images. Select this option to automatically correct only images shot with Exif 2.2 compliant cameras. 3. See Printing Images for the next steps (p. 75).
-
 1
1 -
2
-
3
-
4
-
5
-
6
-
7
-
8
-
9
-
10
-
11
-
12
-
13
-
14
-
15
-
16
-
17
-
18
-
19
-
20
-
21
-
22
-
23
-
24
-
25
-
26
-
27
-
28
-
29
-
30
-
31
-
32
-
33
-
34
-
35
-
36
-
37
-
38
-
39
-
40
-
41
-
42
-
43
-
44
-
45
-
46
-
47
-
48
-
49
-
50
-
51
-
52
-
53
-
54
-
55
-
56
-
57
-
58
-
59
-
60
-
61
-
62
-
63
-
64
-
65
-
66
-
67
-
68
-
69
-
70
-
71
-
72
-
73
-
74
-
75
-
76
-
 77
77 -
 78
78 -
 79
79 -
 80
80 -
 81
81 -
 82
82 -
 83
83 -
 84
84 -
 85
85 -
 86
86 -
 87
87 -
88
-
89
-
90
-
91
-
92
-
93
-
94
-
95
-
96
-
97
-
98
-
99
-
100
-
101
-
102
-
103
-
104
-
105
-
106
-
107
-
108
-
109
-
110
-
111
-
112
-
113
-
114
-
115
-
116
-
117
-
118
-
119
-
120
-
121
-
122
-
123
 |
 |
78
Mac OS X
1.
Click the [ImageBrowser] menu in ImageBrowser and select [Preferences].
2.
In the Preferences window, select [Print], set the image quality settings
and click [OK].
A check mark must be placed here to
automatically correct the image quality.
Select this option to automatically correct
images shot with Exif 2.2 compliant
cameras and other images.
Select this option to automatically correct
only images shot with Exif 2.2 compliant
cameras.
3.
See
Printing Images
for the next steps (p. 75).